
This guide covers every menu you can see on your own screen, in the order it appears in your sidebar. Each entry explains what the page is for and the exact steps to carry out its actions. For bursars, accountants and finance officers.
1. Signing in
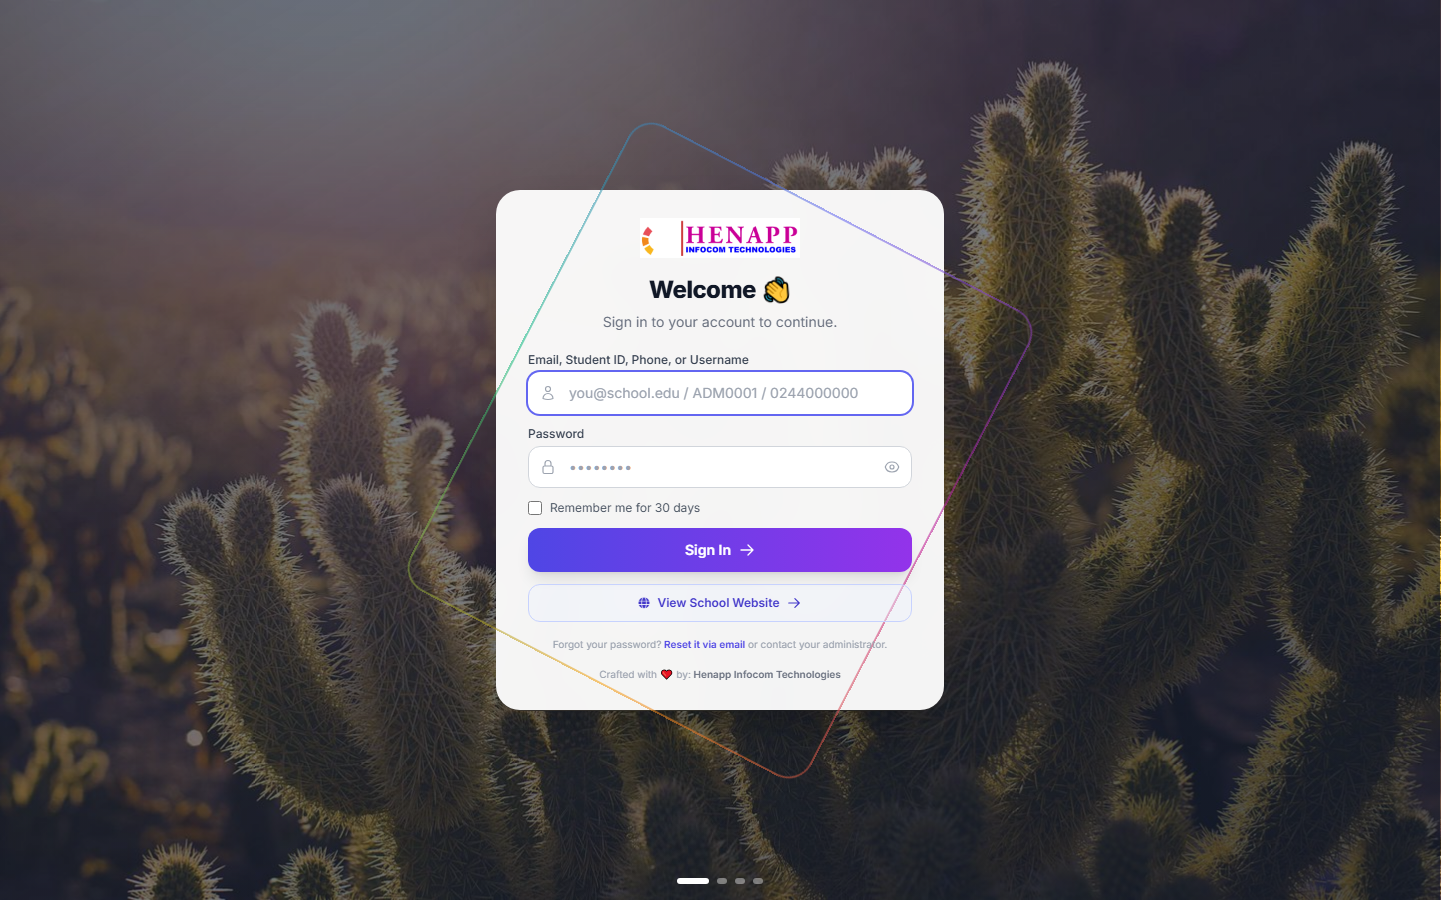
Your school gives you a web address, your email or username, and a first-time password. Open the address in any modern browser — Chrome, Edge, Safari or Firefox — on a phone, tablet or computer.
How to sign in
- Open your school portal address. If you were given a link, tap it.
- Type your email address or username in the first box.
- Type your password in the second box. Passwords are case-sensitive.
- Tick "Remember me" only on a device nobody else uses.
- Click Sign In.
If you forget your password
- Click "Forgot password?" on the sign-in page — if your school has email set up, a reset link is sent to you.
- Otherwise ask the school office to reset it. They can issue you a new temporary password.
The system asks you to set your own password the first time you sign in. Choose something only you know, and never share it — everything you do is recorded against your name.
2. Finding your way around
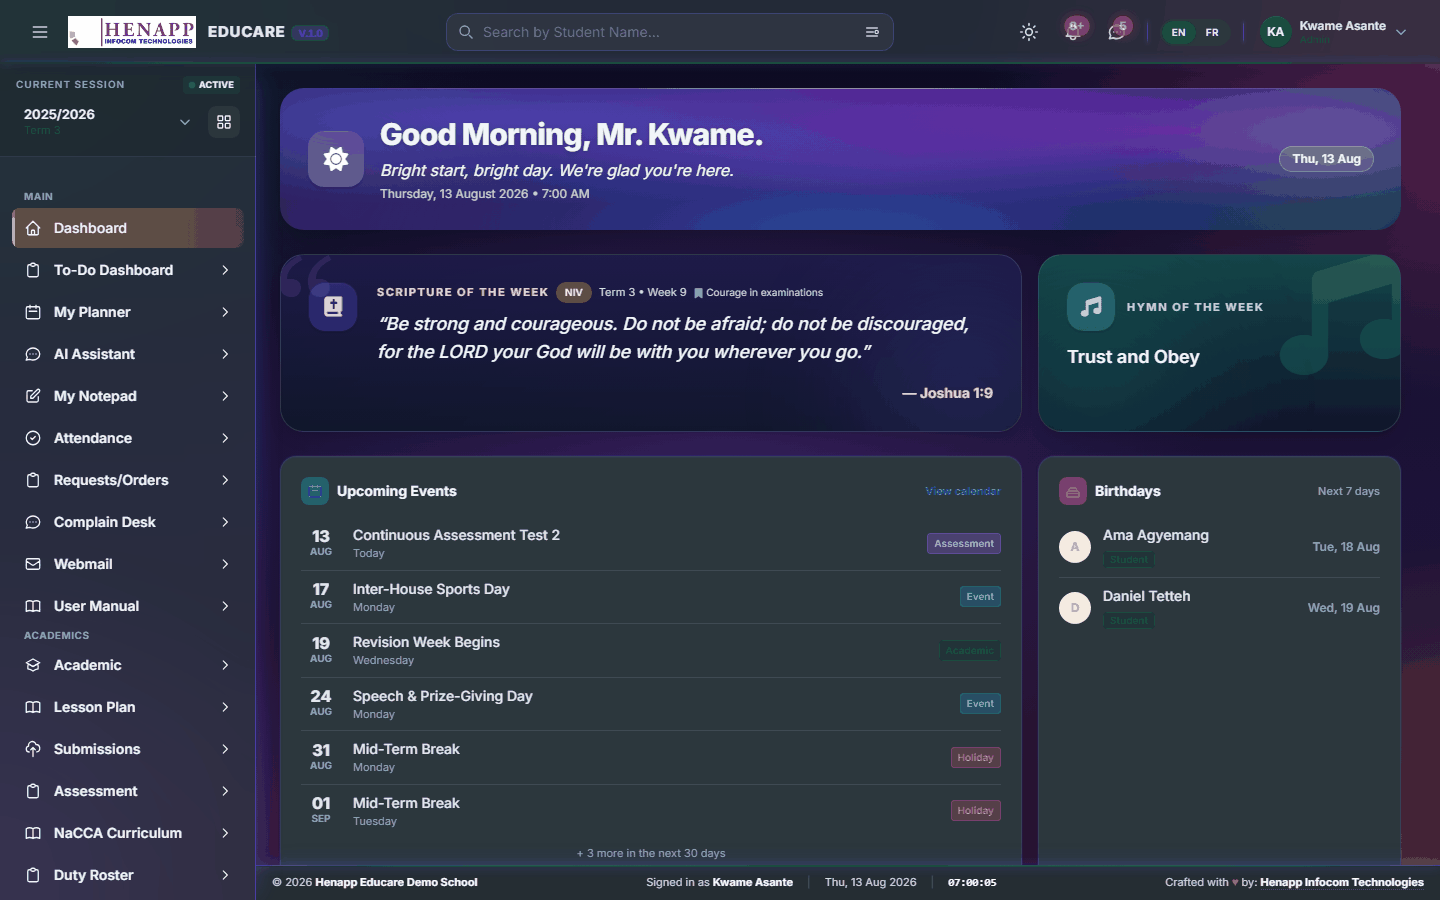
After signing in you land on your dashboard. Everything else is reached from the sidebar on the left and the bar across the top.
The sidebar
- The sidebar lists every part of the system you are allowed to use. What you see here is exactly what this guide covers — nothing more, nothing less.
- Click a heading to open its submenus; click again to close it.
- On a phone, tap the ☰ menu icon at the top-left to slide the sidebar in and out.
The top bar
- Academic year and term selector — nearly every page shows data for the year and term chosen here. If figures look wrong or a list looks empty, check this first.
- Search — jump to any page or person by name.
- Sun / moon icon — switch between light and dark appearance.
- Bell icon — your notifications.
- Your name and photo — profile, and Sign out.
3. Your profile and password
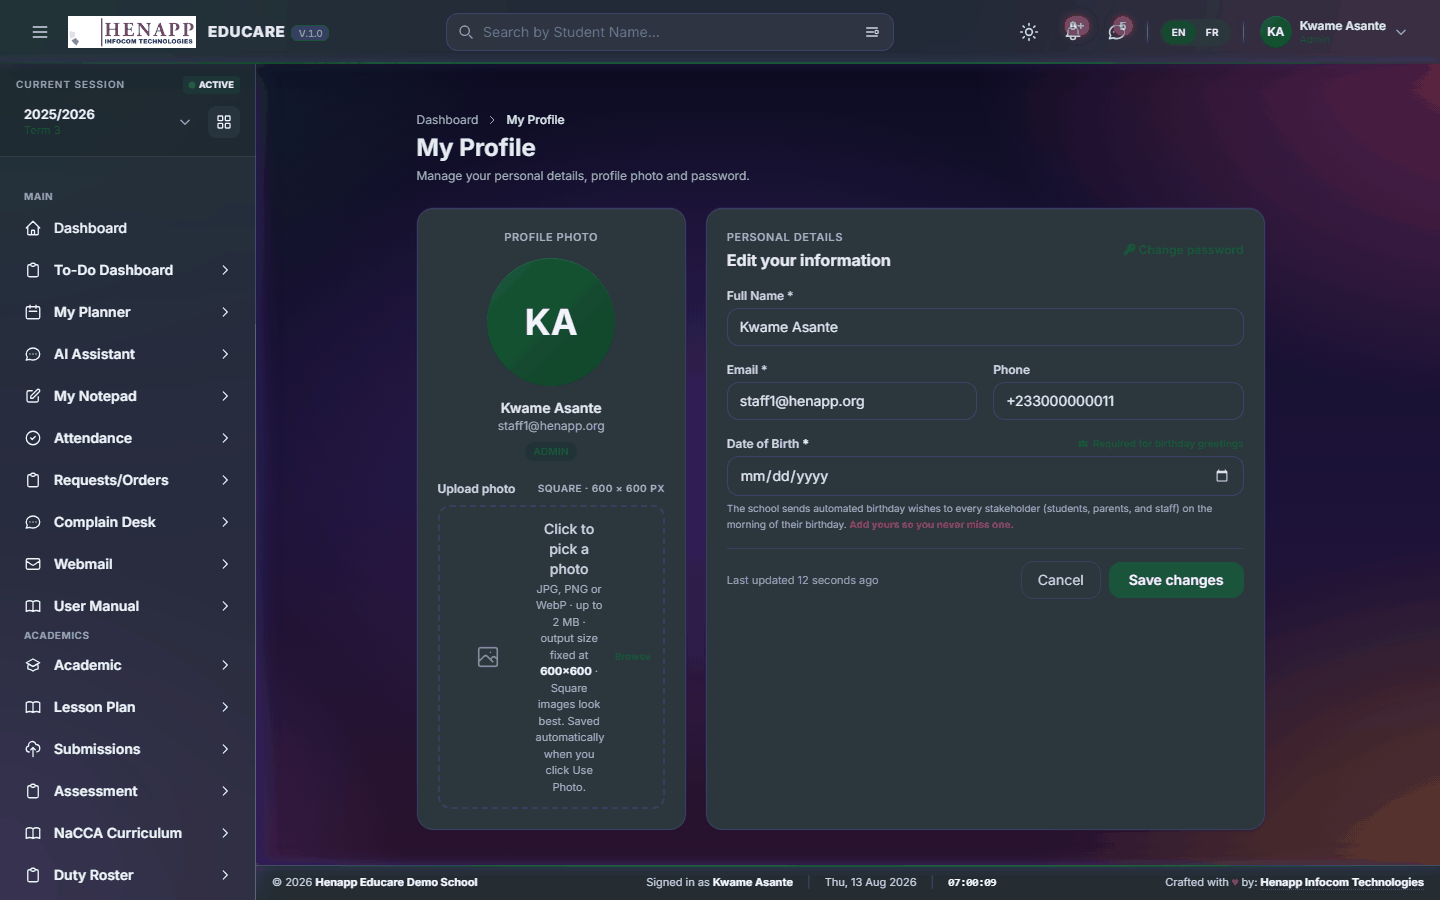
Your profile holds your contact details, your photo and your password.
How to update your details
- Click your name at the top-right, then Profile.
- Edit your phone number, address or other details and click Save.
- Click your photo to upload a new one — a clear head-and-shoulders picture works best.
How to change your password
- Open your profile and find the Change Password section.
- Type your current password, then your new password twice.
- Click Update Password. You stay signed in on this device.
On a school, library or family computer, click your name and choose Sign out when you finish. Closing the tab alone does not sign you out.
4. Dashboard
Your home page. It summarises what needs your attention today and links straight to the pages that answer it.
Find it in the sidebar under Main → Dashboard.
4.1 Dashboard
The first page after you sign in. The cards you see depend on your role — the important thing is that each one is a shortcut: click it to open the page behind the number.

How to use it
- Read the cards along the top for the headline figures for today.
- Click any card or chart to open the full page it summarises.
- Use the academic year and term selector in the top bar to see the same dashboard for a different period.
- Scroll down for your recent activity and anything awaiting your action.
5. AI Assistant
A built-in assistant that answers questions about your own school data and drafts routine text for you.
Find it in the sidebar under Main → AI Assistant.
5.1 AI Assistant
Ask questions in plain language and get answers drawn from your school data, within the limits of what your role is allowed to see. It also drafts routine wording for you to edit — a notice to parents, a report remark, an SMS short enough to send.
How to use it
- Open AI Assistant from the sidebar.
- Type your question or instruction in the box at the bottom and press Enter.
- Ask follow-up questions in the same conversation — it remembers what you just asked, so "now make it shorter" works.
- Your past conversations are listed down the side; click one to reopen it.
- Start a new conversation when you change subject, so earlier context does not colour the answer.
The assistant can be confidently wrong. Treat a figure it quotes as a prompt to open the real page and confirm, and read any text it drafts before you send it.
It answers only from data your role can already open. It is not a way around a permission you do not have.
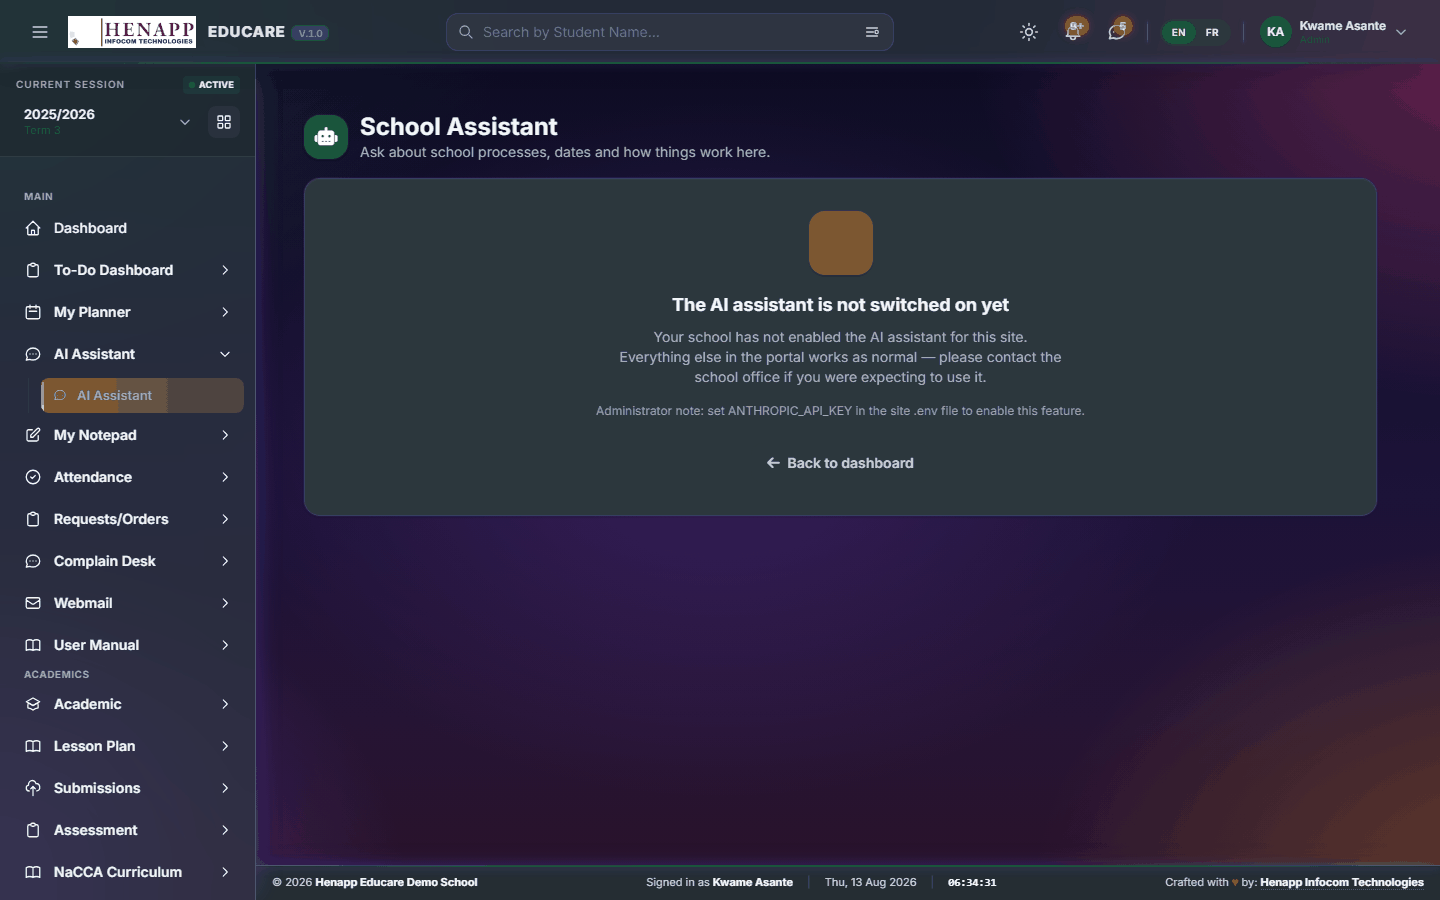
If it says the assistant is not configured, no AI provider key has been set for your school — an administrator sets that under System Settings. The school can hold keys for several providers, and the system moves to the next one automatically if one is busy or over its daily limit, so the feature keeps working.
6. Attendance
Daily presence — both learner registers and staff clocking. Attendance figures feed report cards, so keeping them accurate matters beyond the register itself.
A register always belongs to the academic year and term shown in the top bar. If a register looks empty or the wrong learners appear, check that selector before anything else.
Find it in the sidebar under Main → Attendance.
6.1 GPS Attendance
Sign in from your phone by location, for staff who work away from a device — the system records where you were and, if the school requires it, a photo.
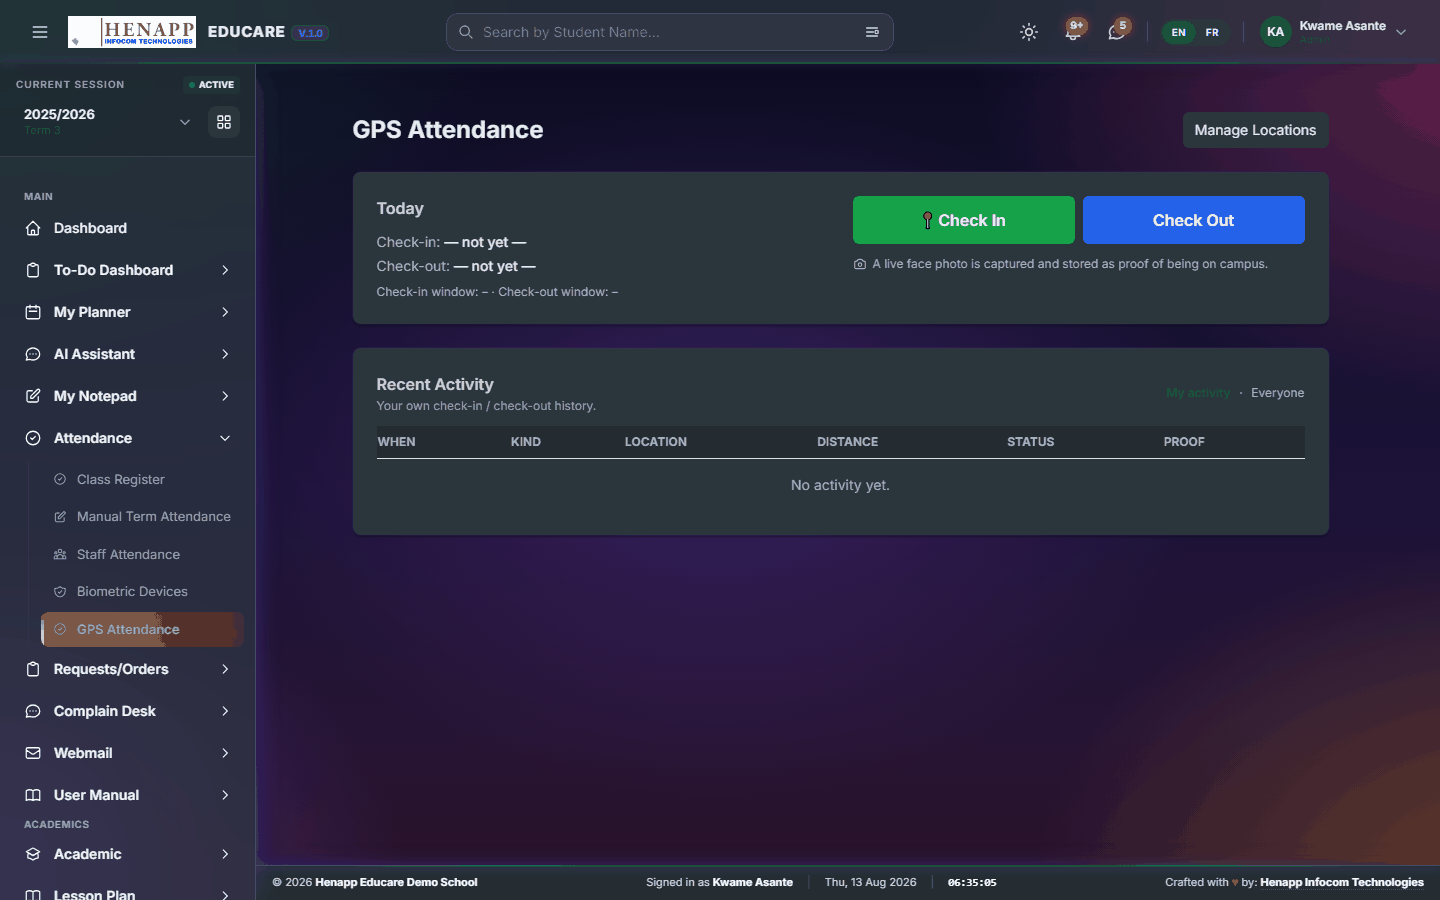
How to use it
- Open GPS Attendance on your phone while you are at the school.
- Allow the browser to use your location when it asks.
- Tap Check In on arrival. Take the photo if you are prompted for one.
- Tap Check Out when you leave.
The school sets a radius around its coordinates. A check-in from outside that radius is refused, so allow location access and try again from the premises rather than on the way in.
7. User Manual
This manual. It is built from your own sidebar, so it documents exactly the menus you can see and nothing you cannot.
Find it in the sidebar under Main → User Manual.
7.1 User Manual
This manual. It is generated from your own sidebar, so every chapter matches a menu you actually have.
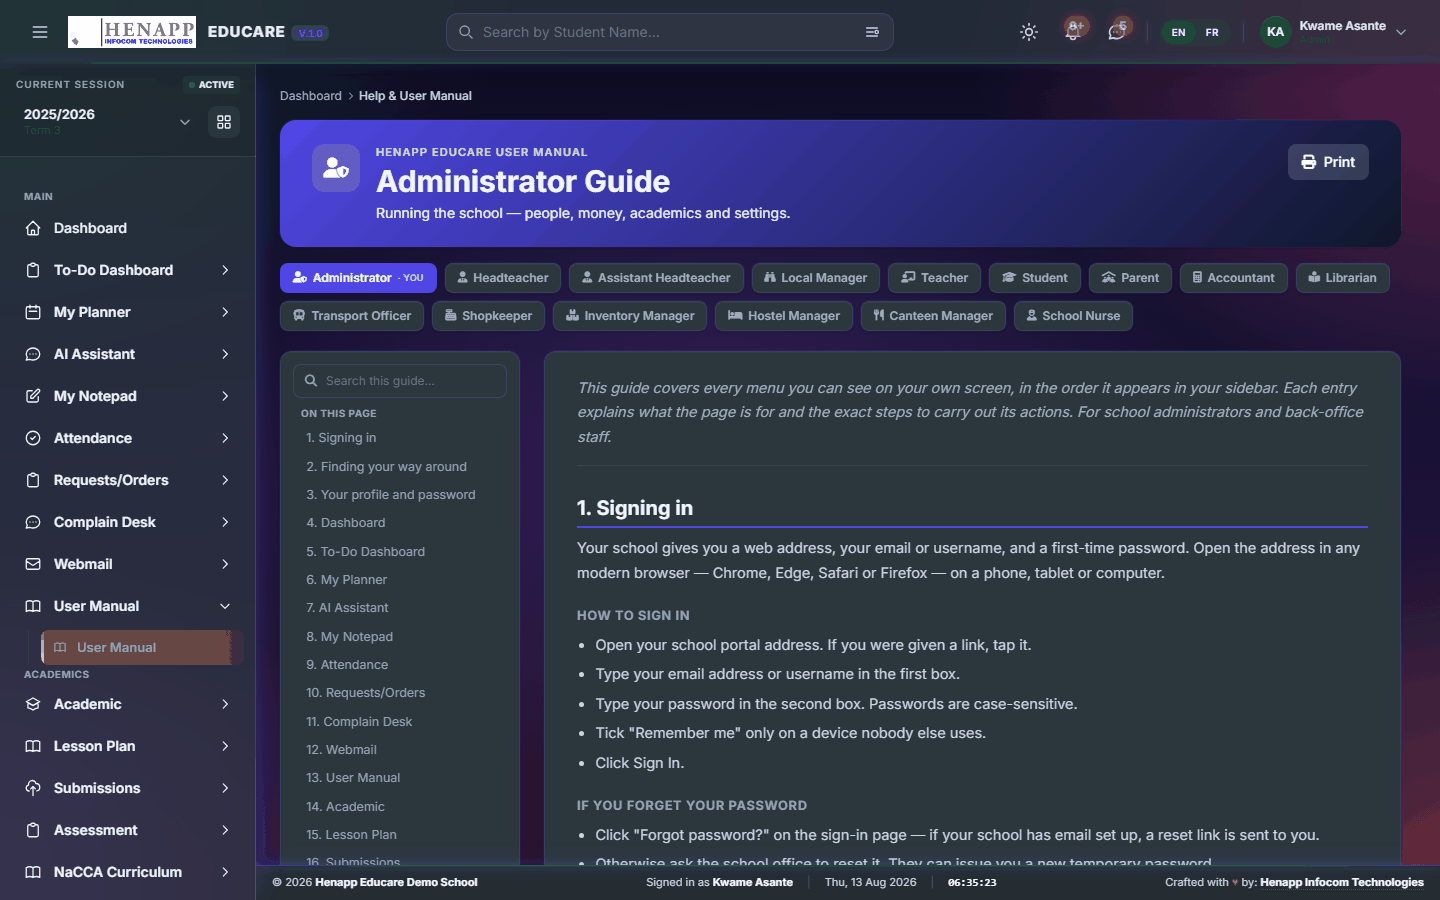
How to use it
- Open User Manual from the sidebar.
- Use the contents list on the left to jump to a chapter.
- Type in the search box to filter to the chapters that mention a word.
- Click Print for a paper copy or a PDF.
8. Duty Roster
Who is on duty, which week — published so staff and management see the same rota.
Find it in the sidebar under Academics → Duty Roster.
8.1 Duty Roster
Who is on duty each week and what the duty covers — published so nobody has to ask.
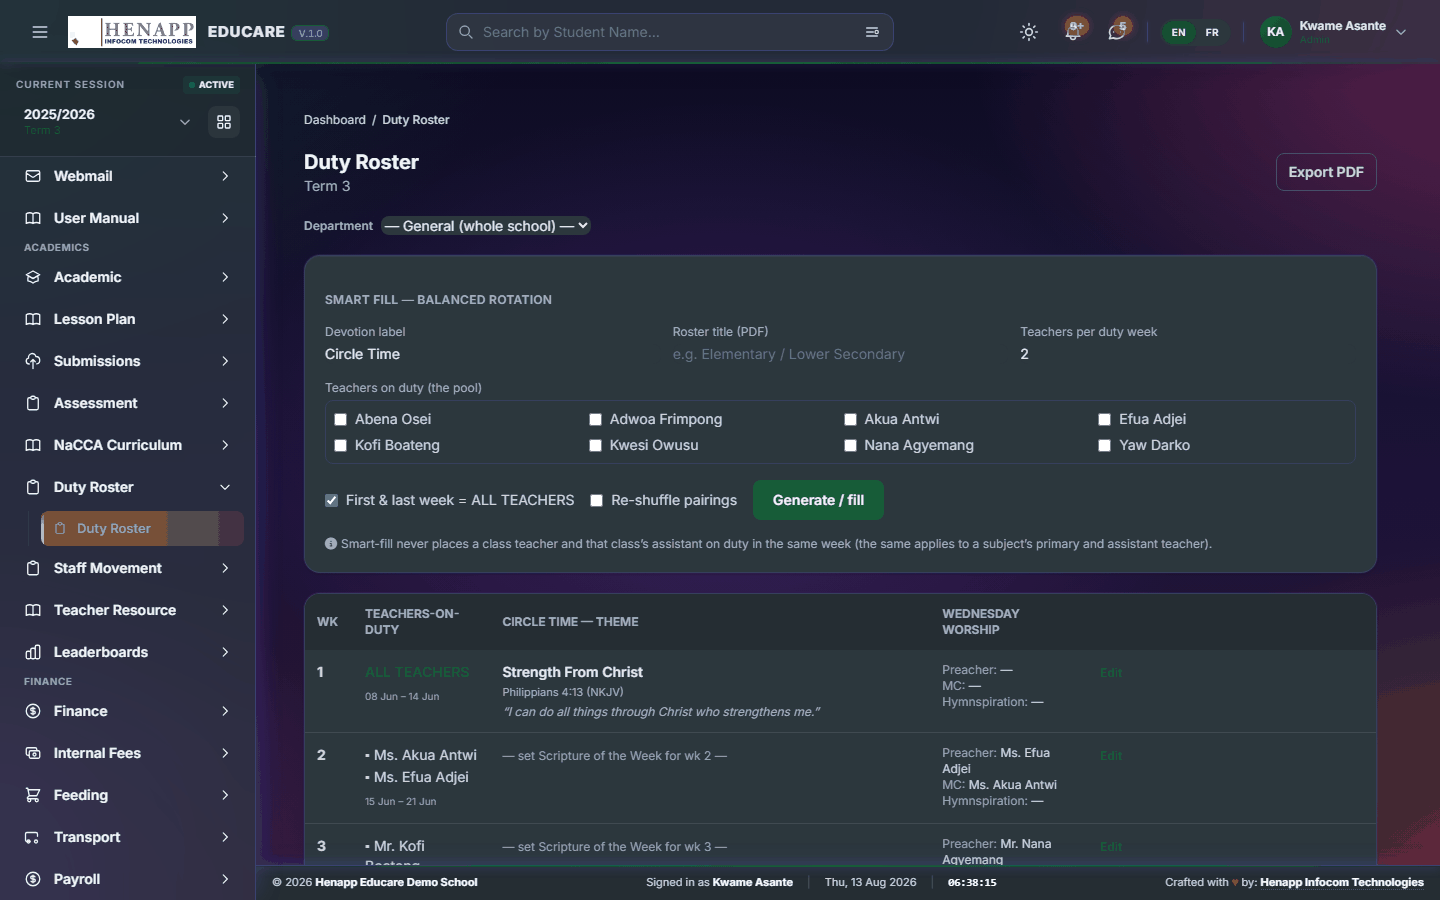
How to use it
- Open Duty Roster.
- Pick the term to see its weeks.
- Assign staff to each week and each duty.
- Save and publish. Staff see their own duty on their dashboard.
- Export the roster as a PDF for the staff room.
9. Staff Movement
Staff leaving the premises during the working day: the request, the approval, the gate record and the reports that come out of it.
Find it in the sidebar under Academics → Staff Movement.
9.1 Requests
Ask permission to leave the premises during working hours, and see the history of your own requests.
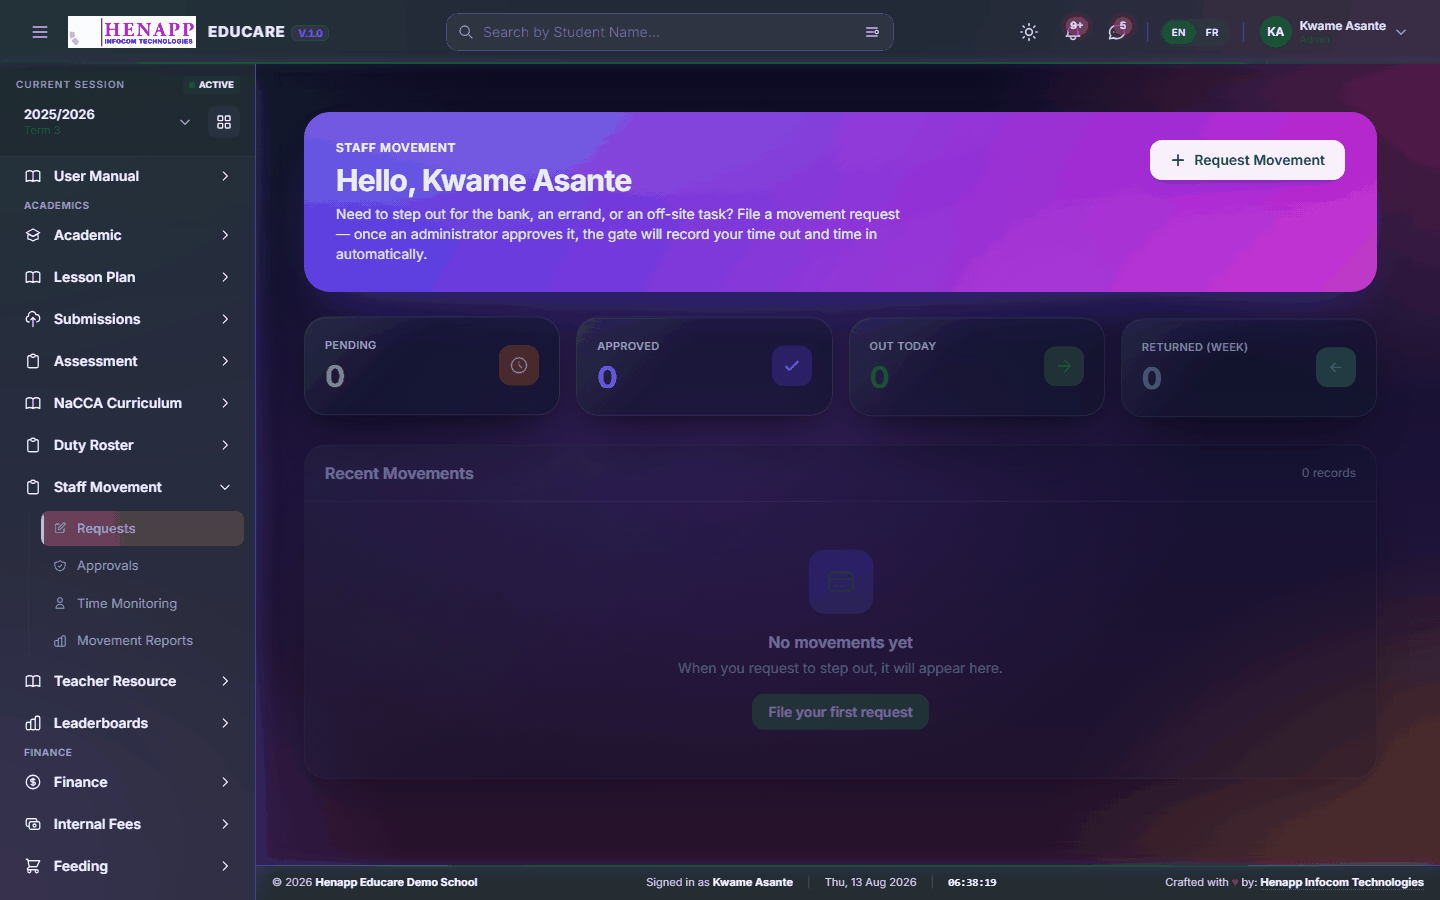
How to use it
- Open Staff Movement → Requests.
- Click New Request.
- Give the reason, the time you expect to leave and to return.
- Submit. Your approver is notified and you are told the outcome.
10. Teacher Resource
A shared file drive for teaching material — upload, organise into folders, and share with colleagues or a class.
Find it in the sidebar under Academics → Teacher Resource.
10.1 My Drive
Your teaching file drive — upload material, sort it into folders, and share it with colleagues or a class.
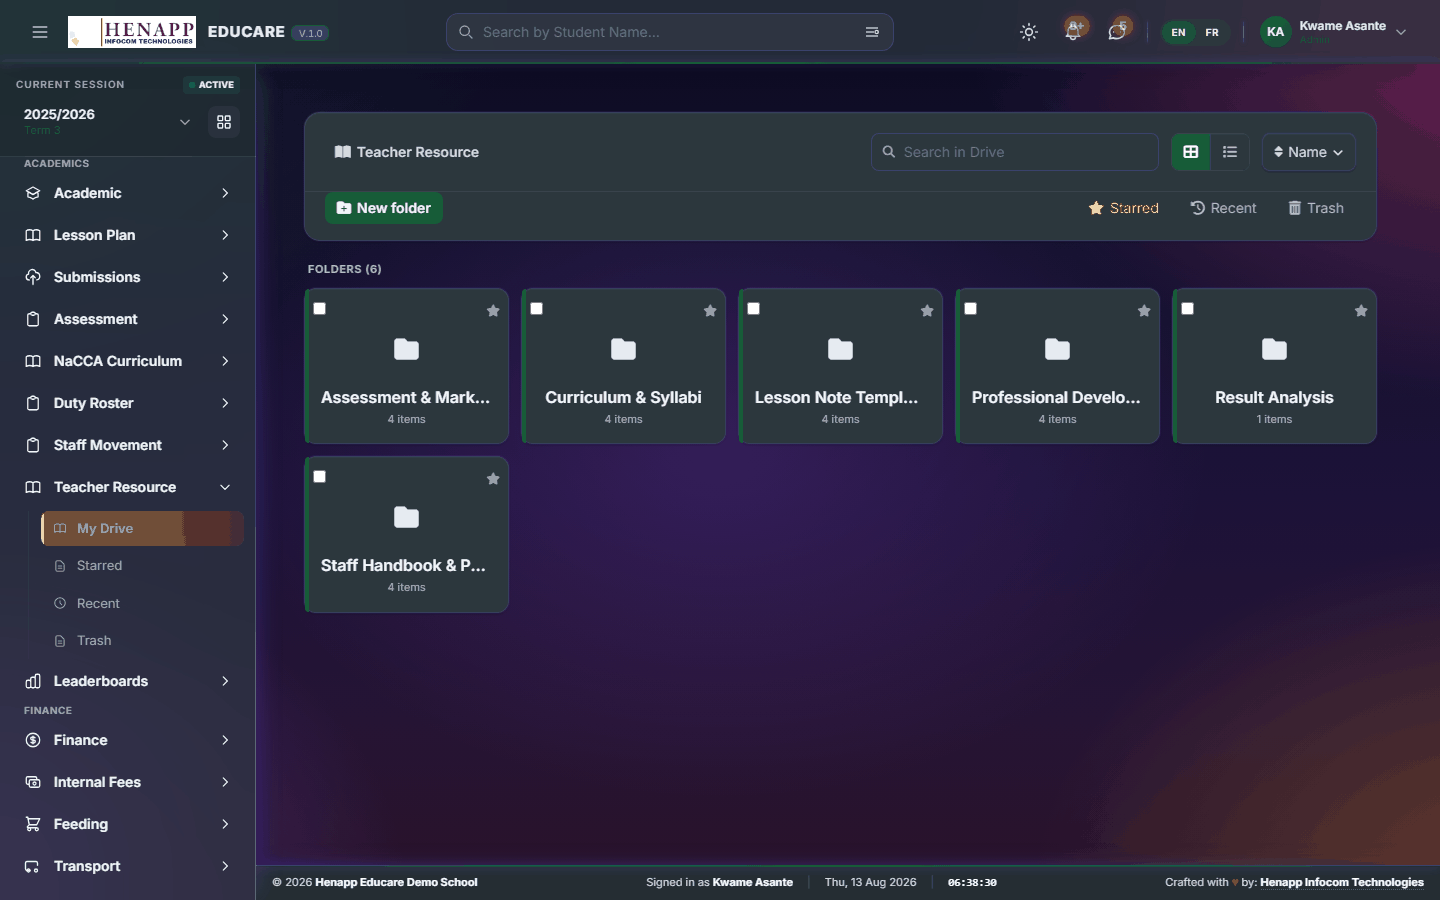
How to use it
- Open Teacher Resource → My Drive.
- Click Upload and choose your files, or drag them onto the page.
- Use New Folder to organise them.
- Use a file's Share option to give colleagues or a class access.
- Click a file to preview it in the browser without downloading.
10.2 Starred
The files you have starred, for quick reach.
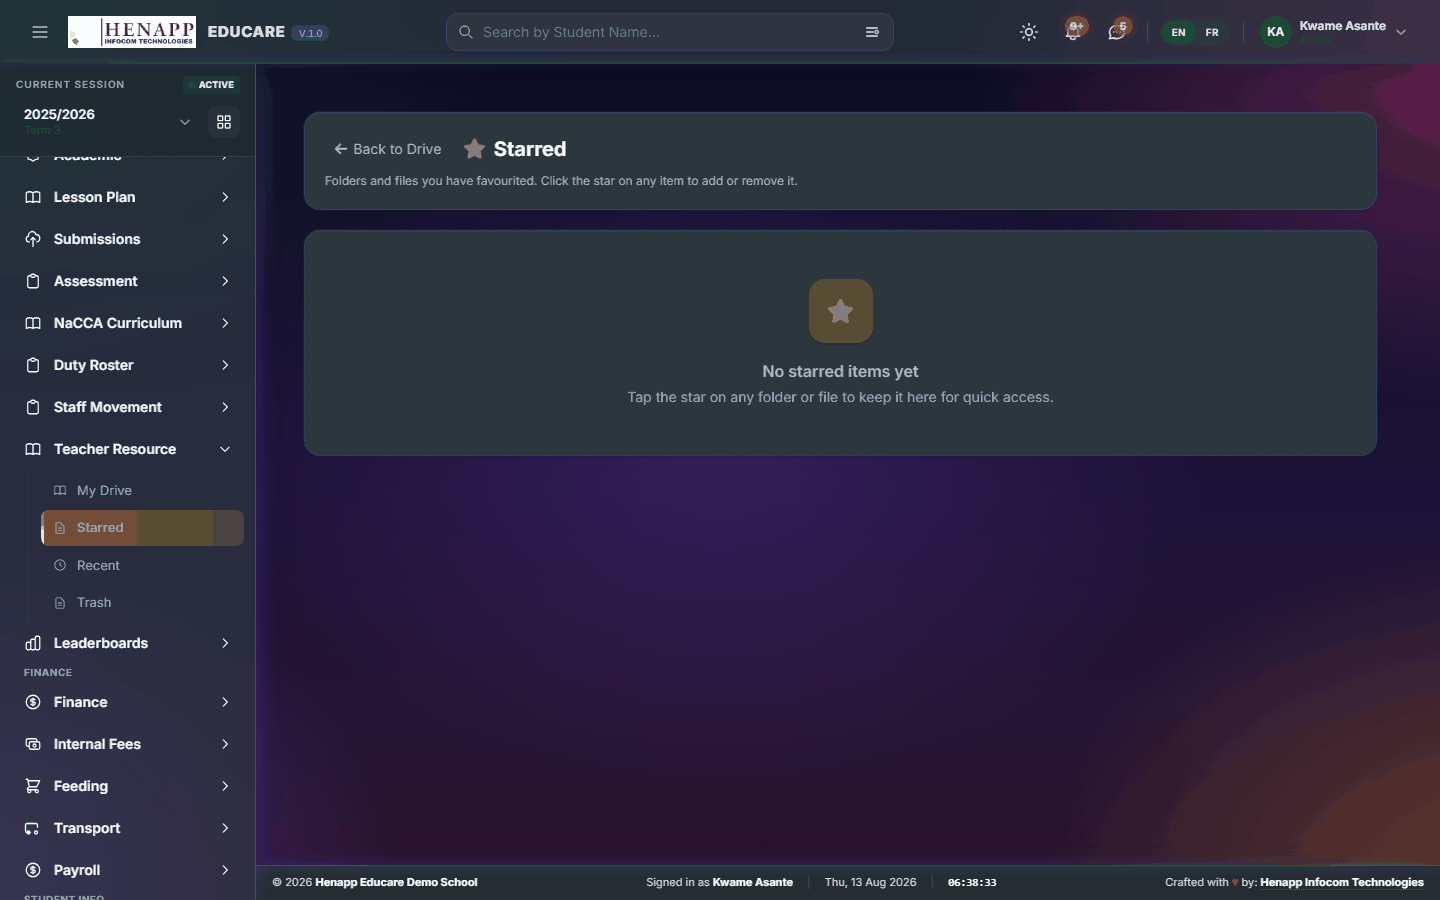
How to use it
- Star any file from its menu.
- Open Teacher Resource → Starred to see just those.
10.3 Recent
What you have opened or changed lately.
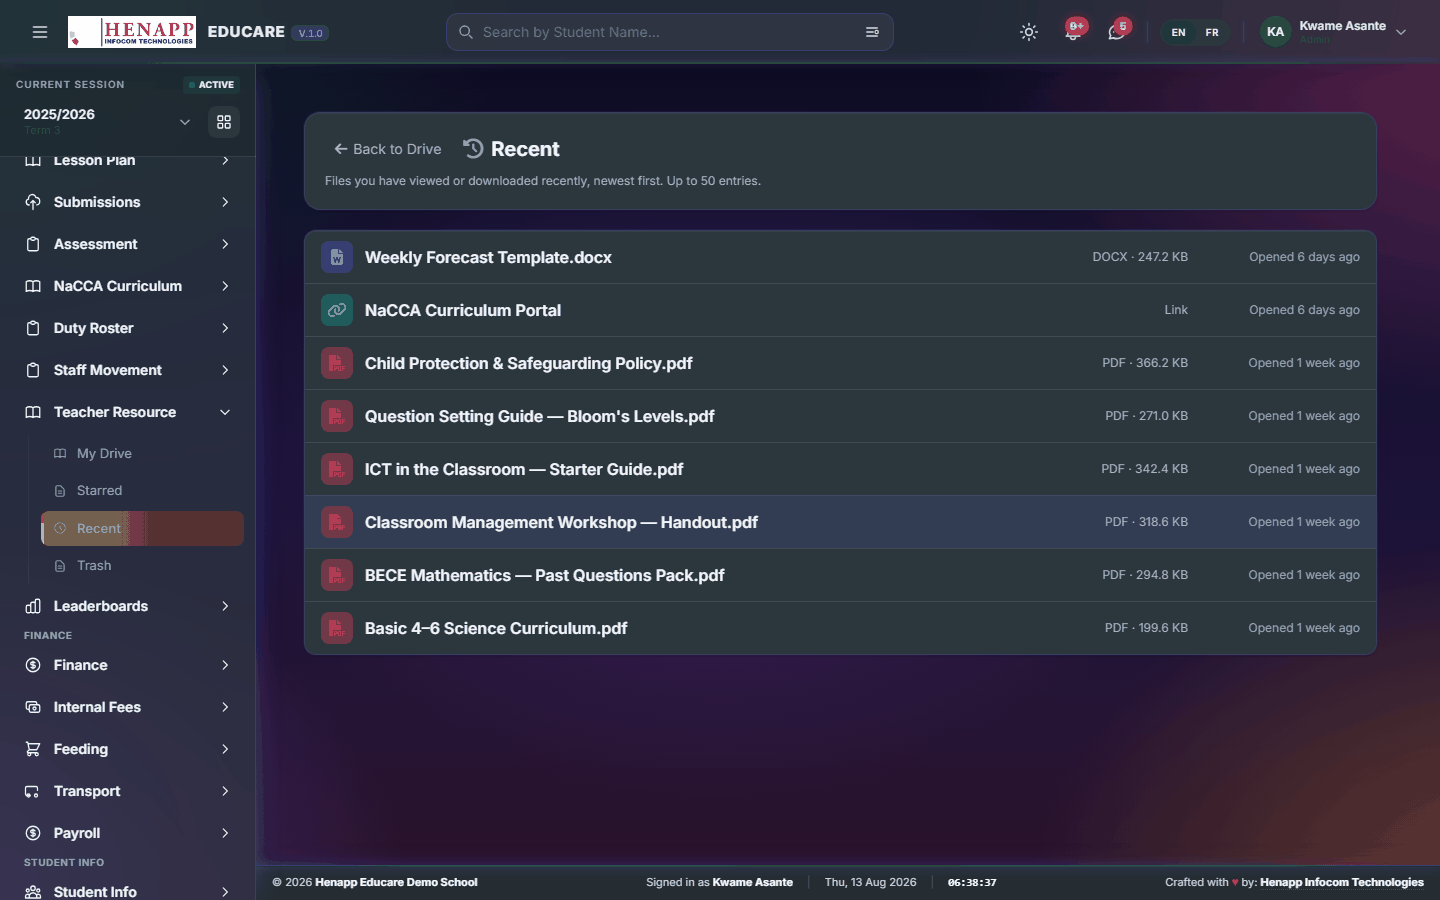
How to use it
- Open Teacher Resource → Recent.
- Files are listed most recently used first.
11. Leaderboards
Rankings that make participation visible — who is submitting on time, who is teaching online, who is turning up.
Leaderboards are a nudge. A low position usually means a workload or access problem worth asking about rather than a performance finding on its own.
Find it in the sidebar under Academics → Leaderboards.
11.1 Staff Attendance Leaderboard
Ranks staff on punctuality and attendance.
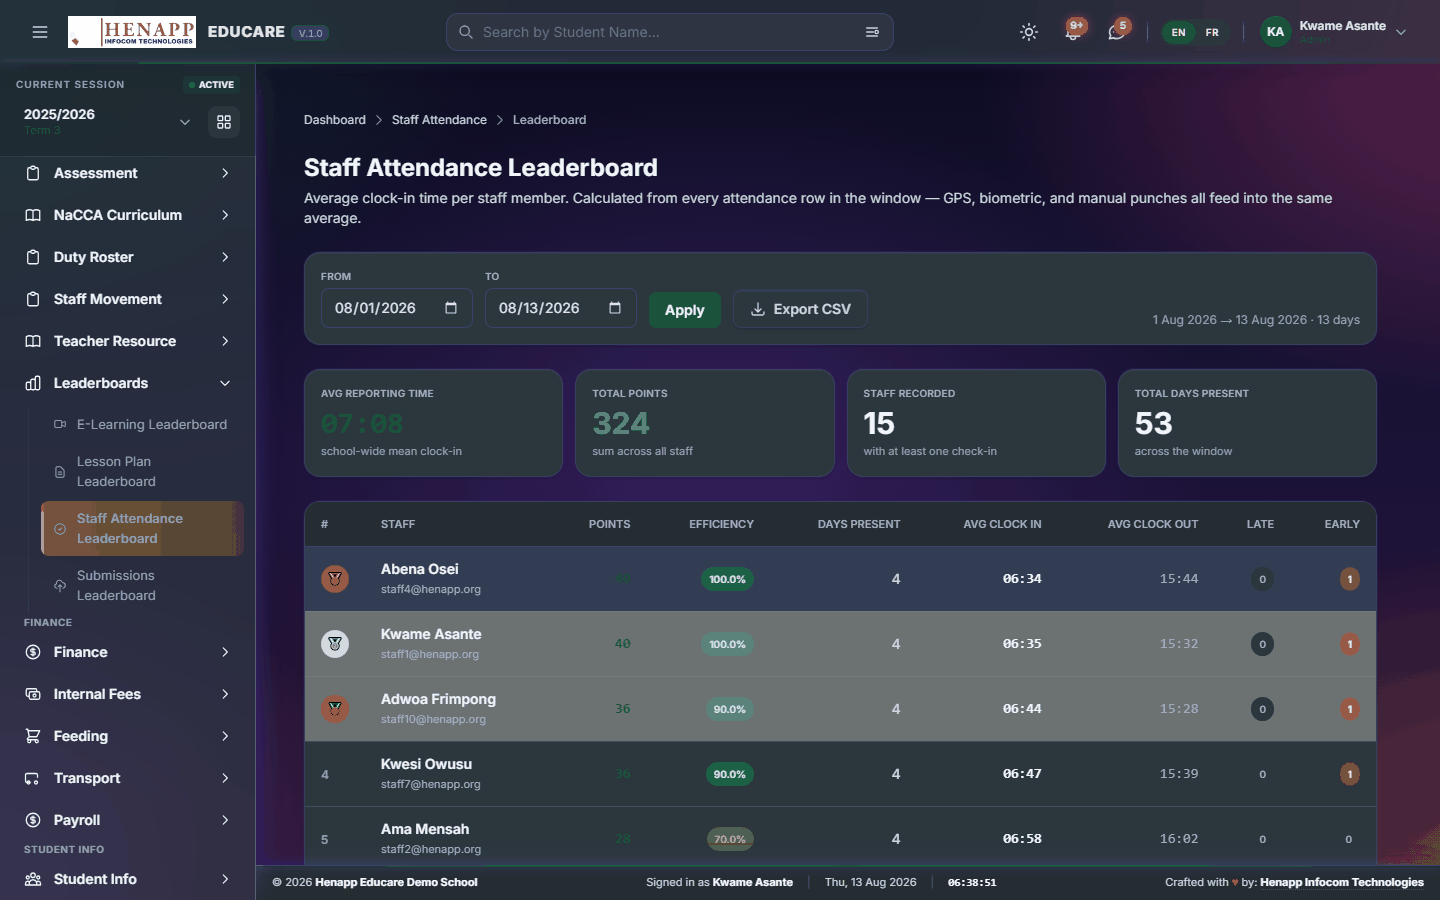
How to use it
- Open Leaderboards → Staff Attendance Leaderboard.
- Choose the period and read the standings.
12. Finance
School money end to end — what families are billed, what has been collected, what the school spends, and the accounting statements that come out of it.
Fee categories, income sources and expense headers should be in place before the first invoice of the year. Changing a category after invoices exist does not rewrite invoices already raised.
Find it in the sidebar under Finance.
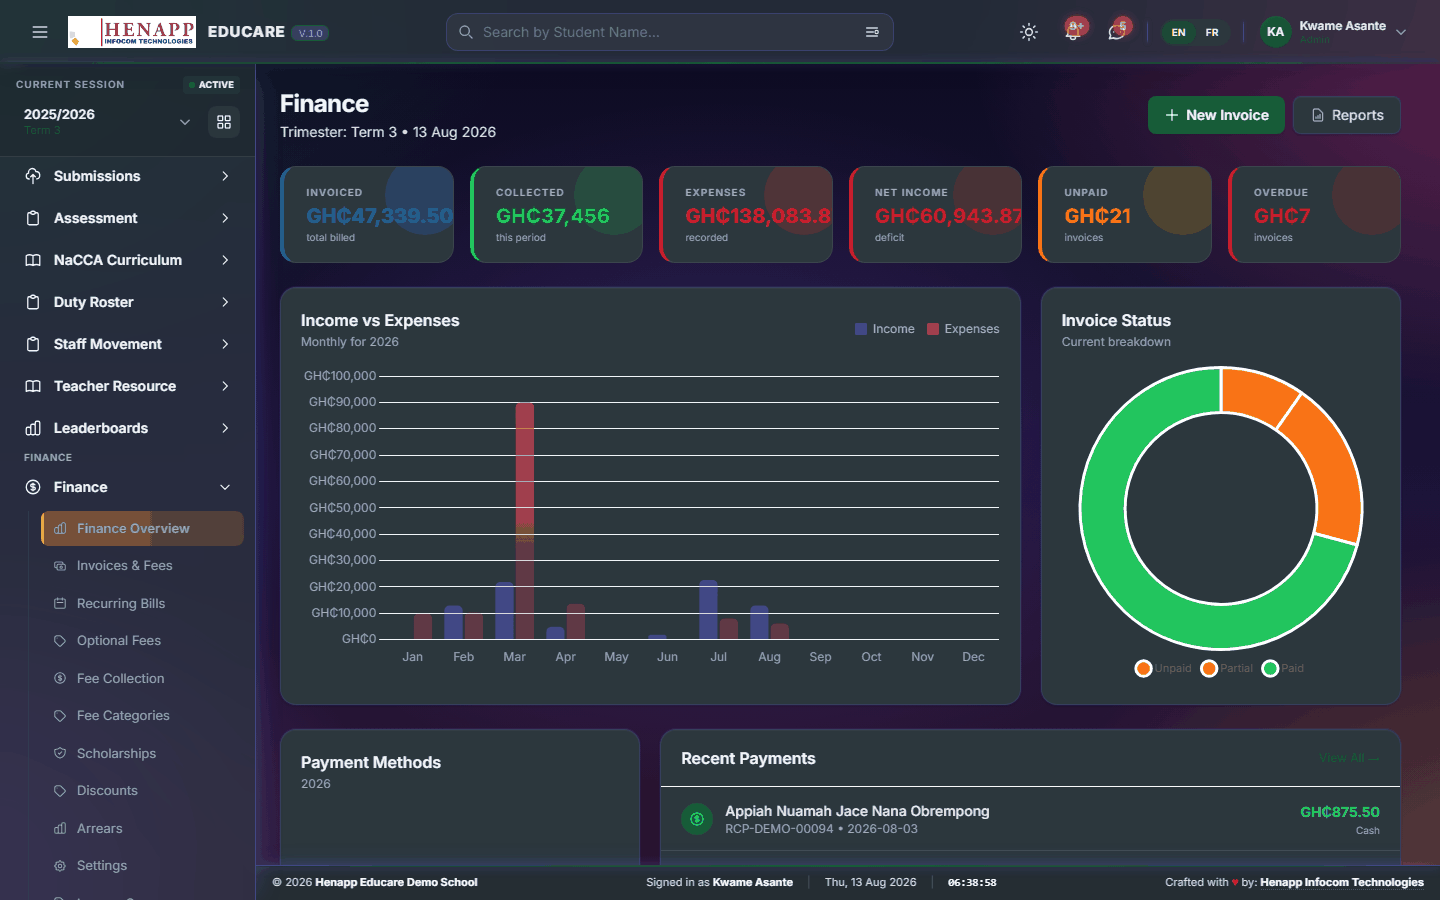
12.1 Finance Overview
The finance home page — billed, collected and outstanding for the current term at a glance.
How to use it
- Open Finance → Finance Overview.
- Read the headline figures for the term shown in the top bar.
- Click any figure to open the detail behind it.
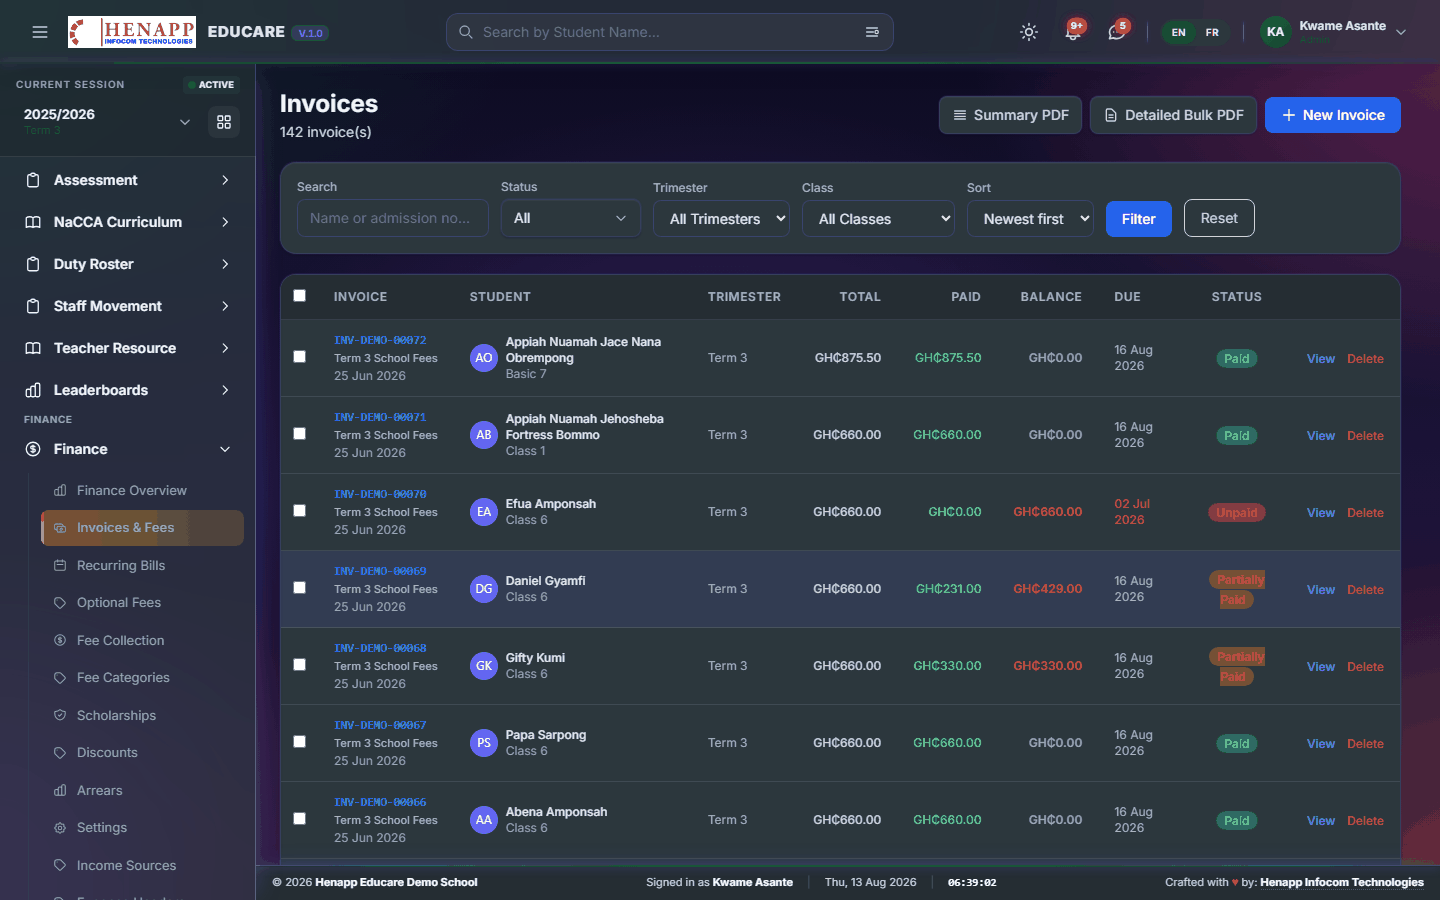
12.2 Invoices & Fees
Every invoice raised — create them one at a time or for a whole class at once, and reissue or adjust where needed.
How to use it
- Open Finance → Invoices & Fees.
- Click New Invoice for a single learner: choose the learner, add each fee line, and save.
- Use Bulk Invoice to bill a whole class or the whole school: choose the classes and the fee categories, preview the count and total, then generate.
- Open any invoice to add a line, correct one, or reissue it.
- Print or email an invoice to the family from the invoice itself.
A bulk run can raise hundreds of invoices in one click. The preview shows how many and for how much — read it before confirming, because unpicking a wrong run is far more work than checking.
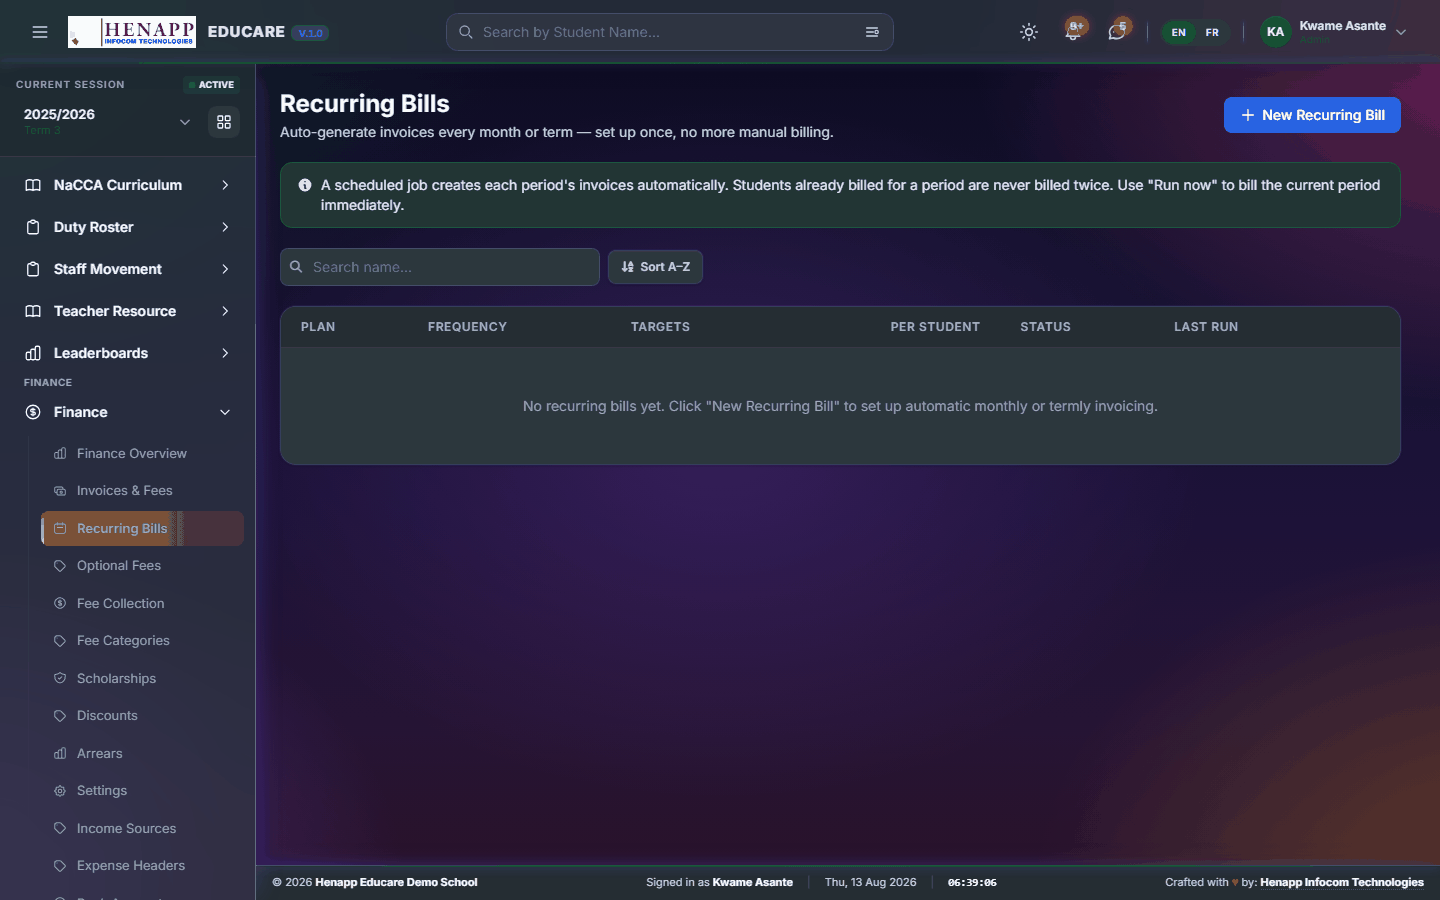
12.3 Recurring Bills
Charges that repeat on a schedule — monthly feeding, termly transport — raised automatically instead of by hand.
How to use it
- Open Finance → Recurring Bills.
- Click New Recurring Bill and choose the fee category and amount.
- Set how often it repeats and who it applies to.
- Save. Invoices are then raised on schedule; review them on the Invoices page as they appear.
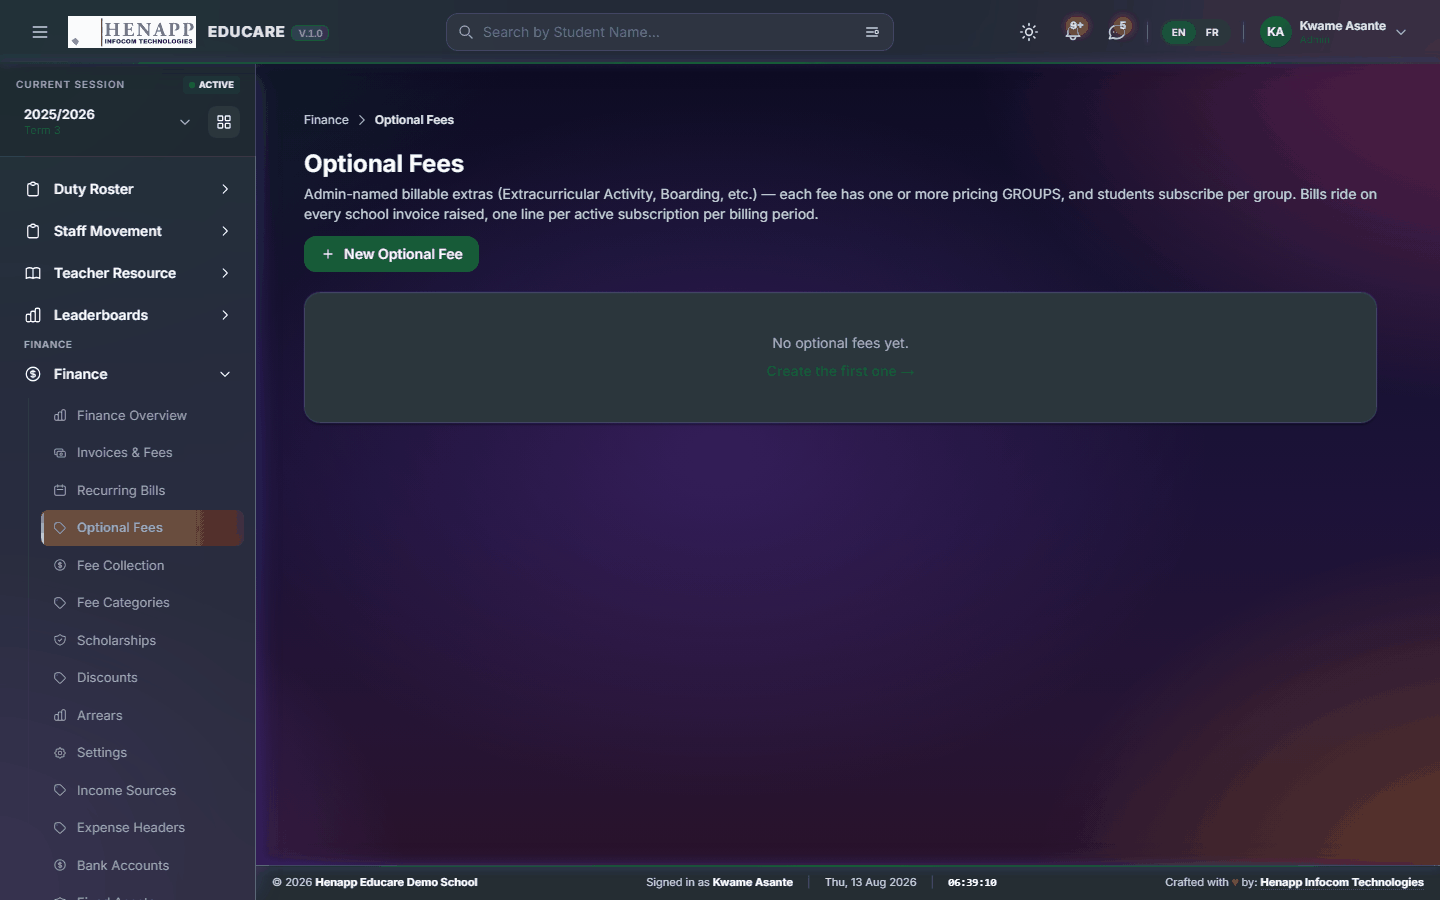
12.4 Optional Fees
Fees a family chooses rather than is charged automatically — an excursion, a club, an activity.
How to use it
- Open Finance → Optional Fees.
- Create the optional fee with its amount and who may take it up.
- Subscribe families individually, or use the bulk subscribe tool for a class.
- Subscribed learners are invoiced; the fee can be attached to an existing invoice rather than raising a new one.
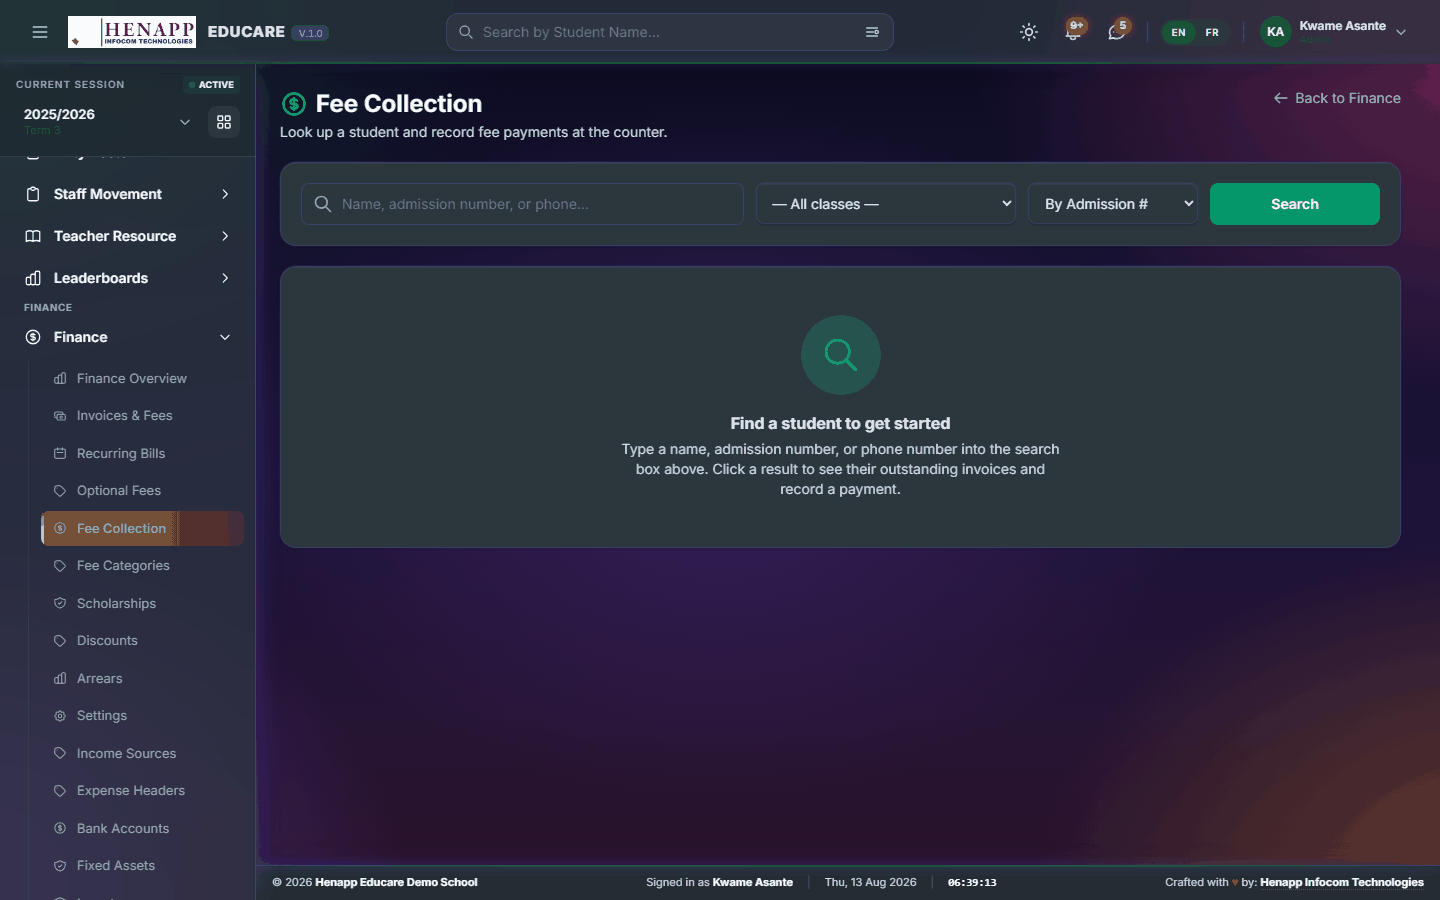
12.5 Fee Collection
Taking payment and issuing the receipt — the counter page.
How to use it
- Open Finance → Fee Collection.
- Search for the learner by name or admission number.
- Their outstanding invoices are listed; choose what is being paid.
- Enter the amount and the method — cash, cheque, transfer, mobile money.
- Save. The receipt number is generated and the receipt can be printed or emailed straight away.
Enter whatever was actually handed over. The balance stays outstanding against the invoice and the next payment picks up from there.
12.6 Payment History
The printed record of everything one learner has ever paid — for the parent who asks, and for the file when a bill is disputed.
How to use it
- Open Finance → Payment History.
- Search for the learner by name, admission number or phone — or pick a class and choose from the roster.
- The page shows a summary for every academic year and term — the class the learner sat in, what was billed, what was paid and what is left — and under it every receipt in date order with who paid it and who received it.
- Narrow it to one academic year, or to a range of payment dates, if the parent only wants that stretch.
- Print it with PDF, Word or Excel. All three come out on the school letterhead with the standard footer.
Received From is whoever actually handed the money over — usually a parent or guardian, sometimes a relative or a sponsor. It is typed at the counter when the payment is taken. Received By is the member of staff who took it.
On receipts taken before that box existed, or where the cashier left it blank, the payment stands in the learner’s own name and prints in grey.
When a term ends unpaid, the balance is carried onto the next term’s bill — so it appears in two terms’ Billed figures, and adding that column down the page would charge the family for it twice. The TOTAL row counts each charge once, adding each term’s own new fees; the Arrears column shows how much of a term’s bill was carried in, so the difference is always visible.
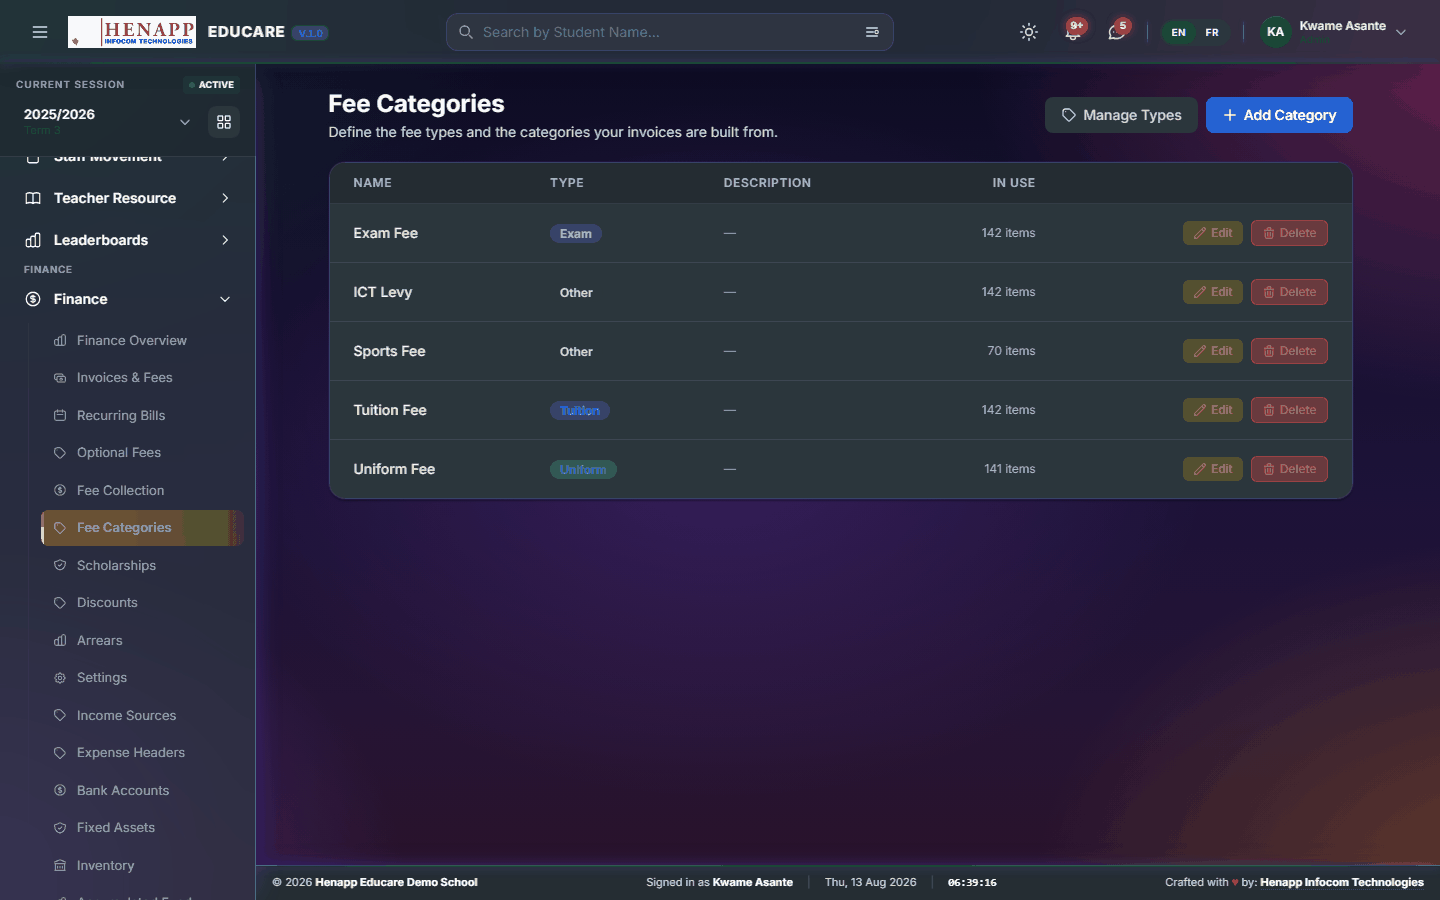
12.7 Fee Categories
The kinds of fee the school charges — tuition, admission, examination, feeding — and what each costs per class.
How to use it
- Open Finance → Fee Categories.
- Click Add Category and name it.
- Set the amount per class, and whether it recurs each term or is charged once.
- Save. The category is then available when raising invoices.
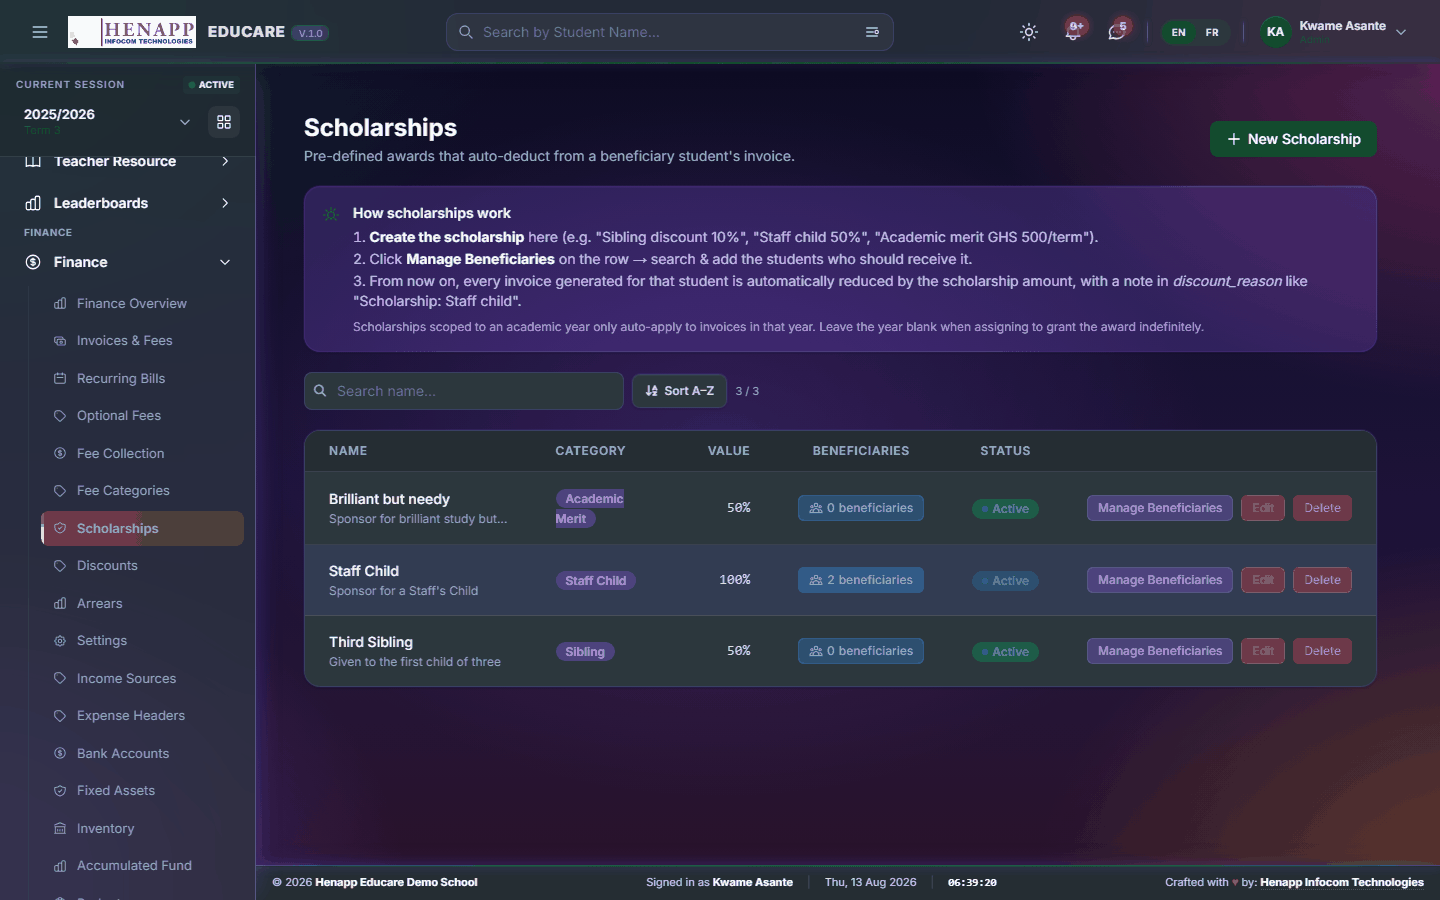
12.8 Scholarships
Full or partial awards that reduce what a family is billed.
How to use it
- Open Finance → Scholarships.
- Create the scholarship with its name and its value — a percentage or a fixed amount.
- Award it to the learners who hold it.
- Invoices raised from then on carry the reduction automatically.
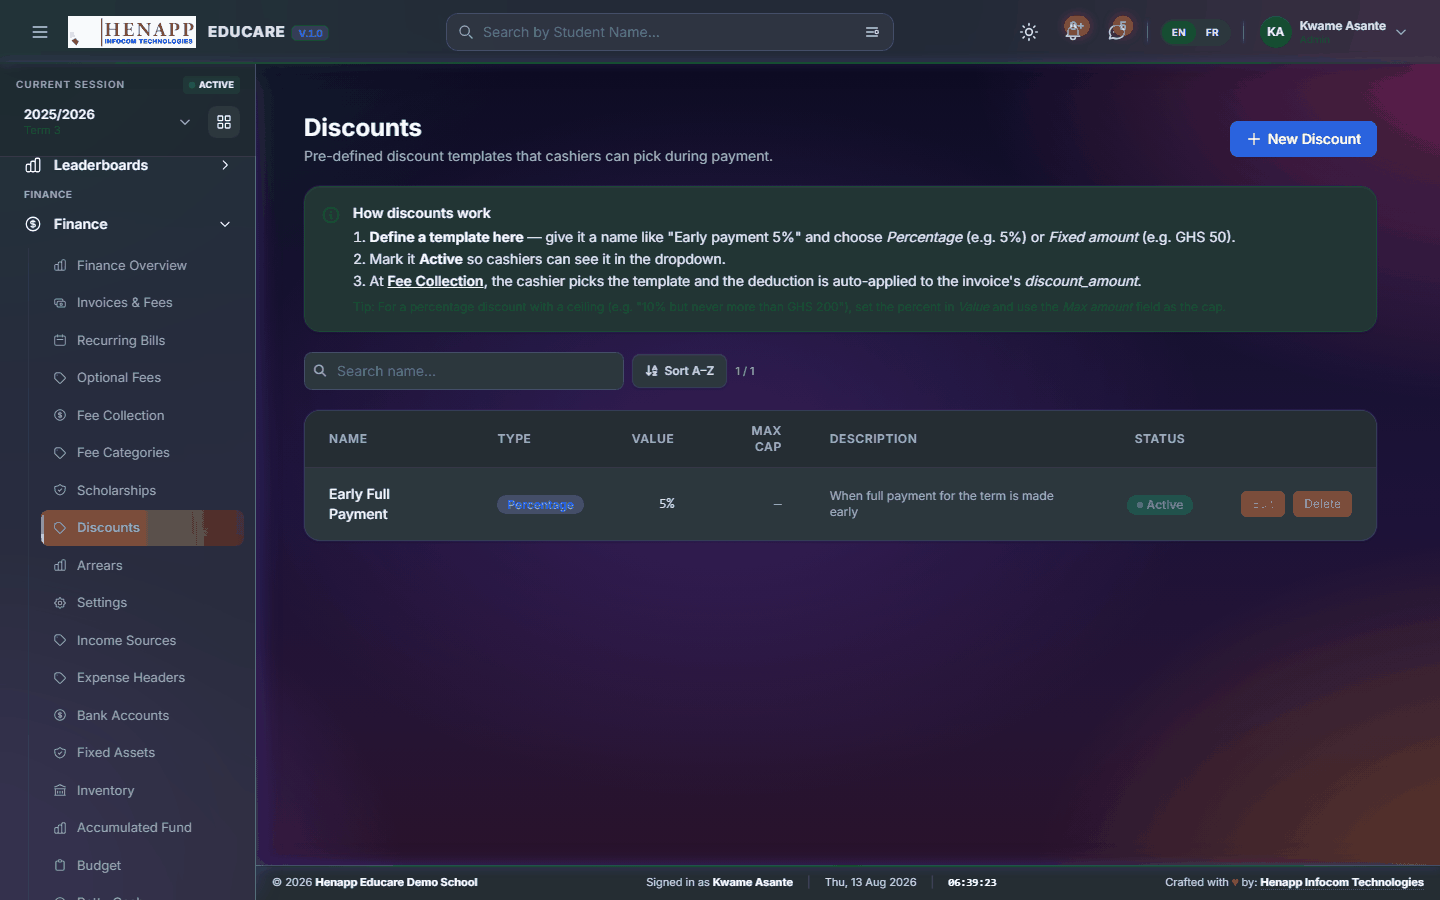
12.9 Discounts
Reductions applied case by case — a sibling discount, a staff-child rate, an early-payment allowance.
How to use it
- Open Finance → Discounts.
- Create the discount and set its value.
- Apply it to a learner or to an invoice.
12.10 Arrears
What is owed from earlier terms — brought-forward balances and manual arrears carried onto the current account.
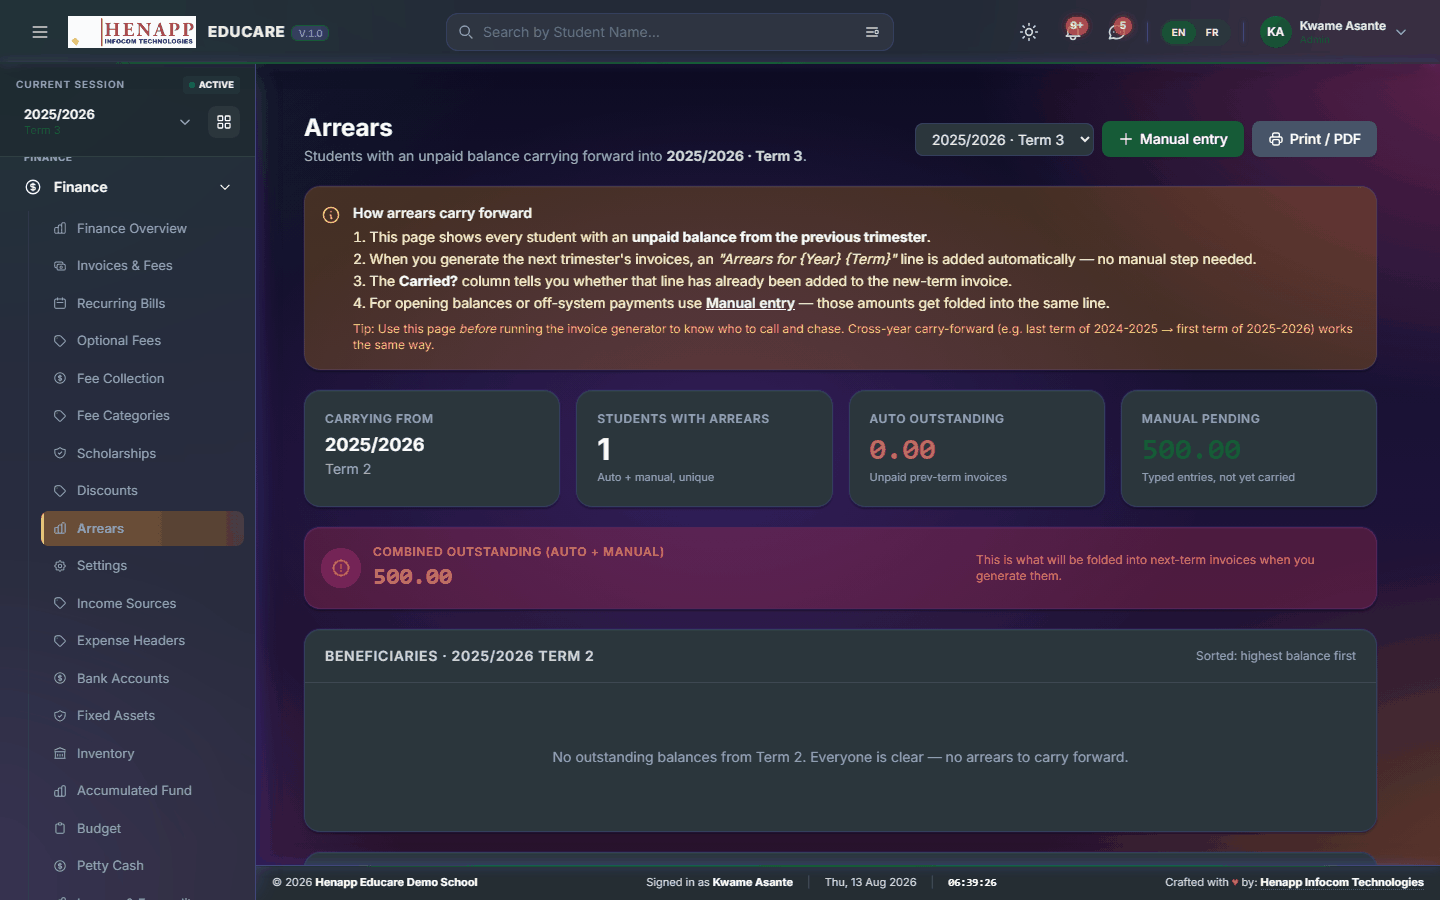
How to use it
- Open Finance → Arrears.
- Review the outstanding balances by class or by learner.
- Add a manual arrear where a debt predates the system.
- Export the list for follow-up.
12.11 Settings
How finance behaves — receipt numbering, currency, what prints on an invoice, and the payment methods you accept.
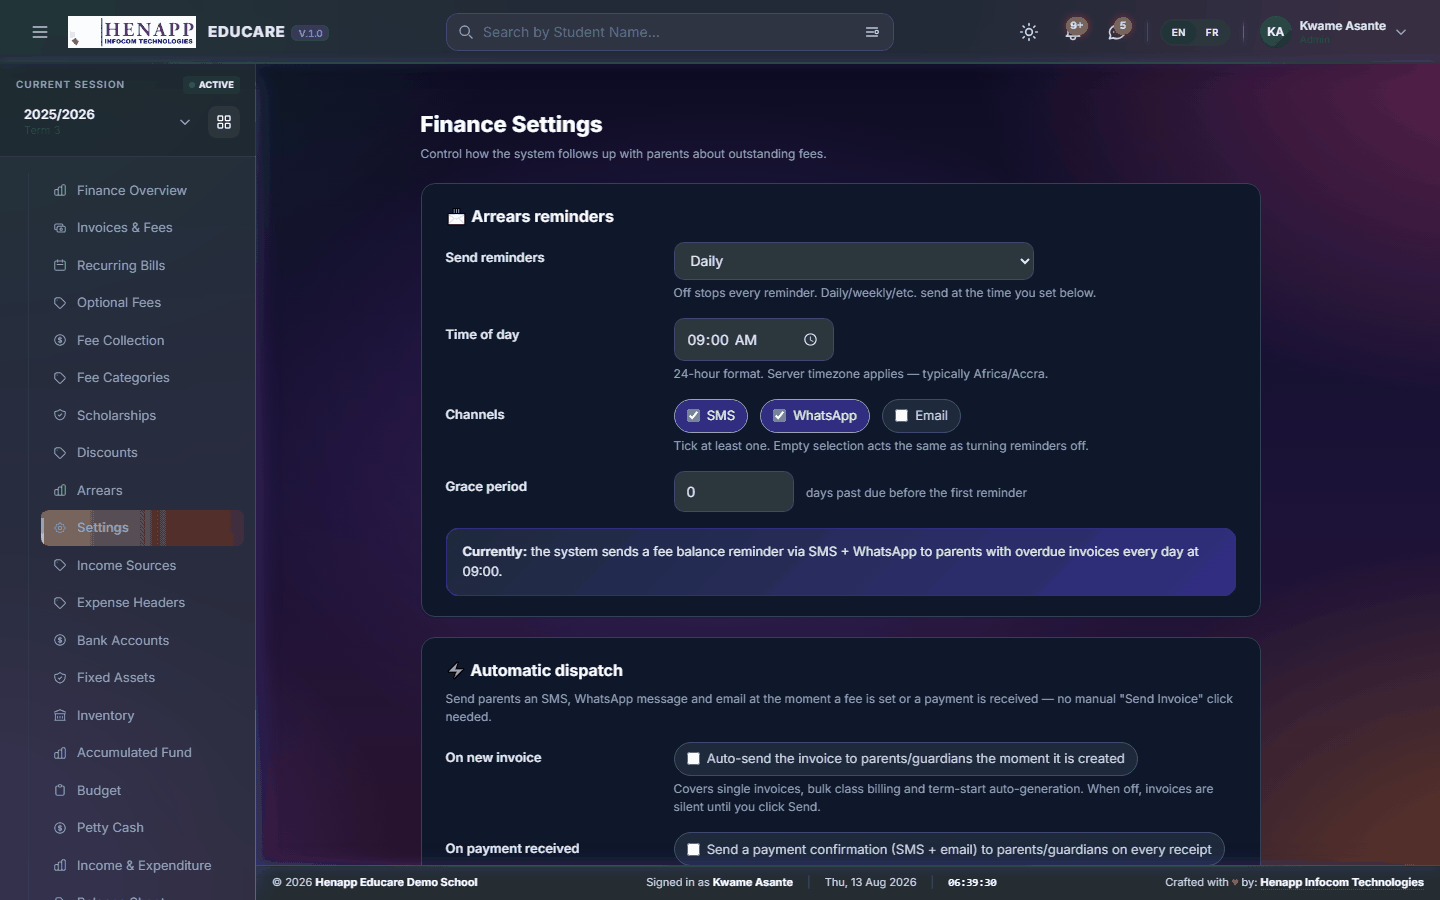
How to use it
- Open Finance → Settings.
- Set the receipt and invoice number formats.
- Choose the payment methods staff may select at the counter.
- Set what prints on invoices and receipts, then Save.
12.12 Bank Accounts
The school's bank and mobile-money accounts, so receipts and payments can be traced to where the money actually sits.
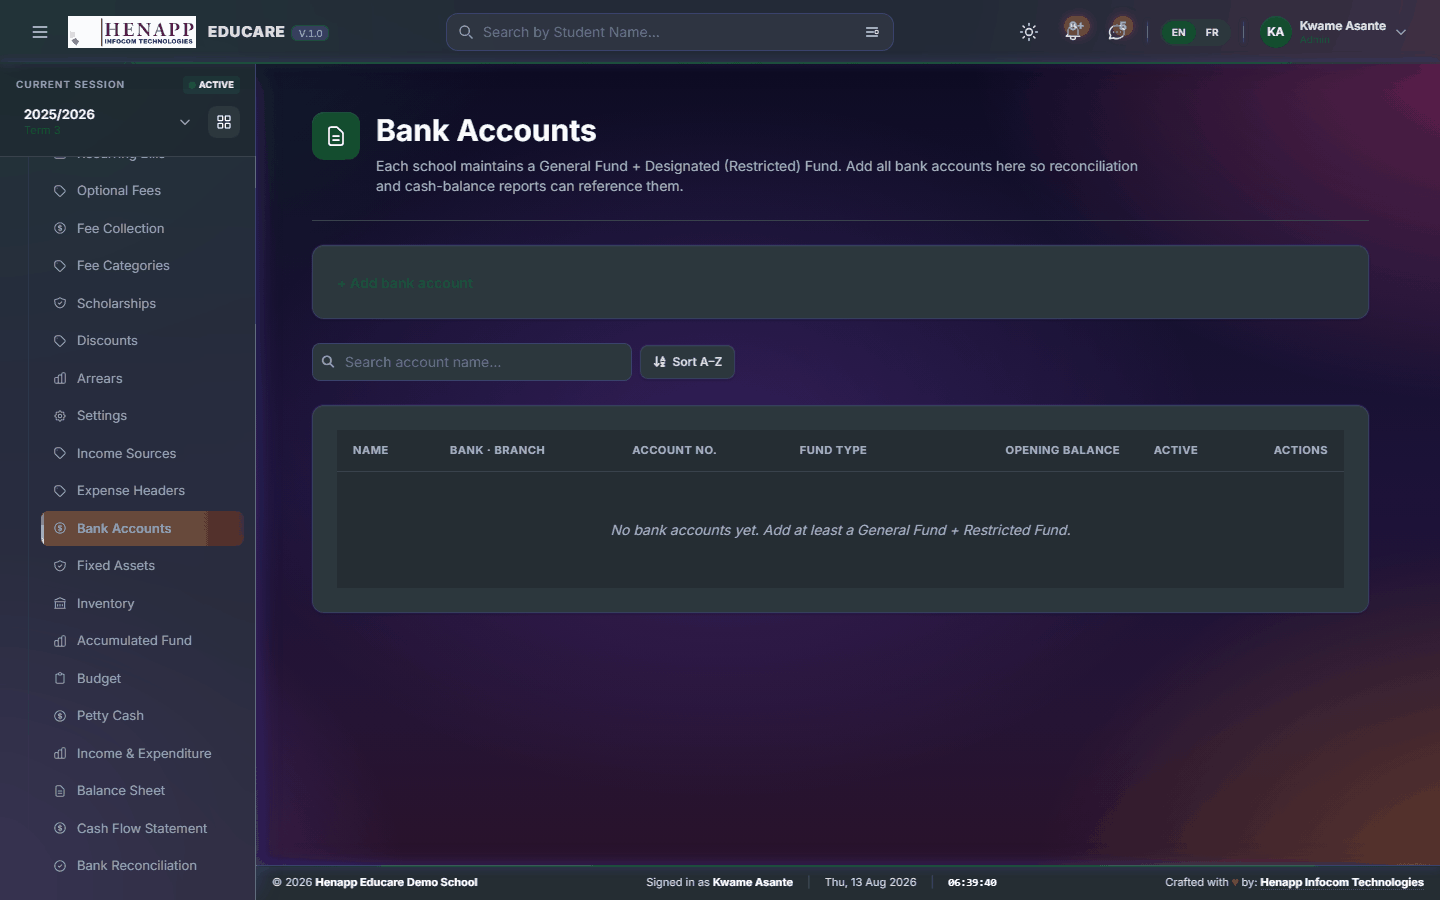
How to use it
- Open Finance → Bank Accounts.
- Add each account with its name, number and opening balance.
- Save. Payments can then be assigned to an account and reconciled against its statement.
12.13 Fixed Assets
What the school owns — buildings, vehicles, equipment — with its value and depreciation.
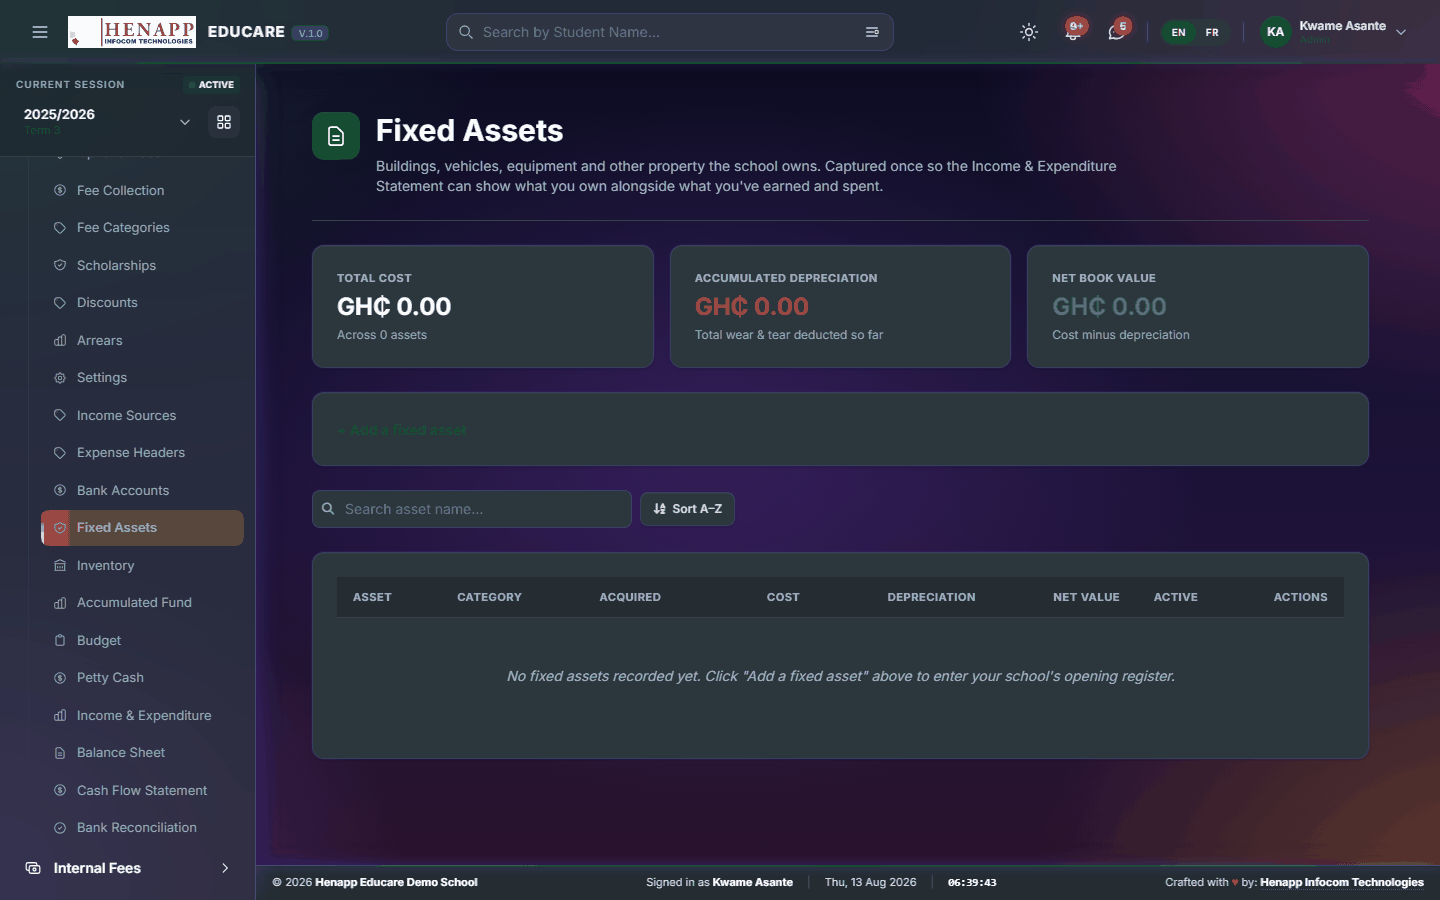
How to use it
- Open Finance → Fixed Assets.
- Add each asset with its cost, purchase date and expected life.
- Save. Depreciation is calculated and carried into the balance sheet.
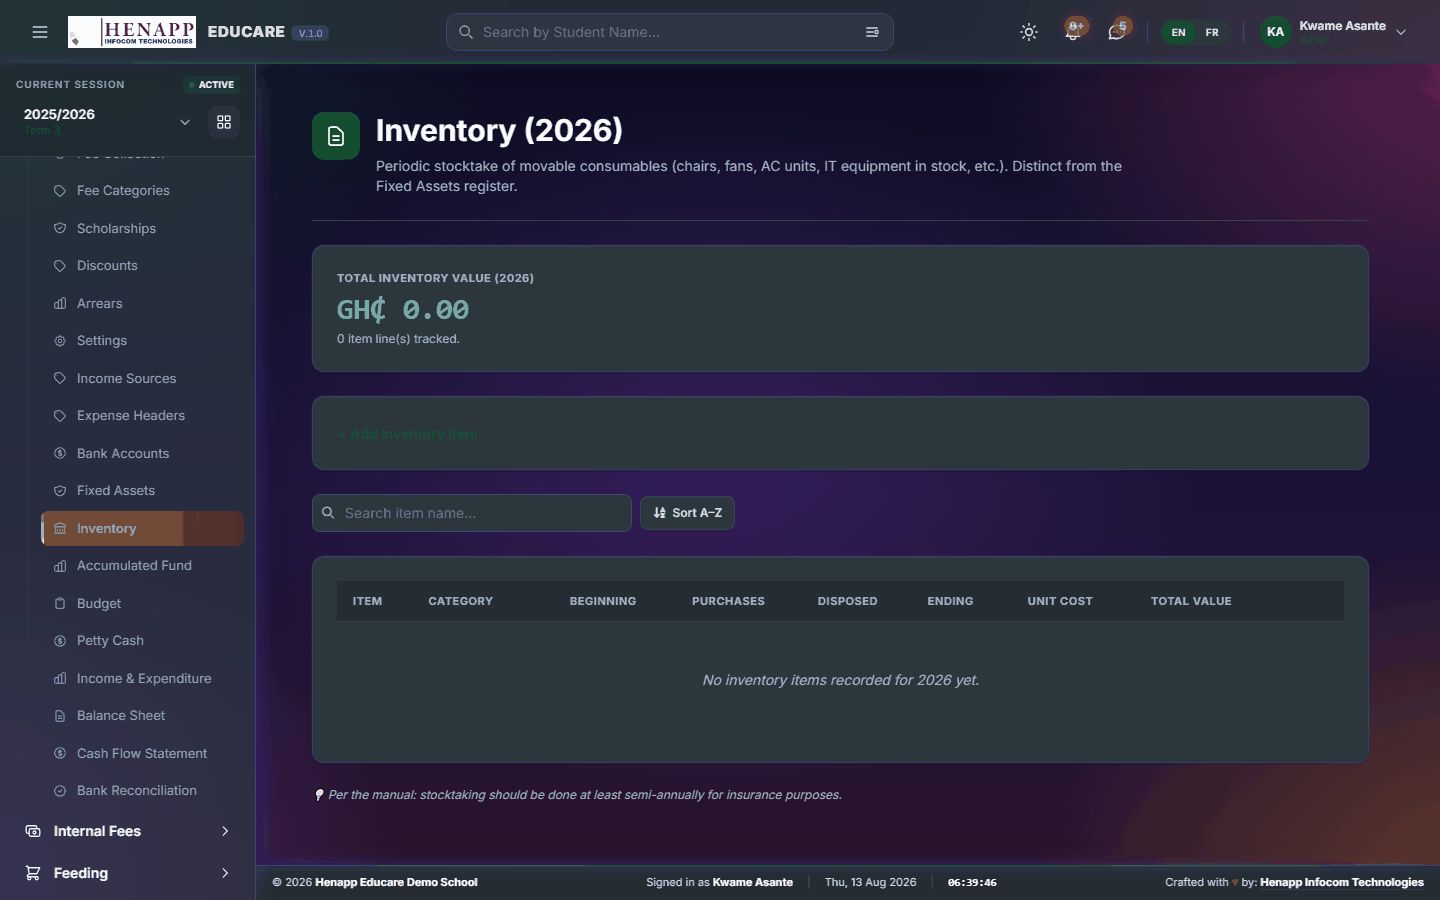
12.14 Inventory
Stock held for sale or use, valued for the accounts.
How to use it
- Open Finance → Inventory.
- Record each item with its quantity and unit value.
- Update quantities as stock moves; the value flows into the balance sheet.
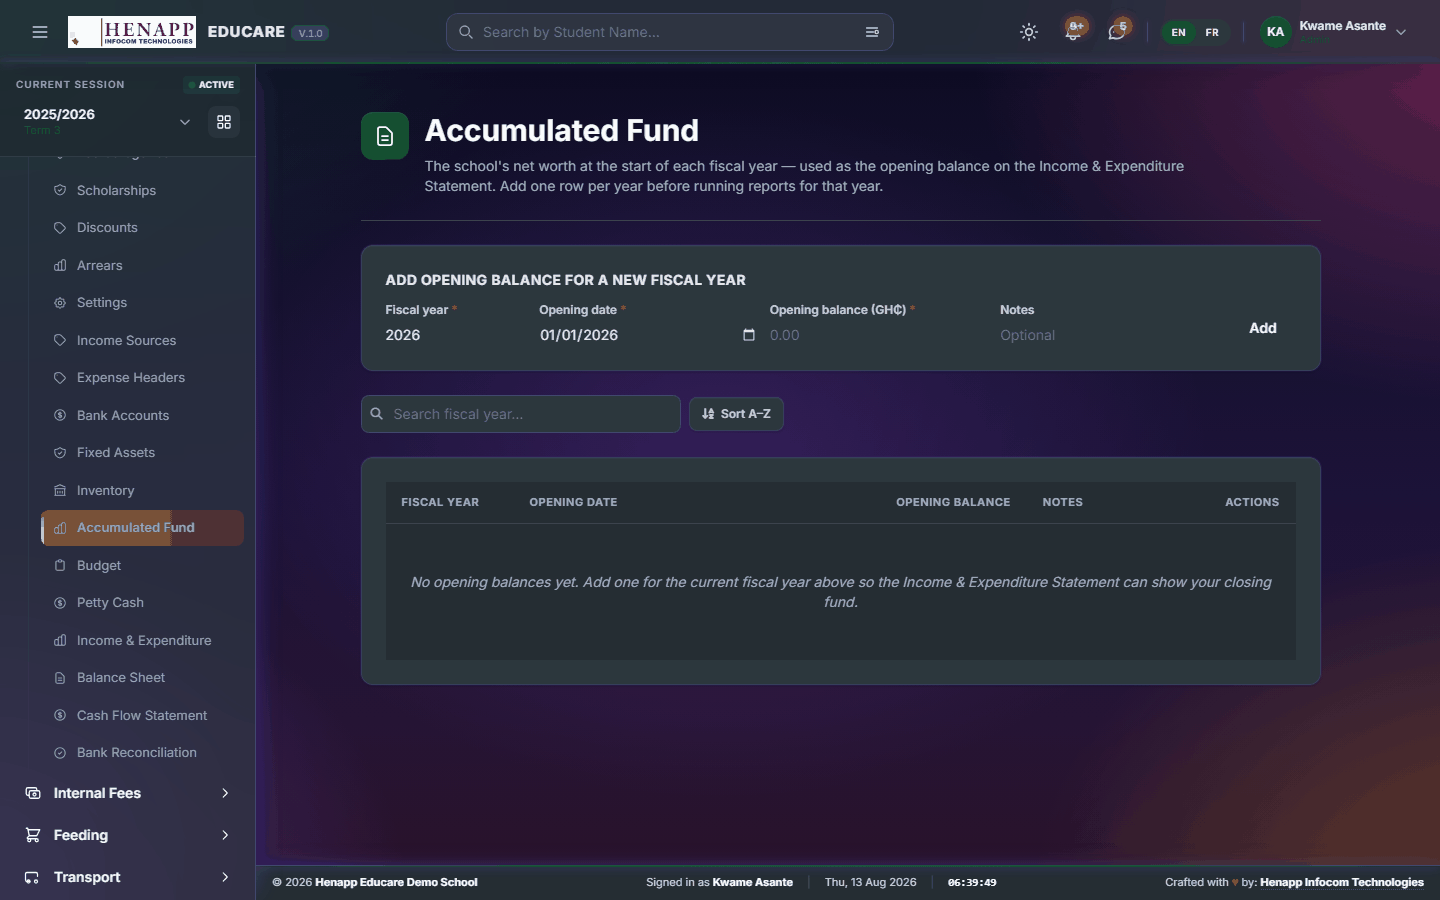
12.15 Accumulated Fund
The school's accumulated surplus carried forward — the equity line of the balance sheet.
How to use it
- Open Finance → Accumulated Fund.
- Enter the opening balance when you first set the books up.
- It is updated from each period's surplus or deficit thereafter.
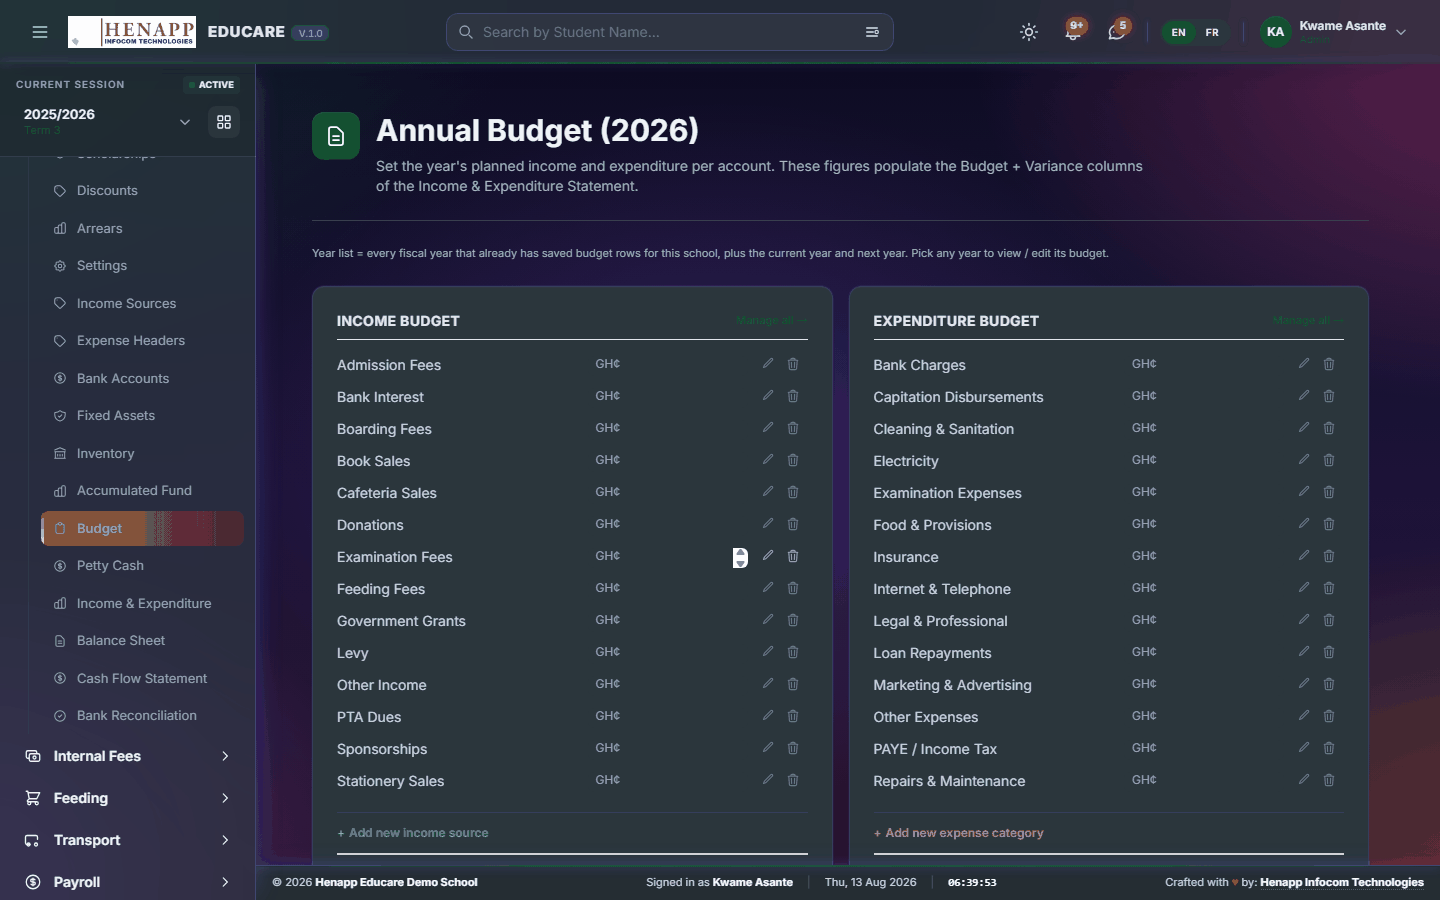
12.16 Budget
What you planned to spend, against what you actually spent.
How to use it
- Open Finance → Budget.
- Choose the period and set a budget figure against each expense header.
- Save. The variance column then shows plan against actual as the period runs.
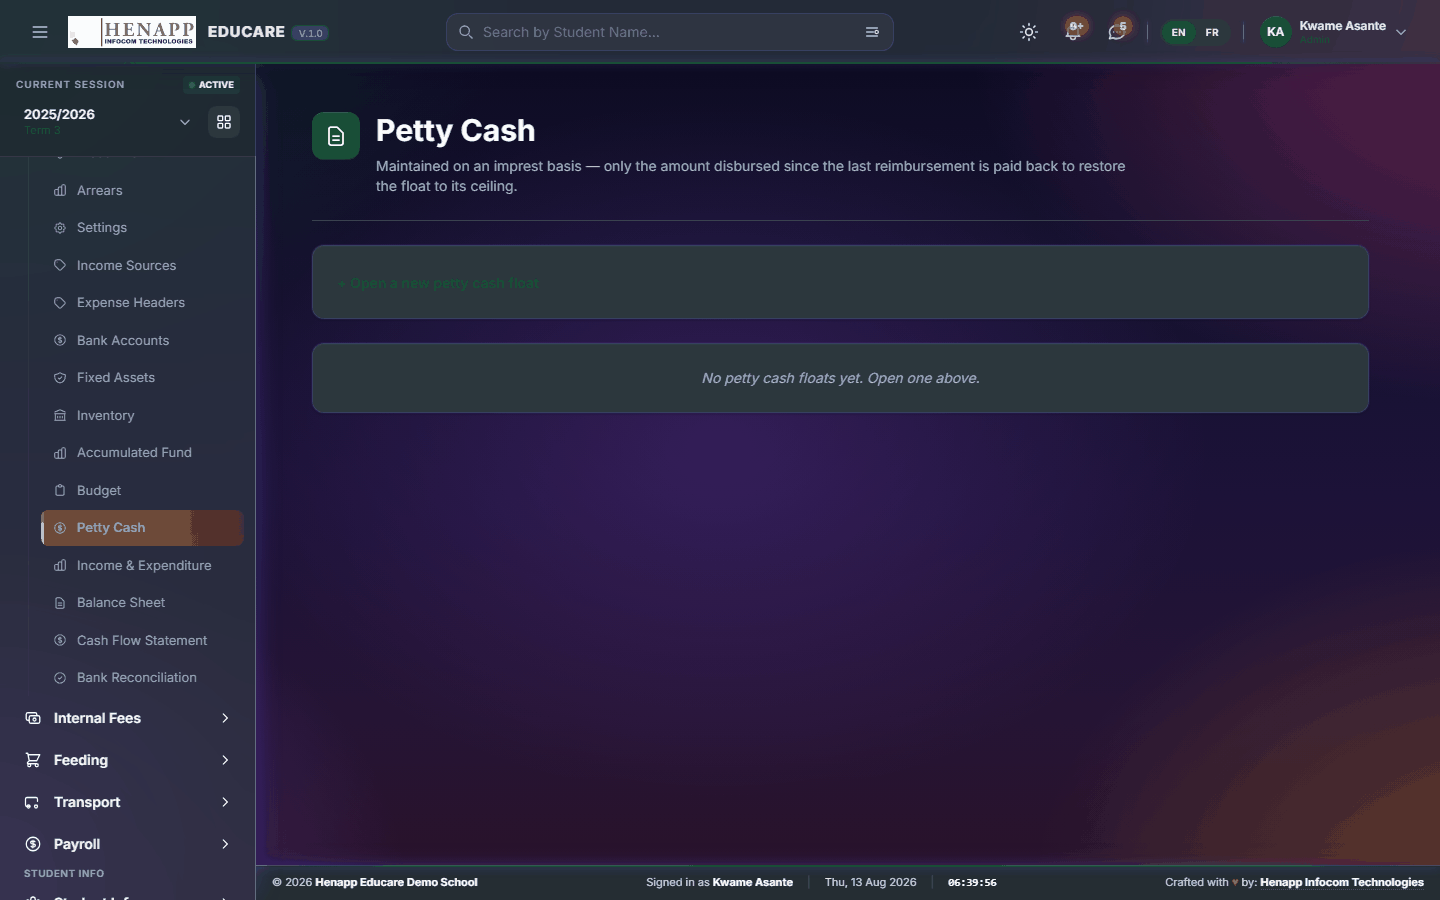
12.17 Petty Cash
The small cash float — what went in, what went out, and what should be in the tin.
How to use it
- Open Finance → Petty Cash.
- Record a top-up when the float is replenished.
- Record each payment with its expense header and a description.
- The running balance is what the tin should hold; reconcile it regularly.
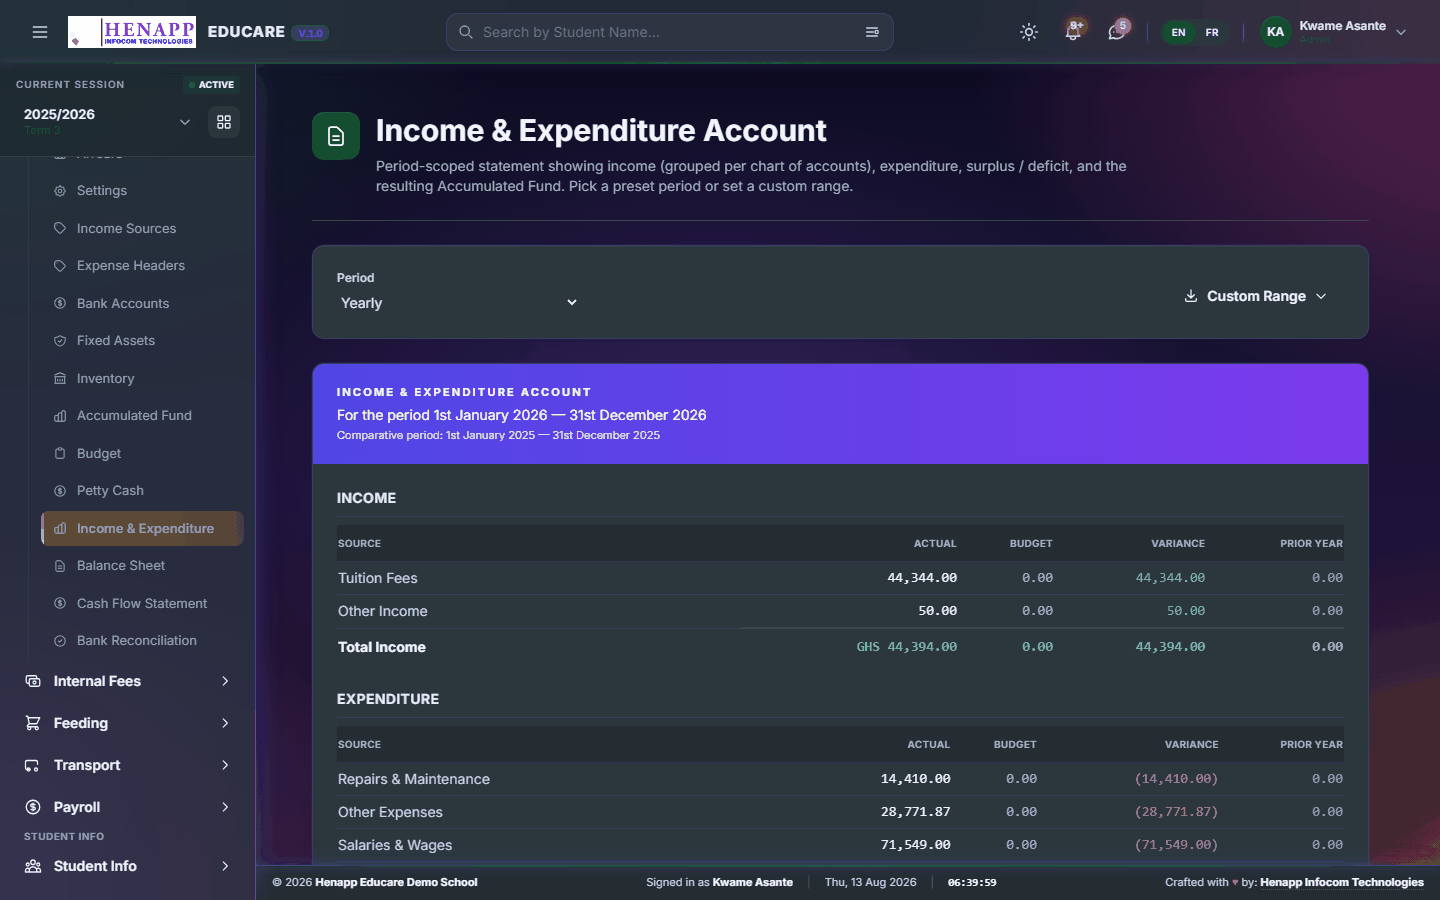
12.18 Income & Expenditure
Income against expenditure for a period, and the surplus or deficit that results.
How to use it
- Open Finance → Income & Expenditure.
- Set the period.
- Read the statement, then export it as a PDF for the board or the auditor.
12.19 Balance Sheet
What the school owns and owes at a point in time.

How to use it
- Open Finance → Balance Sheet.
- Set the date.
- Read the statement and export it.
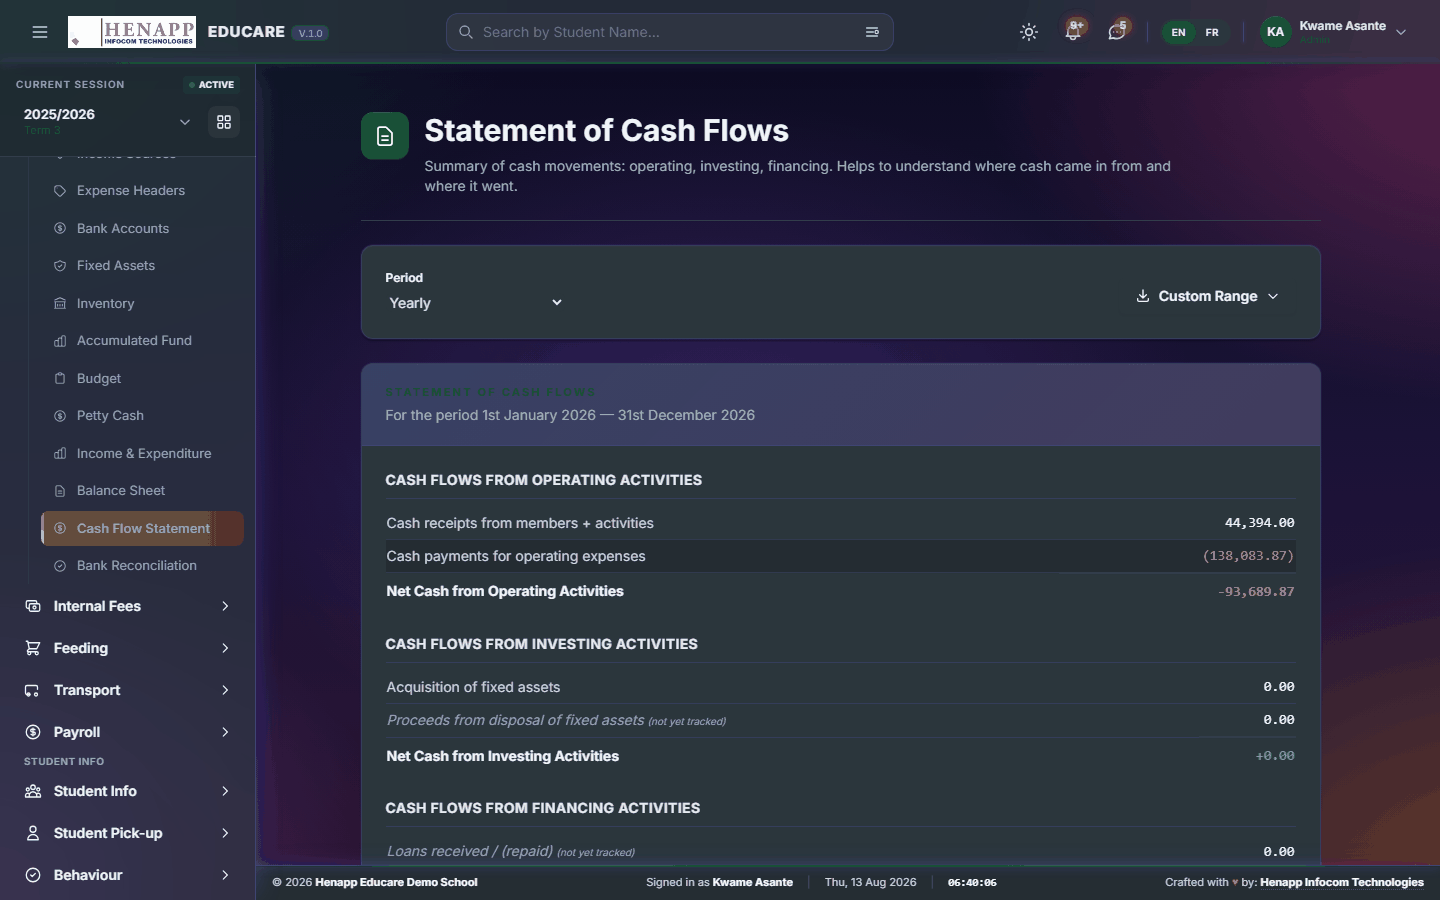
12.20 Cash Flow Statement
Cash actually in and out over a period — which is not the same as income and expenditure.
How to use it
- Open Finance → Cash Flow Statement.
- Set the period, read the statement and export it.
12.21 Bank Reconciliation
Matching the school's records against the bank statement, so differences are found and explained.

How to use it
- Open Finance → Bank Reconciliation.
- Choose the account and the statement period.
- Enter the closing balance from the bank statement.
- Tick off each transaction that appears on both sides.
- Investigate whatever is left unticked, then save the reconciliation.
13. Internal Fees
Charges raised inside the school that sit outside the main fee structure — departmental levies, club subscriptions, one-off contributions.
Find it in the sidebar under Finance → Internal Fees.
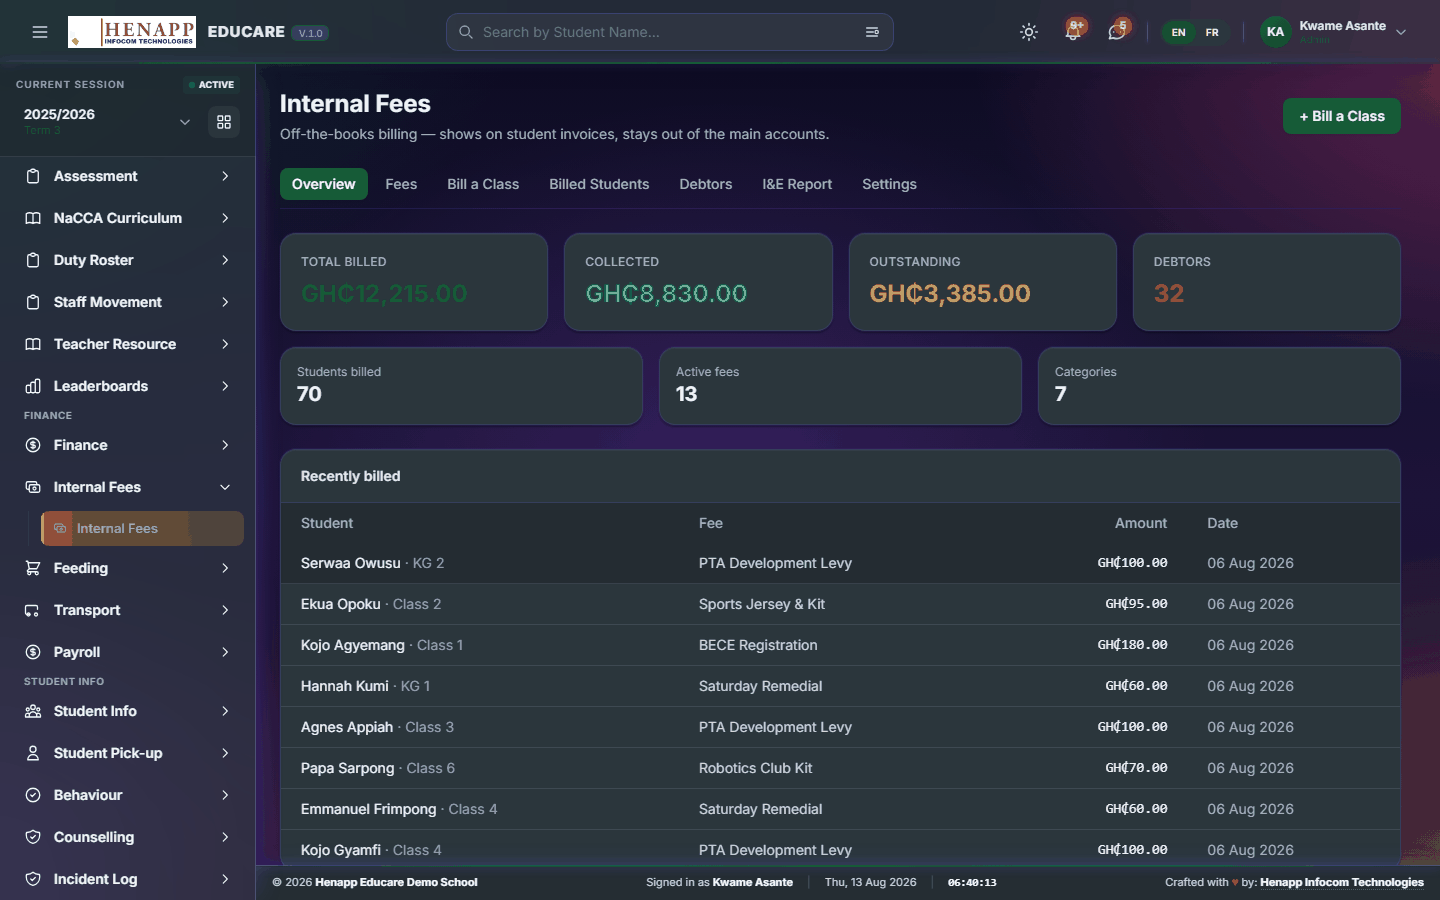
13.1 Internal Fees
Charges raised within the school outside the main fee structure — a departmental levy, a club subscription, a one-off contribution.
How to use it
- Open Internal Fees.
- Create the fee with its name, amount and who it applies to.
- Assign it to the learners or staff concerned.
- Record payments against it and export the collection list.
14. Feeding
The feeding programme — the weekly menu, who is subscribed, and the daily money collected.
Find it in the sidebar under Finance → Feeding.
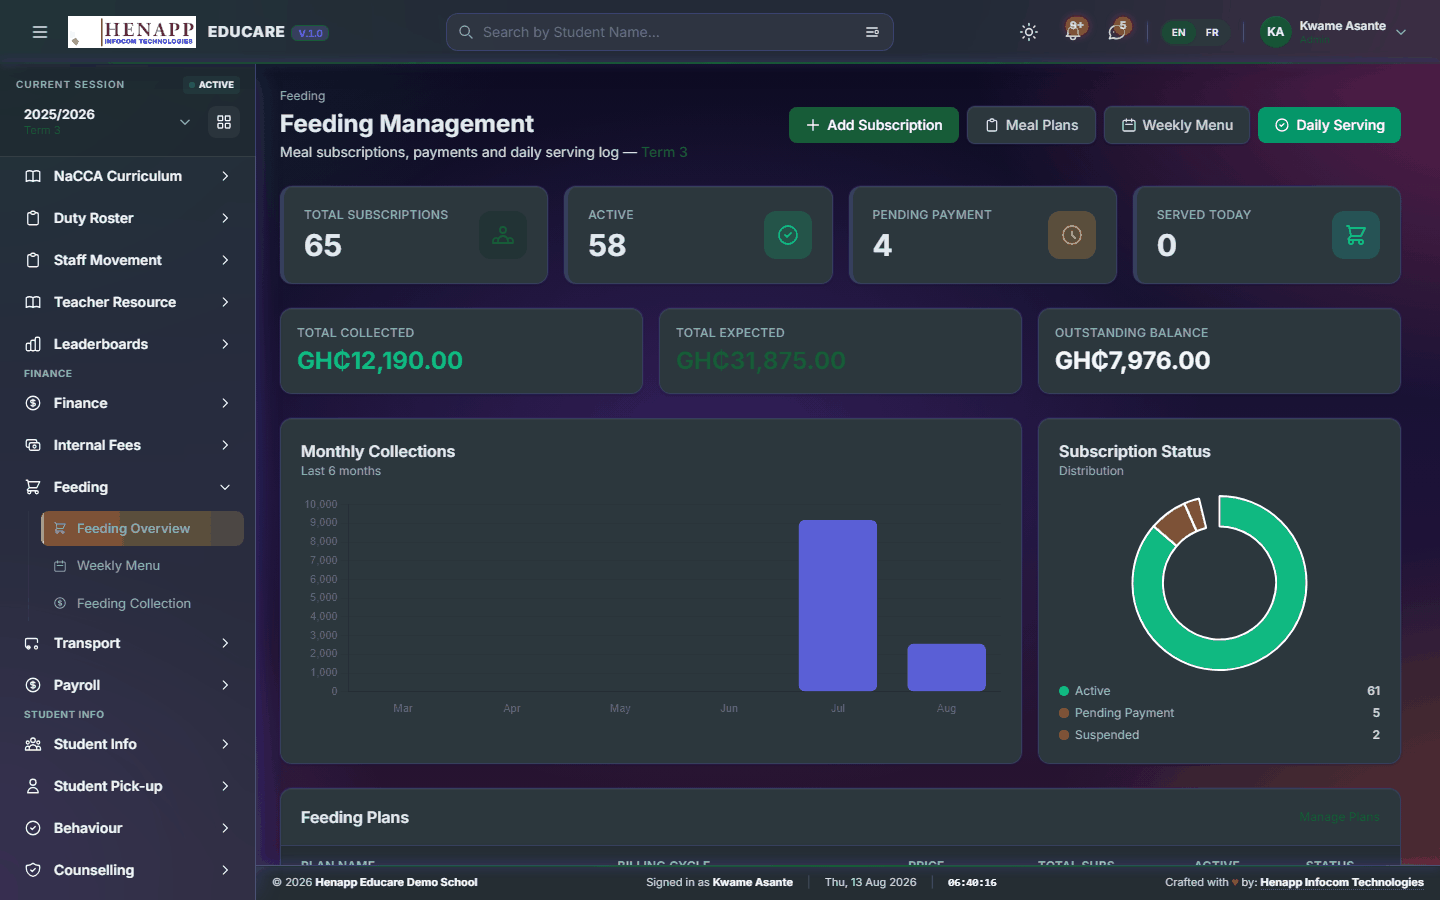
14.1 Feeding Overview
The feeding programme at a glance — who is subscribed and what has been collected.
How to use it
- Open Feeding → Feeding Overview.
- Read the subscriber count and today's collection.
- Click through for the detail.
14.2 Weekly Menu
What is being served each day of the week, published to parents.
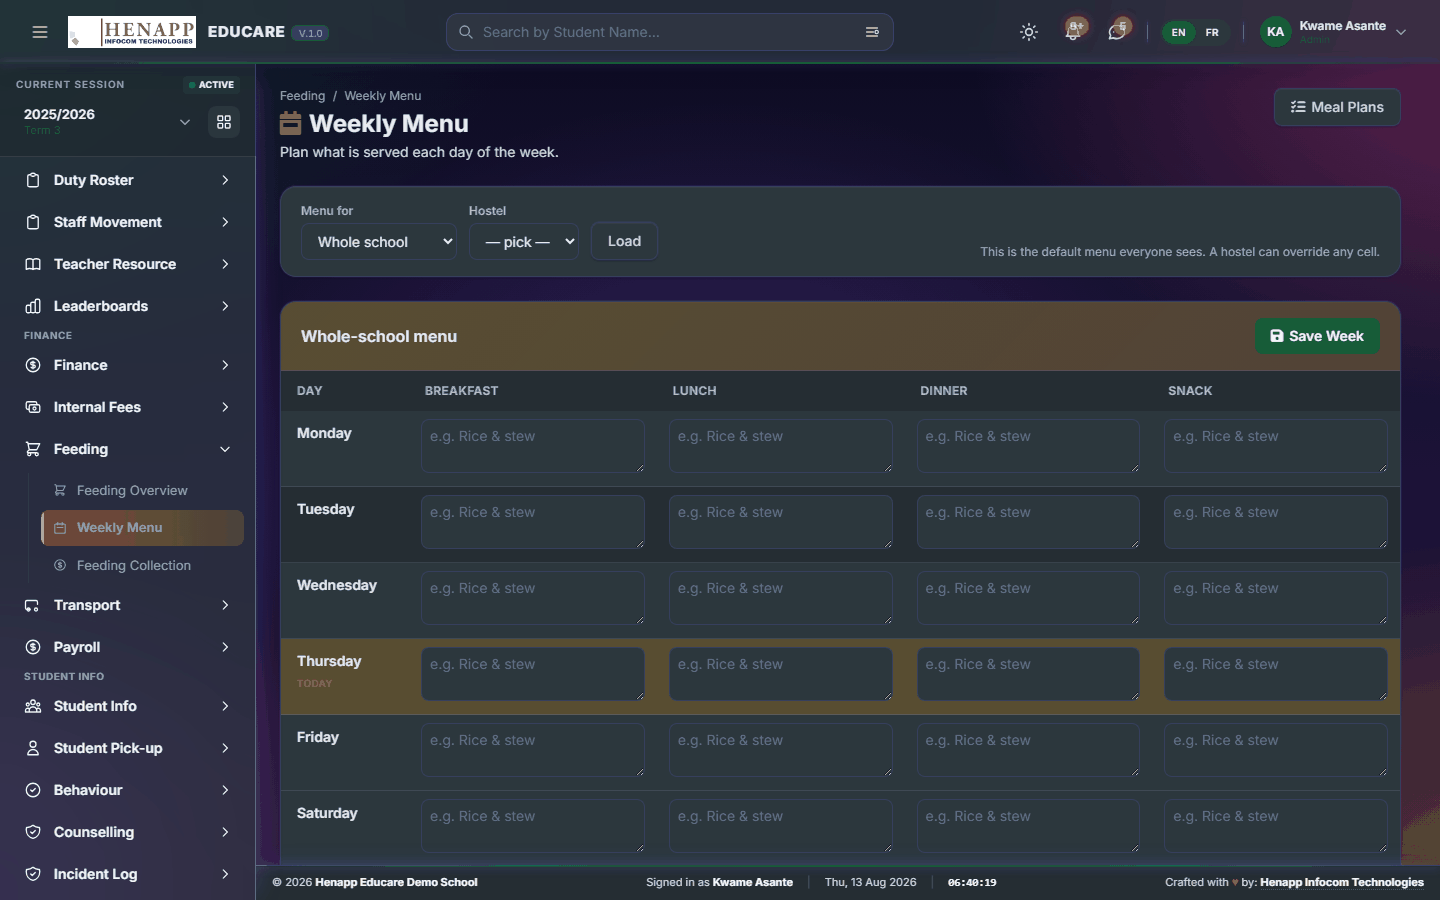
How to use it
- Open Feeding → Weekly Menu.
- Set the meal for each day.
- Save and publish. Parents see the menu in their portal.
15. Transport
School transport — routes, who rides, and the fares collected.
Find it in the sidebar under Finance → Transport.
15.1 Transport Overview
Routes, vehicles and riders in summary.

How to use it
- Open Transport → Transport Overview.
- Add routes and assign vehicles to them.
- Subscribe learners to a route and set the fare.
16. Payroll
Staff pay — salary structures, allowances and deductions, loans, tax, and the monthly run that produces payslips.
Find it in the sidebar under Finance → Payroll.
16.1 Dashboard
The payroll home page — the current month's position and where it is in the run.
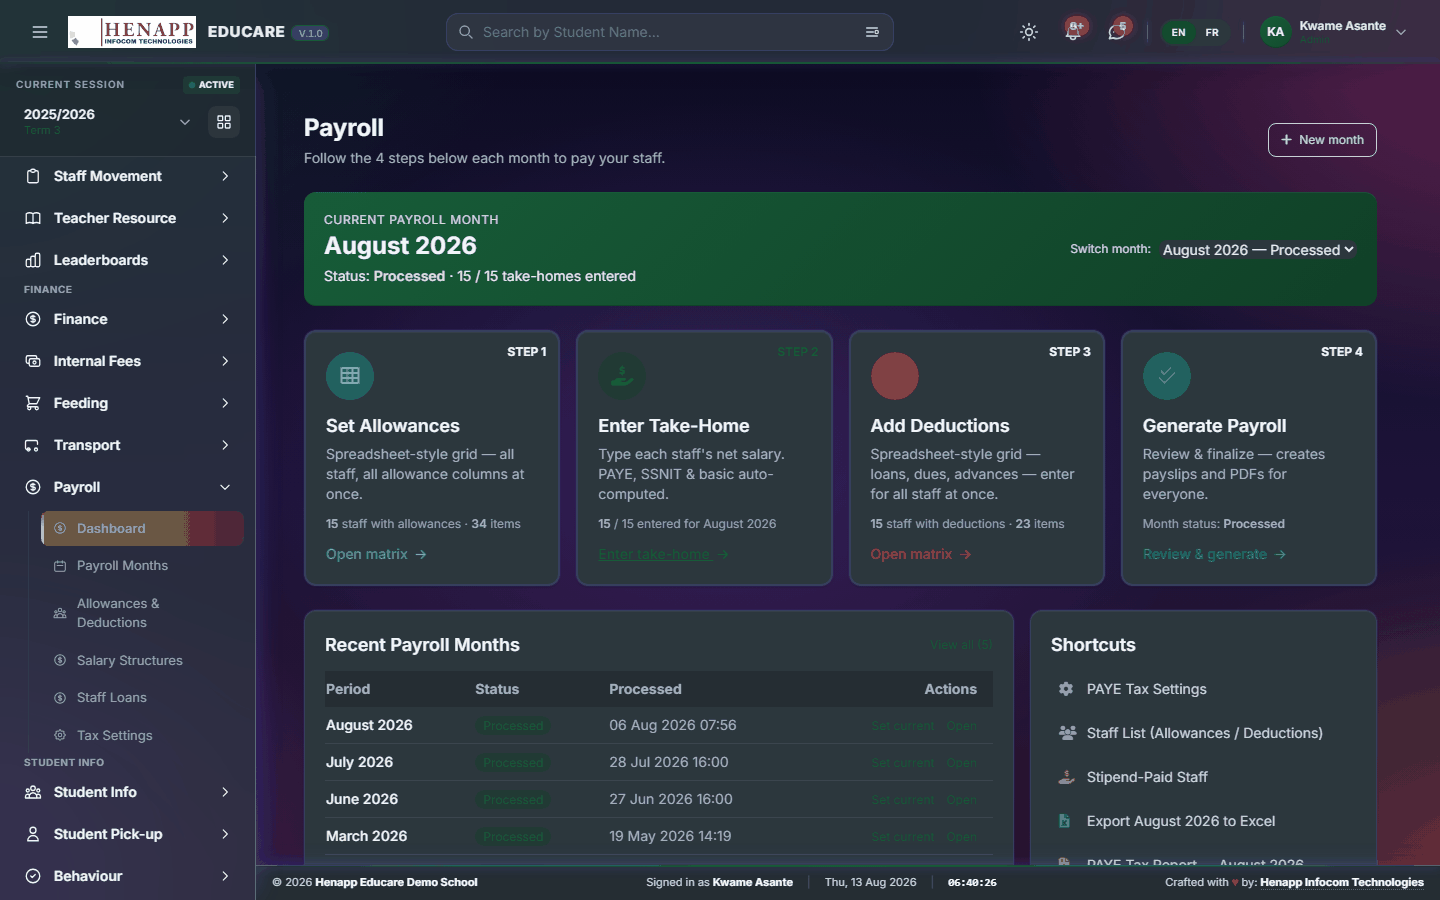
How to use it
- Open Payroll → Dashboard.
- Read the totals for the open month.
- Click through to the month to work on it.
16.2 Payroll Months
Each pay month: open it, process it, produce payslips, and close it.
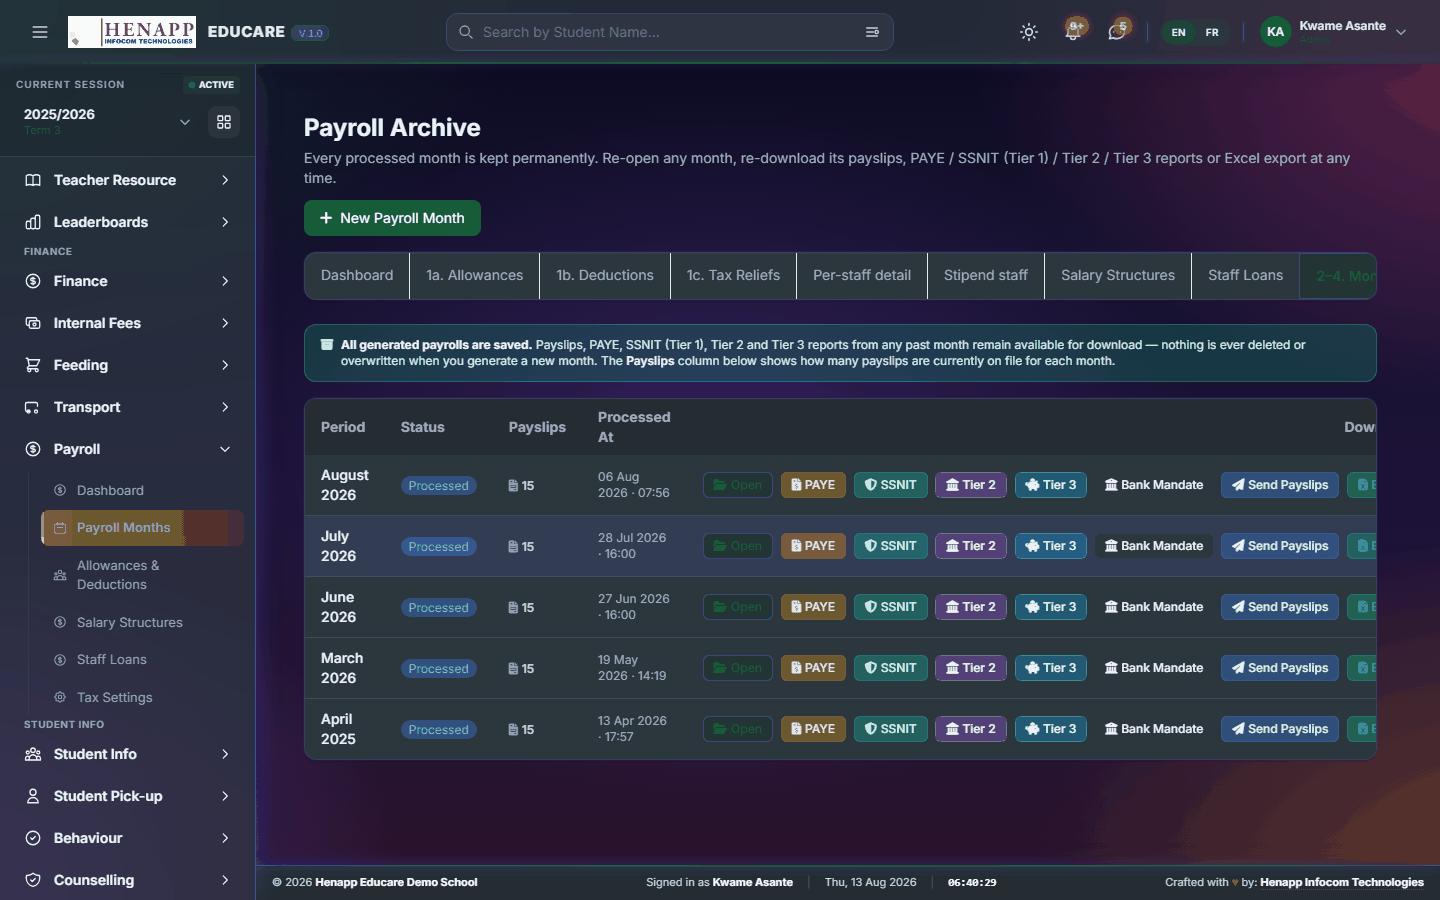
How to use it
- Open Payroll → Payroll Months.
- Click New Month and choose the period, or open the month already running.
- Process the month — the system calculates gross, allowances, deductions, tax and net for each member of staff.
- Review the register line by line before you go further.
- Generate payslips, then close the month once payment has been made.
A closed month is the record of what was paid. Check the register while the month is still open — allowances, deductions and loan repayments are all easier to correct before closing than after.
16.3 Allowances & Deductions
What each member of staff is paid on top of salary, and what comes off it.

How to use it
- Open Payroll → Allowances & Deductions.
- Pick the member of staff.
- Add each allowance and each deduction with its amount, and whether it repeats every month or applies once.
- Save. The next processed month picks the changes up.
16.4 Salary Structures
Pay scales and grades, so staff on the same grade are paid consistently.

How to use it
- Open Payroll → Salary Structures.
- Create each grade with its basic salary.
- Assign staff to a grade — their basic pay then follows the structure.
16.5 Staff Loans
Staff loans and advances, with repayments taken from pay automatically.

How to use it
- Open Payroll → Staff Loans.
- Click New Loan, choose the member of staff and enter the amount.
- Set the monthly repayment and the start month.
- Save. Repayments are deducted each month until the loan clears, and the outstanding balance is shown here.
16.6 Time Losses
What lateness and unexcused absence cost, in minutes and in money, for every member of staff each month.
How to use it
- Open Payroll → Time Losses.
- Choose the month. Each member of staff shows the minutes they were late, the days they were absent without permission, and what that is worth against their own pay.
- Open a name to see the day-by-day working behind the figure.
- Print or export it for a meeting, or leave it — the same summary already prints on each payslip.
Anyone marked on Excused Duty, or with approved leave, is not charged for those days. Days nobody clocked in at all — a holiday, a closure — are not counted against anyone.
16.7 Tax Settings
Tax bands, reliefs and statutory contributions used when a month is processed.
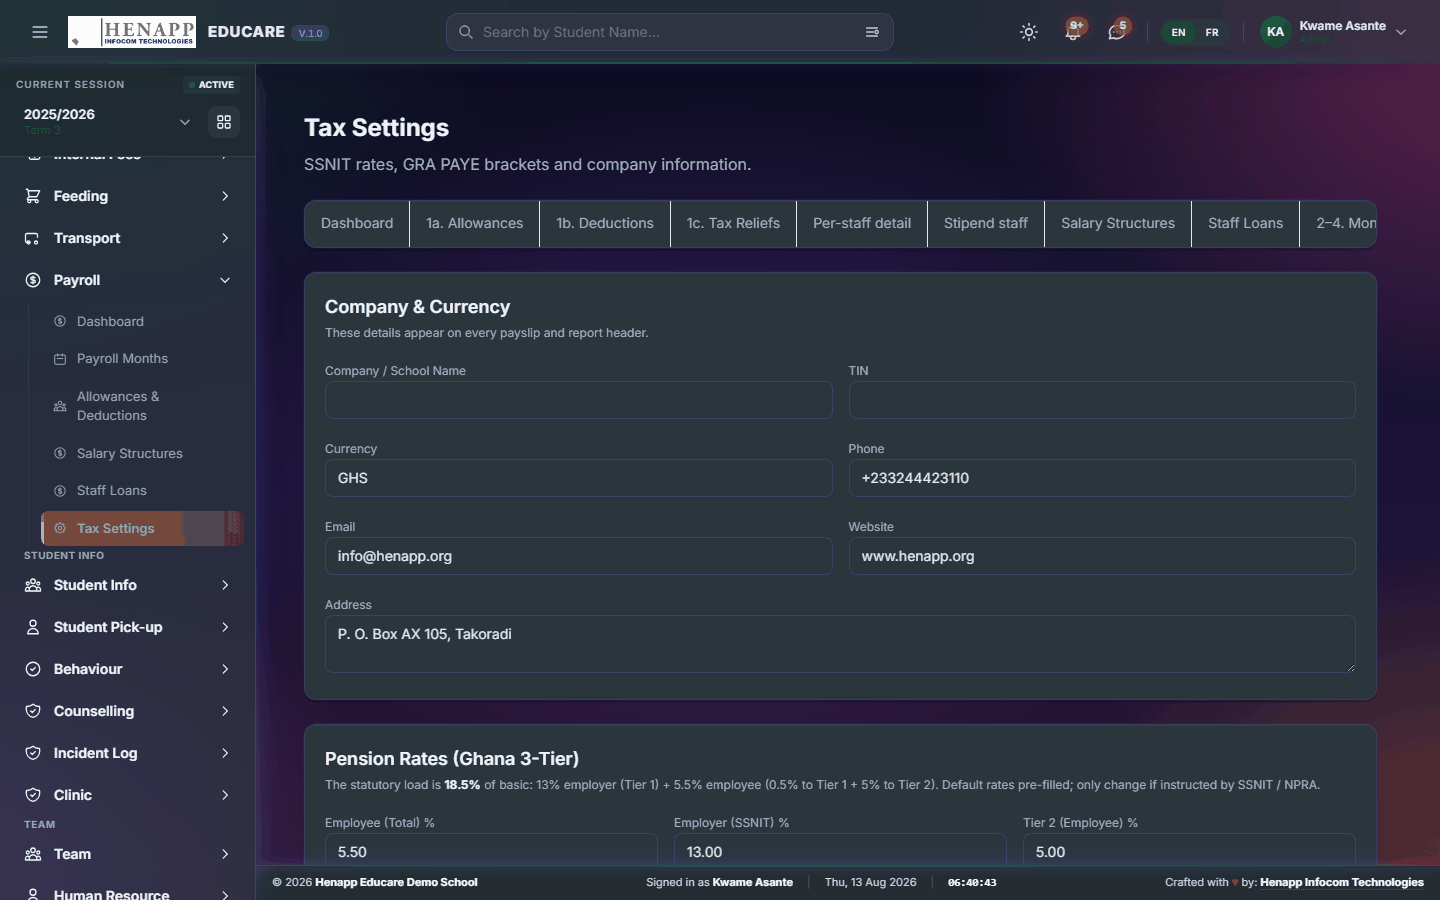
How to use it
- Open Payroll → Tax Settings.
- Set the tax bands and rates.
- Set the reliefs and the pension or social-security rates.
- Save. These take effect from the next month processed, not retrospectively.
17. Student Info
Learner records from application to enrolment — admissions, the student roll, and the family links behind it.
Find it in the sidebar under Student Info.
17.1 Admissions
Applications received, and the path from application to an enrolled learner.
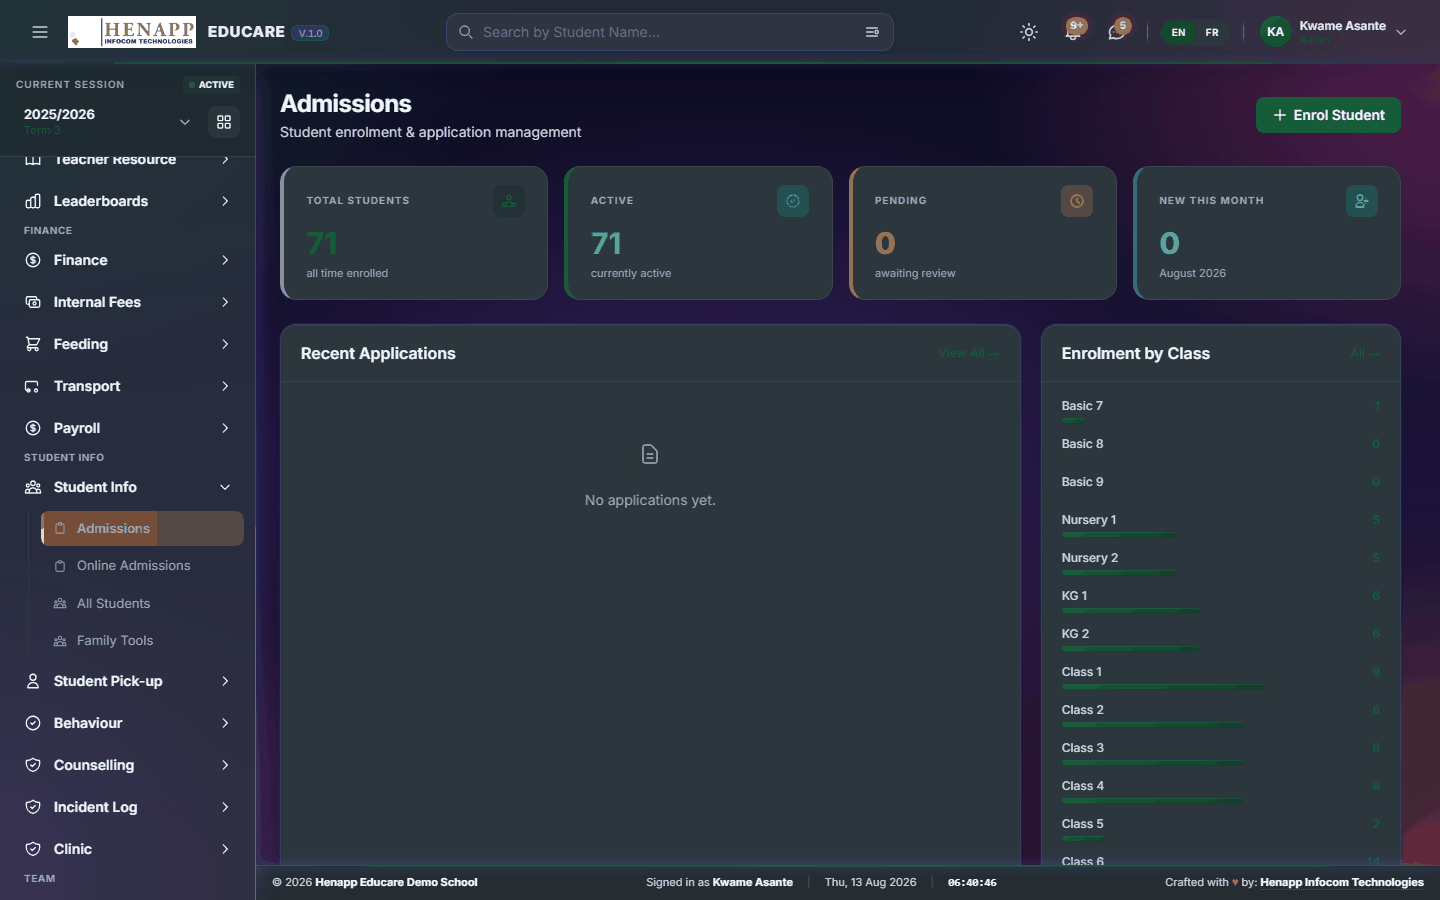
How to use it
- Open Student Info → Admissions.
- Open an application to read it in full.
- Record the outcome of any entrance test or interview.
- Click Enrol to turn an accepted application into a learner record — choose the class and stream they join.
- Decline with a reason where the application is unsuccessful.
17.2 Online Admissions
Applications submitted through the school website, arriving in the same queue as those taken at the office.
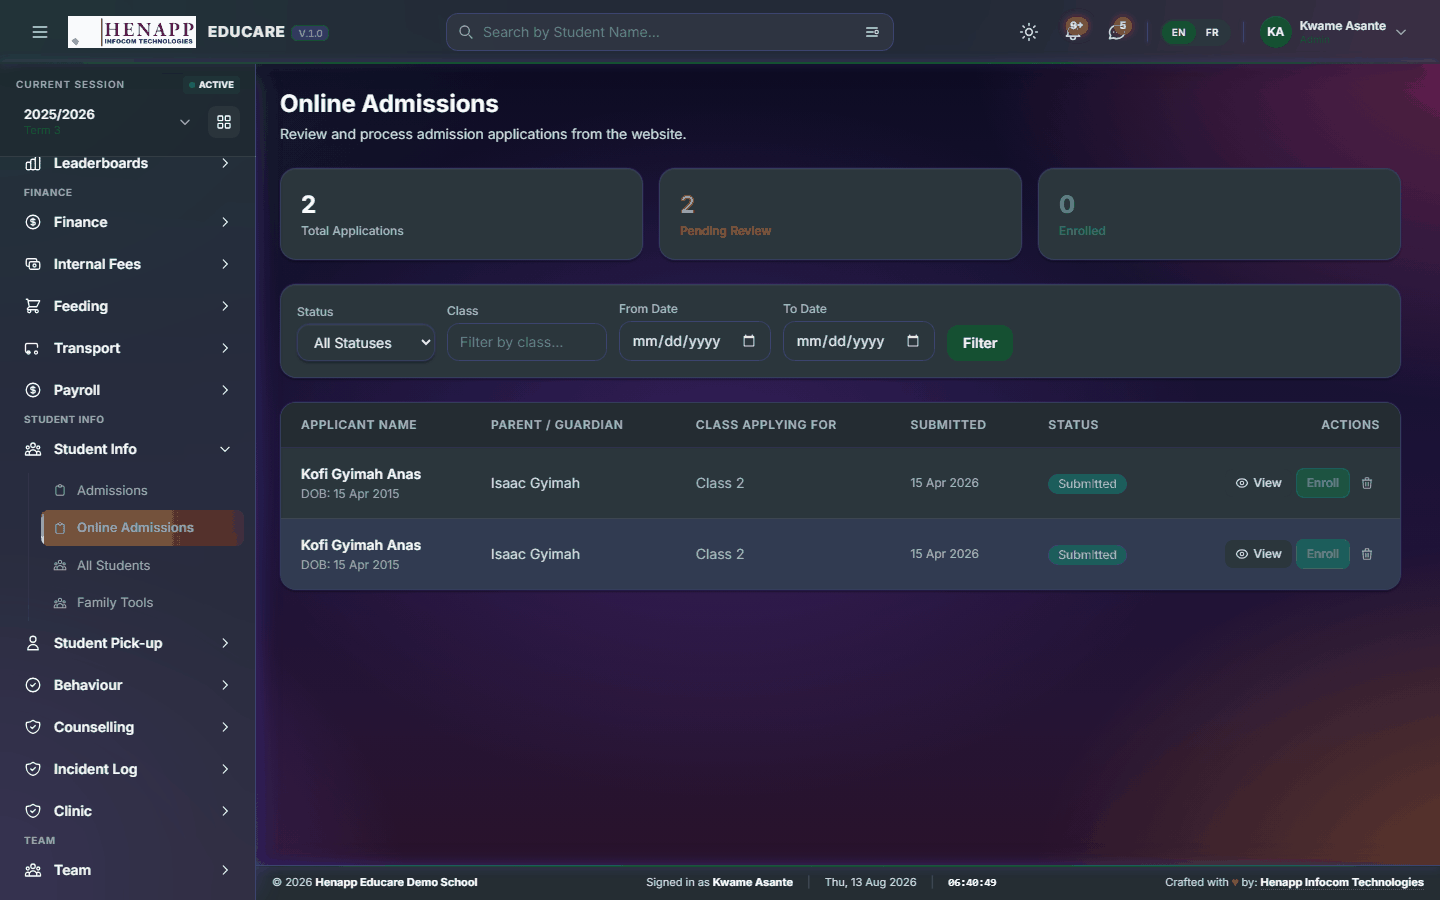
How to use it
- Open Student Info → Online Admissions.
- Review each submission and its attachments.
- Move it forward into the admissions process, or decline it.
17.3 All Students
The student roll — every learner, searchable, with the full record behind each one.
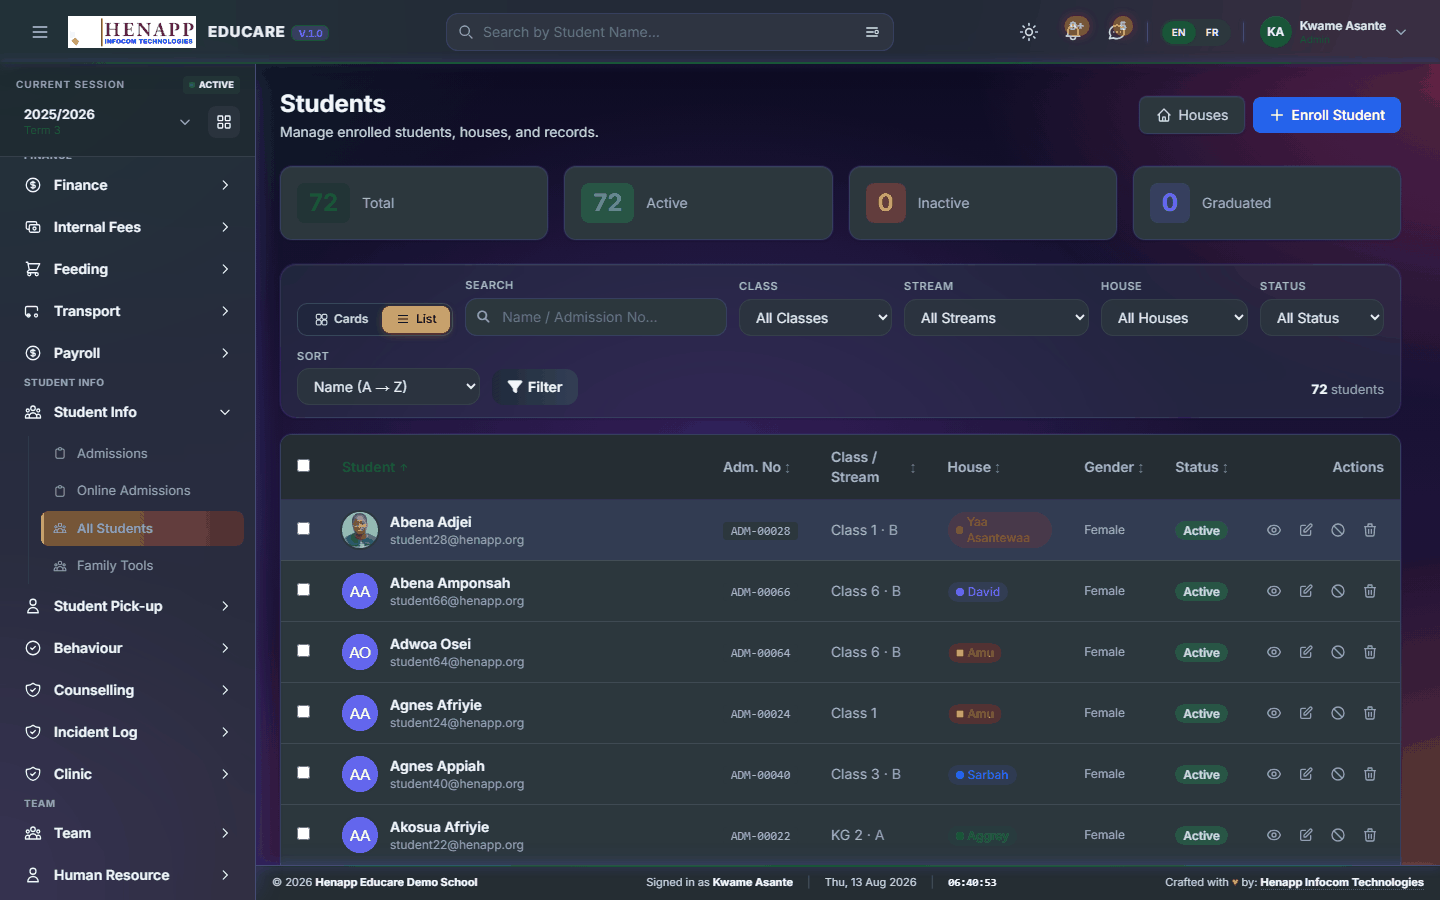
How to use it
- Open Student Info → All Students.
- Search by name or admission number, or filter by class and stream.
- Click a learner to open their record — personal details, guardians, class history, fees, attendance and results.
- Use Add Student for a single new learner.
- Use Bulk Import to load a roster: download the template, fill it in, and upload it.
- Export the list to Excel or PDF when you need it outside the system.
Rows without an email address are given an internal placeholder so the import does not fail. You can add the real address later from the learner record.
17.4 Family Tools
The links between learners and their guardians — siblings, contacts, and which parent account sees which child.

How to use it
- Open Student Info → Family Tools.
- Search for a family or a learner.
- Link siblings so one parent login covers all of them.
- Add or correct a guardian and their contact details.
- Check which parent account is attached to each child before sending credentials.
18. Furniture Use
School furniture issued to a named learner — a tagged desk, chair or locker, held for a set period, with its condition and replacement value recorded on the day it is handed over.
The record is only worth what the family knew at the time. The policy is shown to the parent when the item is assigned, and they are asked to acknowledge it; the date and wording they saw are kept with the record.
Condition and value are fixed at handover and never change afterwards. If the item comes back damaged, that is what any charge is worked out against — not what the item is worth today.
Only the school administration may put a figure on damage. A class teacher reports what they see; the amount, and whether to charge at all, is an administrative decision.
A damage charge is added to the learner's bill through Additional Fees, so it appears on their statement and carries forward as arrears until it is paid or written off.
Find it in the sidebar under Student Info → Furniture Use.
18.1 Assignments
Who is holding what, and what has been charged for damage — the record behind any furniture amount you see on a learner's bill.
How to use it
- Open Furniture Use → Assignments.
- Find the learner or the item you are querying.
- Read the condition and value recorded on the day the item was handed over — every charge is worked out against that value, not against what the item is worth today.
- Where damage was charged, the amount, the reason and who entered it are shown on the record.
- Cross-check that amount against the learner's Internal Fees bill, where it appears as a fee and carries as arrears until it is paid.
Pricing damage is a decision reserved for the administration. You will not be offered a charge field here, and the system will refuse the action if you reach it another way.
If an amount looks wrong, take it back to the office rather than adjusting the bill. The record shows the condition and value at handover and who recorded them, which is what any correction has to be argued from.
A charge raised on a learner who has since left the school still stands and still shows on the debtors list. It is not written off by their leaving.
19. Student Pick-up
Controlled collection at the gate: who is authorised to take a child, when they were collected, and what a late collection costs.
The kiosk is restricted to staff on the pick-up rota for the current week. That is what keeps the record trustworthy.
Find it in the sidebar under Student Info → Student Pick-up.
19.1 Late Pick-up Fees
Charges for collections after the agreed time, raised from the gate record rather than from memory.

How to use it
- Open Student Pick-up → Late Pick-up Fees.
- Set the cut-off time and the charge.
- Review the late collections listed for the period.
- Raise the charges — they appear on the family's account.
20. Team
The directories — how to look up a colleague or a learner without going through a module.
Find it in the sidebar under Team.
20.1 Staff Directory
Every member of staff, searchable, with the contact details your role is allowed to see.
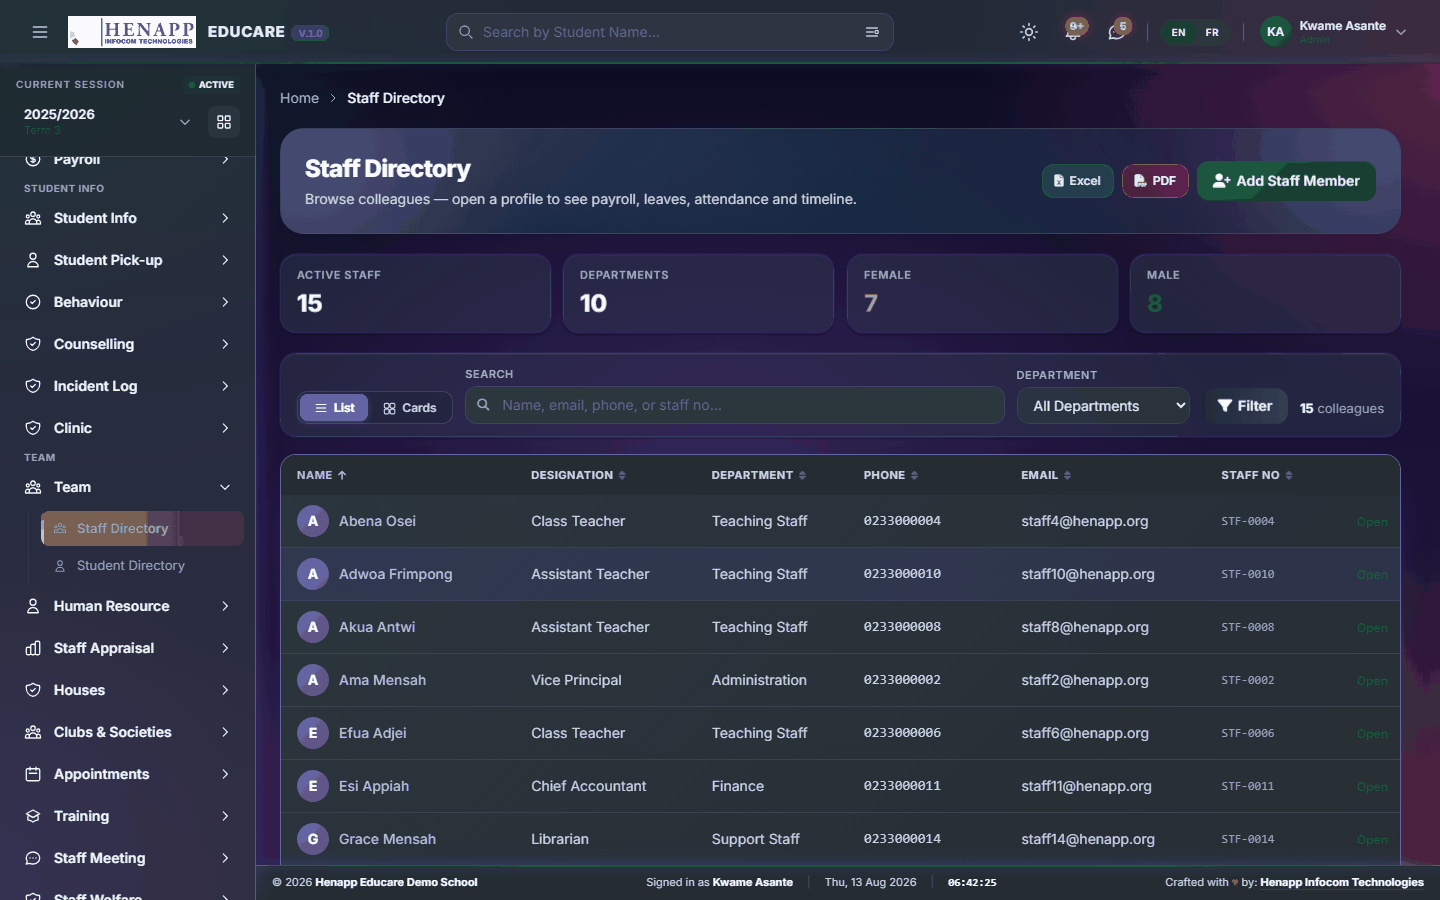
How to use it
- Open Team → Staff Directory.
- Search by name, or filter by department or role.
- Click a colleague to see their details.
- Export the directory where your role permits it.
20.2 Student Directory
Learners you are entitled to look up — the classes you teach, or your own children.

How to use it
- Open Team → Student Directory.
- Search by name or admission number.
- Click a learner for their details.
A teacher sees the classes they teach; a parent sees their own children. The directory is scoped to your role, not to the whole school.
21. Human Resource
Staff records end to end: employment details, teacher registration, recruitment from vacancy to decision, and ID cards.
Find it in the sidebar under Team → Human Resource.
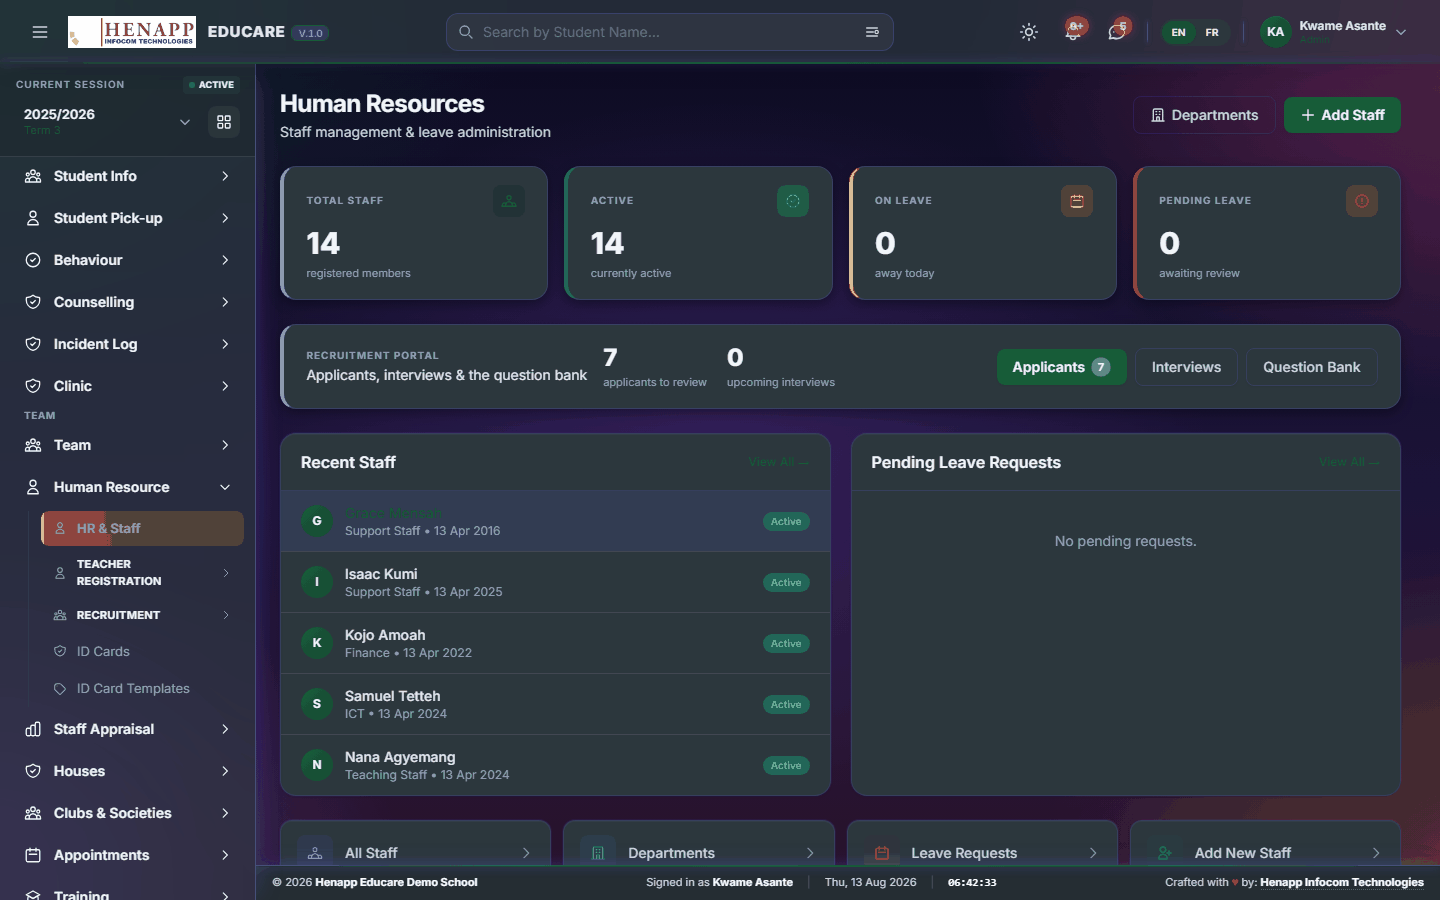
21.1 HR & Staff
The staff register — add a member of staff, set their role, and maintain their employment record.
How to use it
- Open Human Resource → HR & Staff.
- Click Add Staff and enter their full name, email (this becomes their login), phone and date of joining.
- Choose their role from the dropdown. A member of staff can hold more than one.
- Upload a photo and save. Where email is configured, their login is sent to them automatically.
- Open an existing record to edit details or change a role.
- Use Bulk Import to load many staff at once from the template.
The role you choose here determines what that person can see and do across the whole system. Give the narrowest role that lets them do their job.
Superadmin is reserved for the developer and never appears in the dropdown. The form refuses to grant it or to remove it from someone who holds it.
21.2 Teacher Registration
Teachers registering themselves through a link, instead of the office keying in every record.
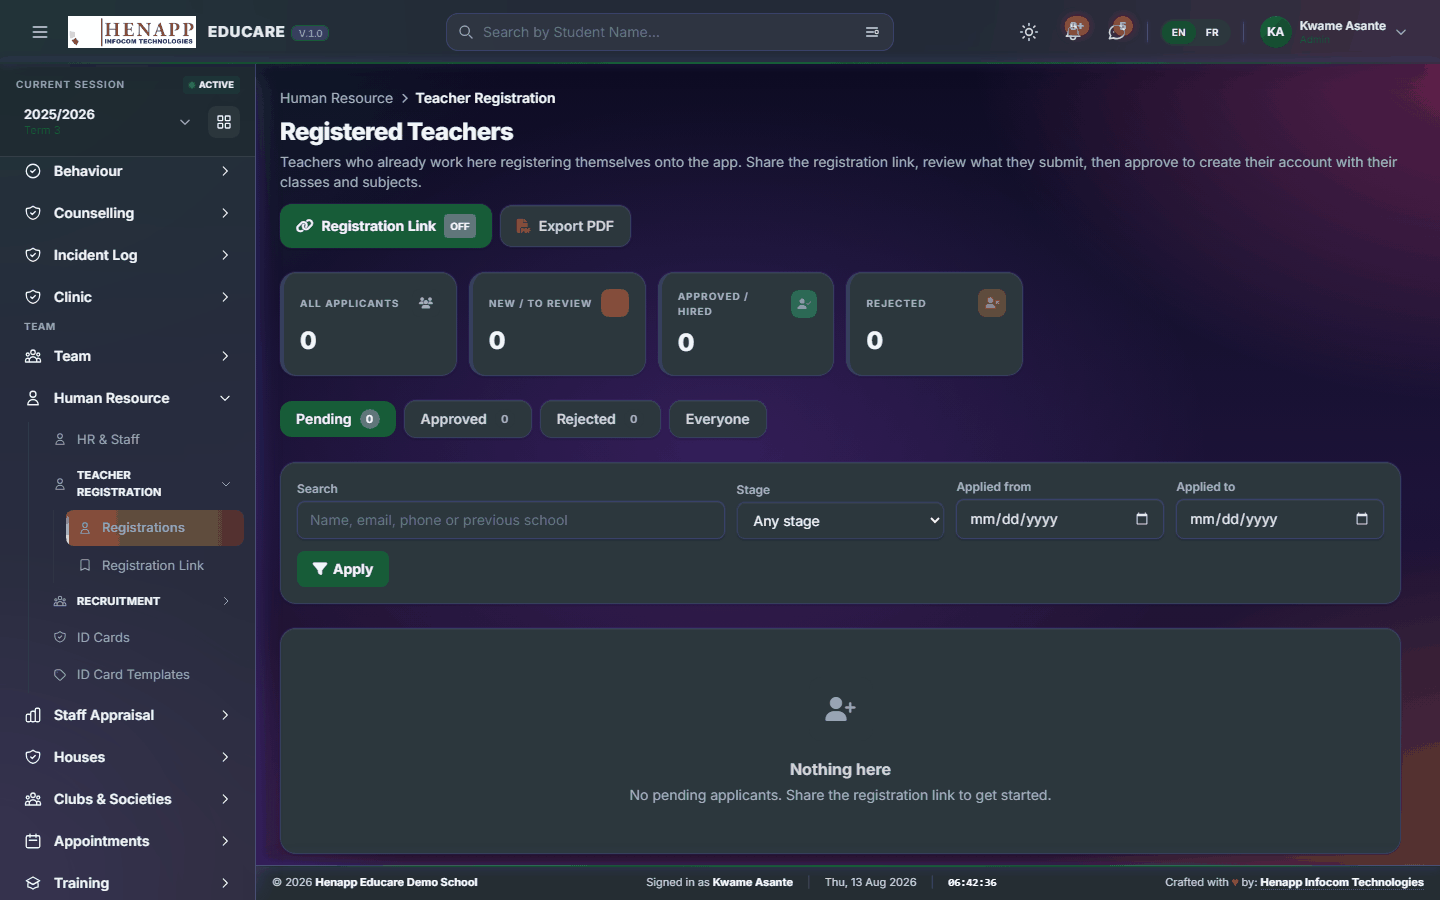
21.2 Registrations
Registrations submitted through the self-registration link, waiting to be checked and approved.
How to use it
- Open Human Resource → Teacher Registration → Registrations.
- Open a submission and check the details and documents.
- Approve it to create the staff record, or decline it with a reason.
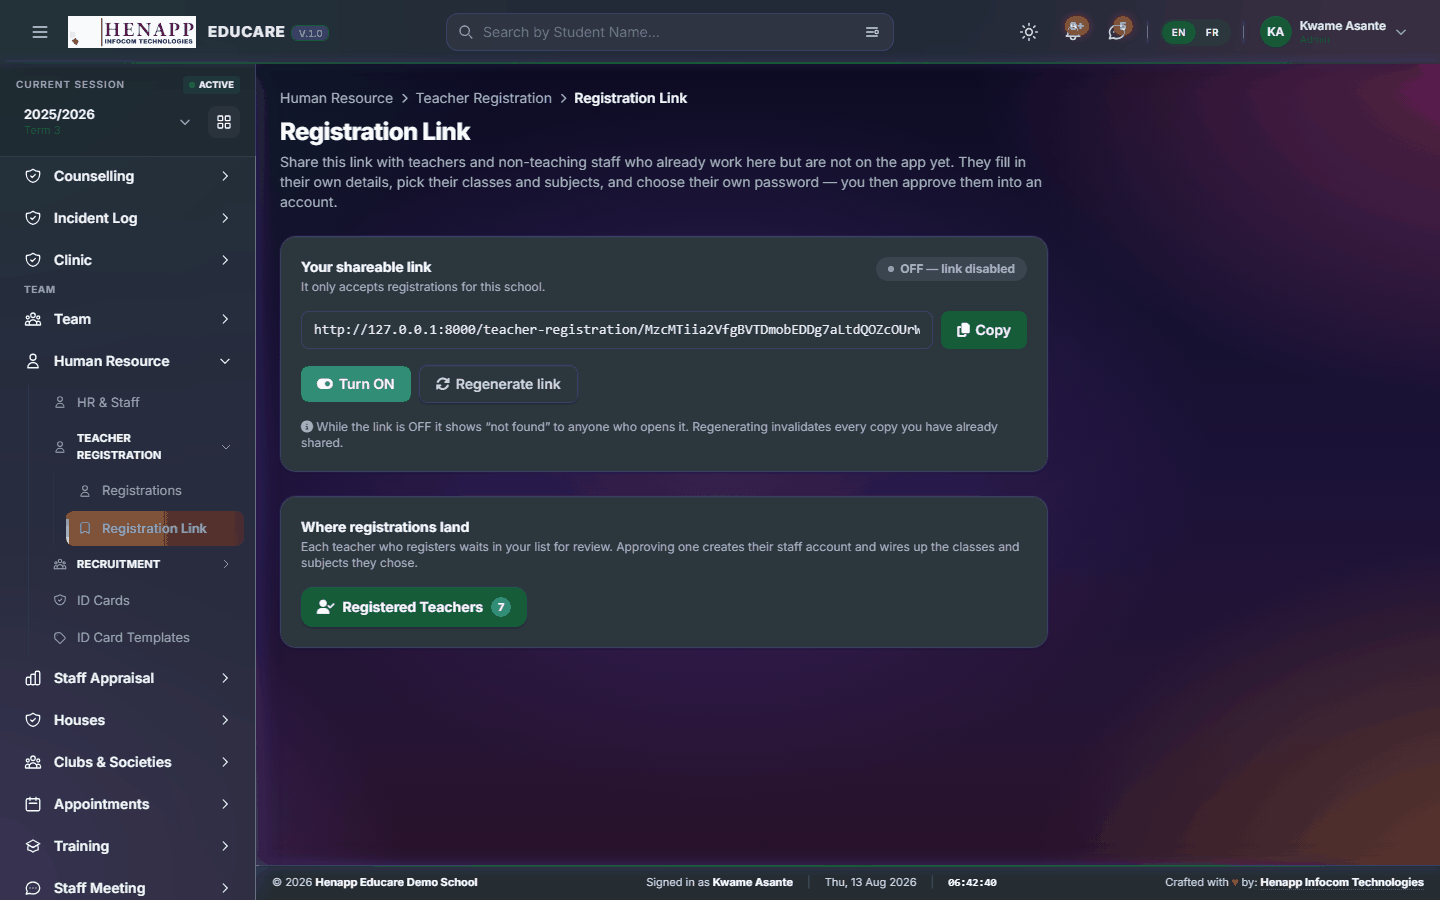
21.2 Registration Link
The link you send to teachers so they can register themselves.
How to use it
- Open Human Resource → Teacher Registration → Registration Link.
- Copy the link and send it to the teachers concerned.
- Regenerate it if it has been shared too widely — the old link then stops working.
Where the link is protected, send the link in one message and the password in another. Both in one message defeats the point of protecting it.
21.3 Recruitment
Hiring from advertised vacancy through to a recorded decision.
21.3 Vacancies
The posts you are advertising, which appear on the school website's careers page.

How to use it
- Open Human Resource → Recruitment → Vacancies.
- Click New Vacancy and enter the title, description, requirements and closing date.
- Publish it — it appears under Join Us on the website.
- Close it when the deadline passes.
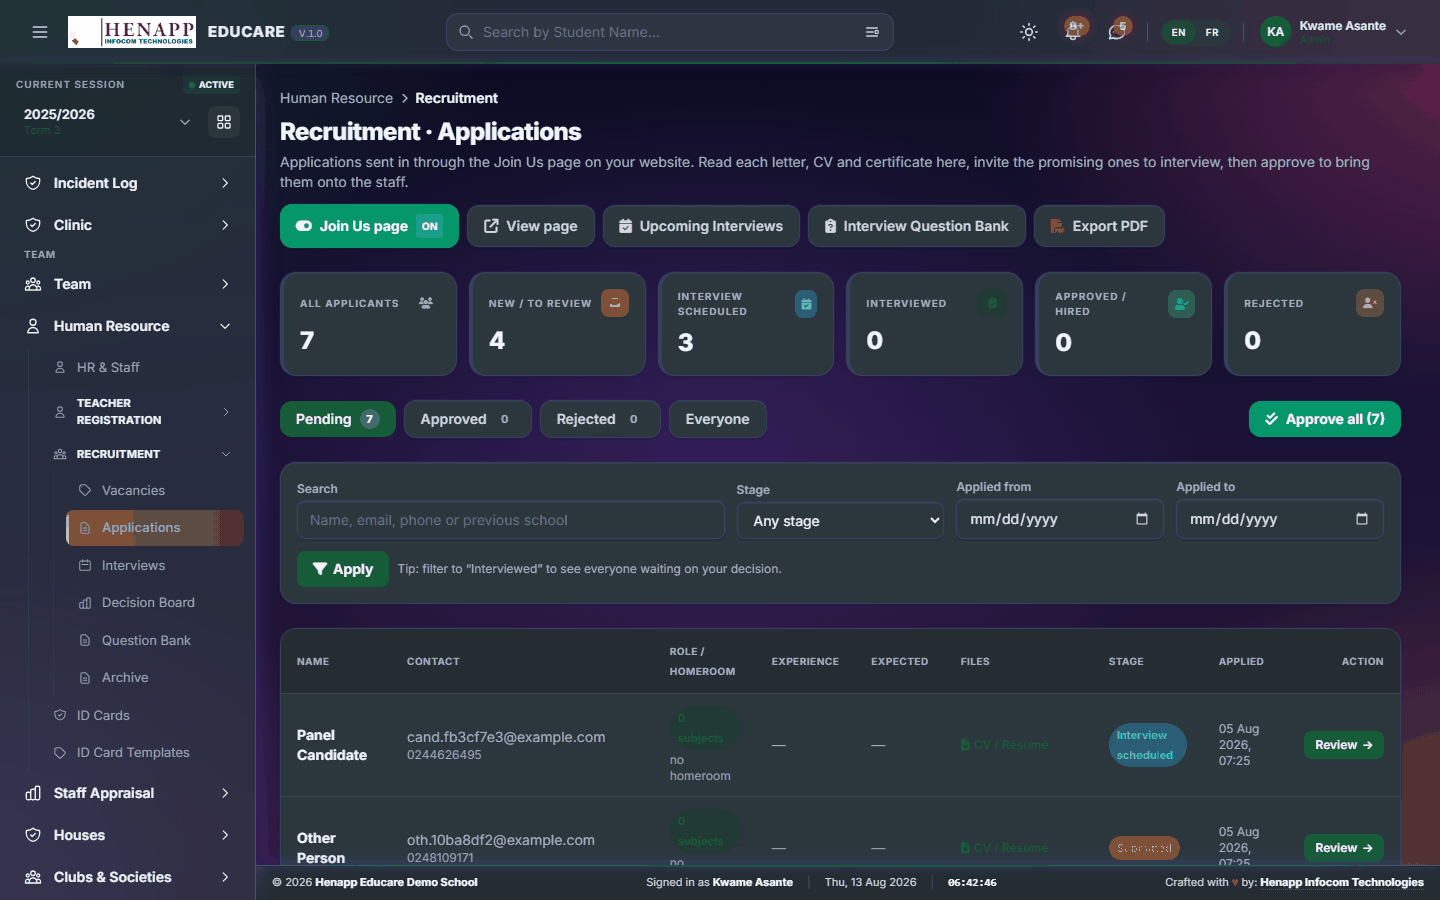
21.3 Applications
Applications received against each vacancy.
How to use it
- Open Human Resource → Recruitment → Applications.
- Filter by vacancy.
- Open an application to read it and its attachments.
- Shortlist it for interview, or decline it.
- Download the application as a PDF for a panel pack.
21.3 Interviews
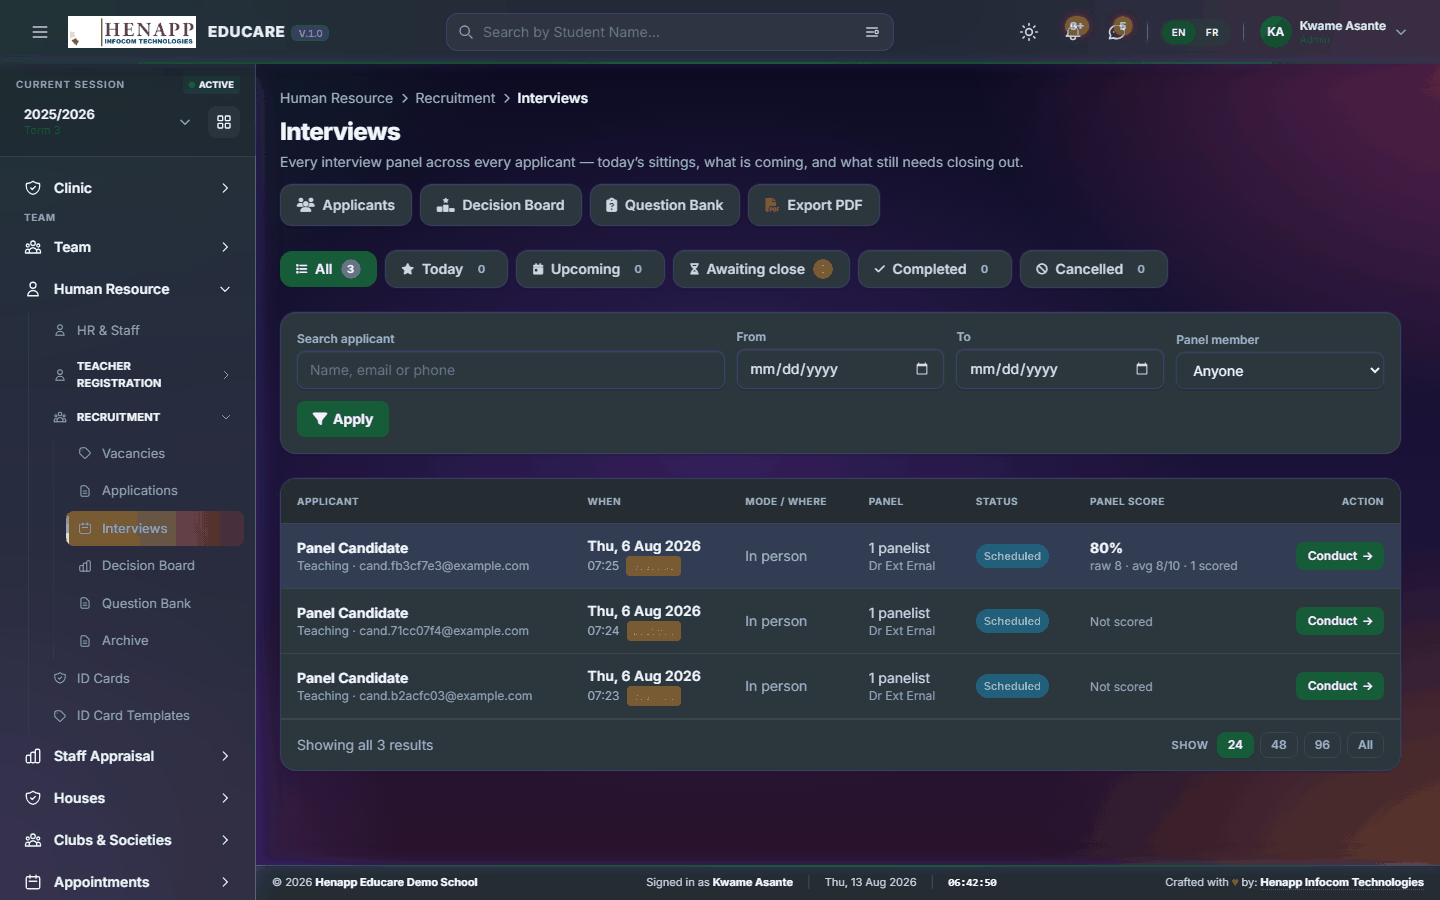
Interviews scheduled, and the panel scoring against each.
How to use it
- Open Human Resource → Recruitment → Interviews.
- Schedule an interview for a shortlisted candidate — date, time and panel.
- Each panel member scores the candidate against the agreed criteria.
- Scores are combined once everyone has submitted.
21.3 Decision Board
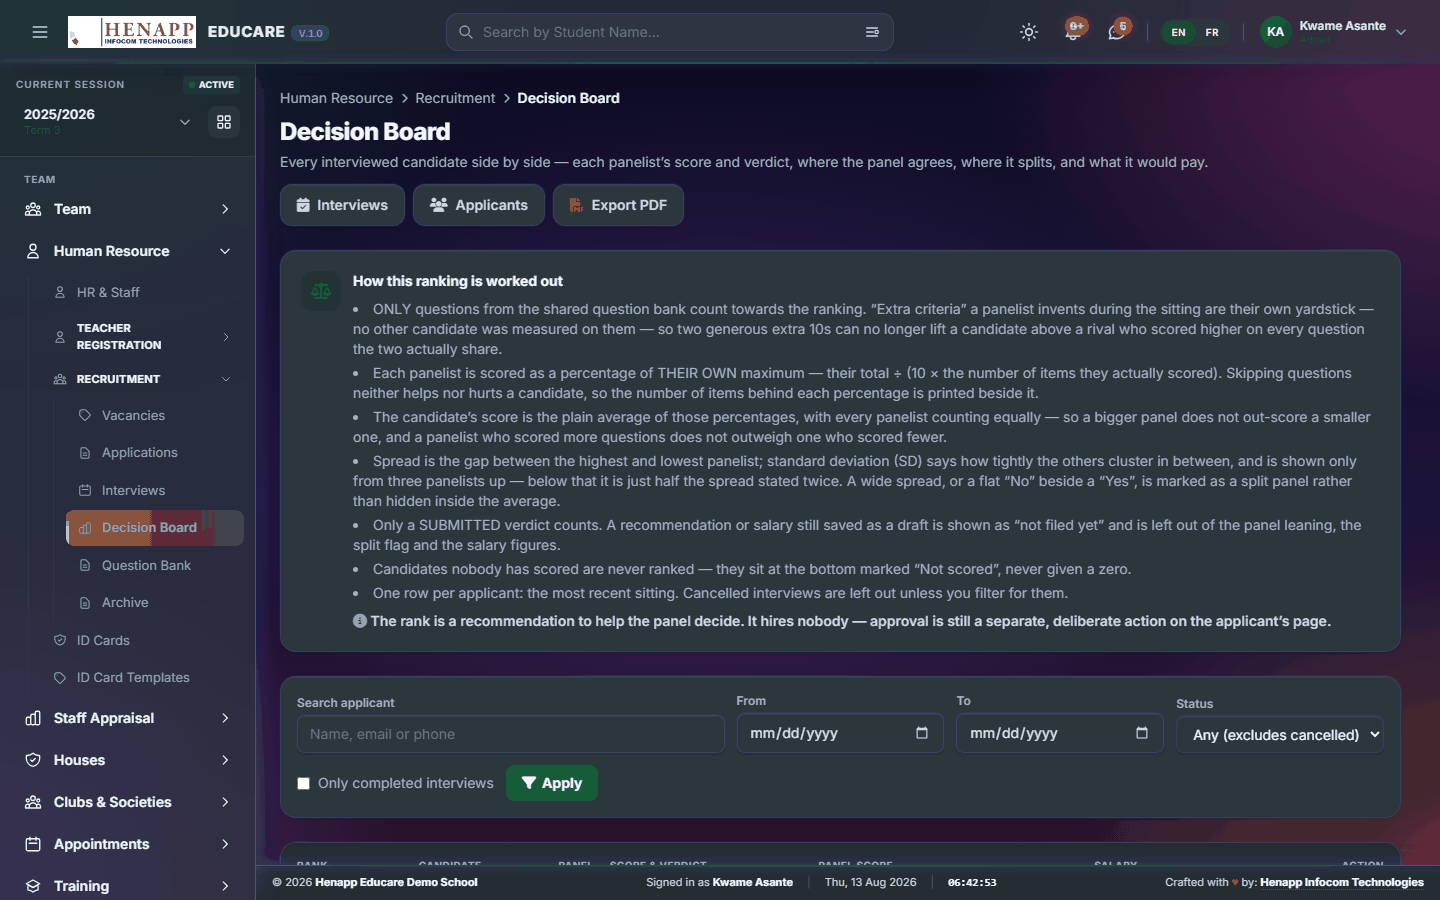
Candidates side by side with their panel scores, for the appointment decision.
How to use it
- Open Human Resource → Recruitment → Decision Board.
- Compare candidates on their combined scores.
- Record the decision against the candidate appointed.
A panel member cannot see anyone else's scoring until their own is in. That is deliberate — it stops the first score anchoring the rest.
21.3 Question Bank
The bank of interview questions and criteria panels score against.

How to use it
- Open Human Resource → Recruitment → Question Bank.
- Add questions and group them by role or competency.
- Save. Panels draw from this when scheduling an interview.
21.3 Archive
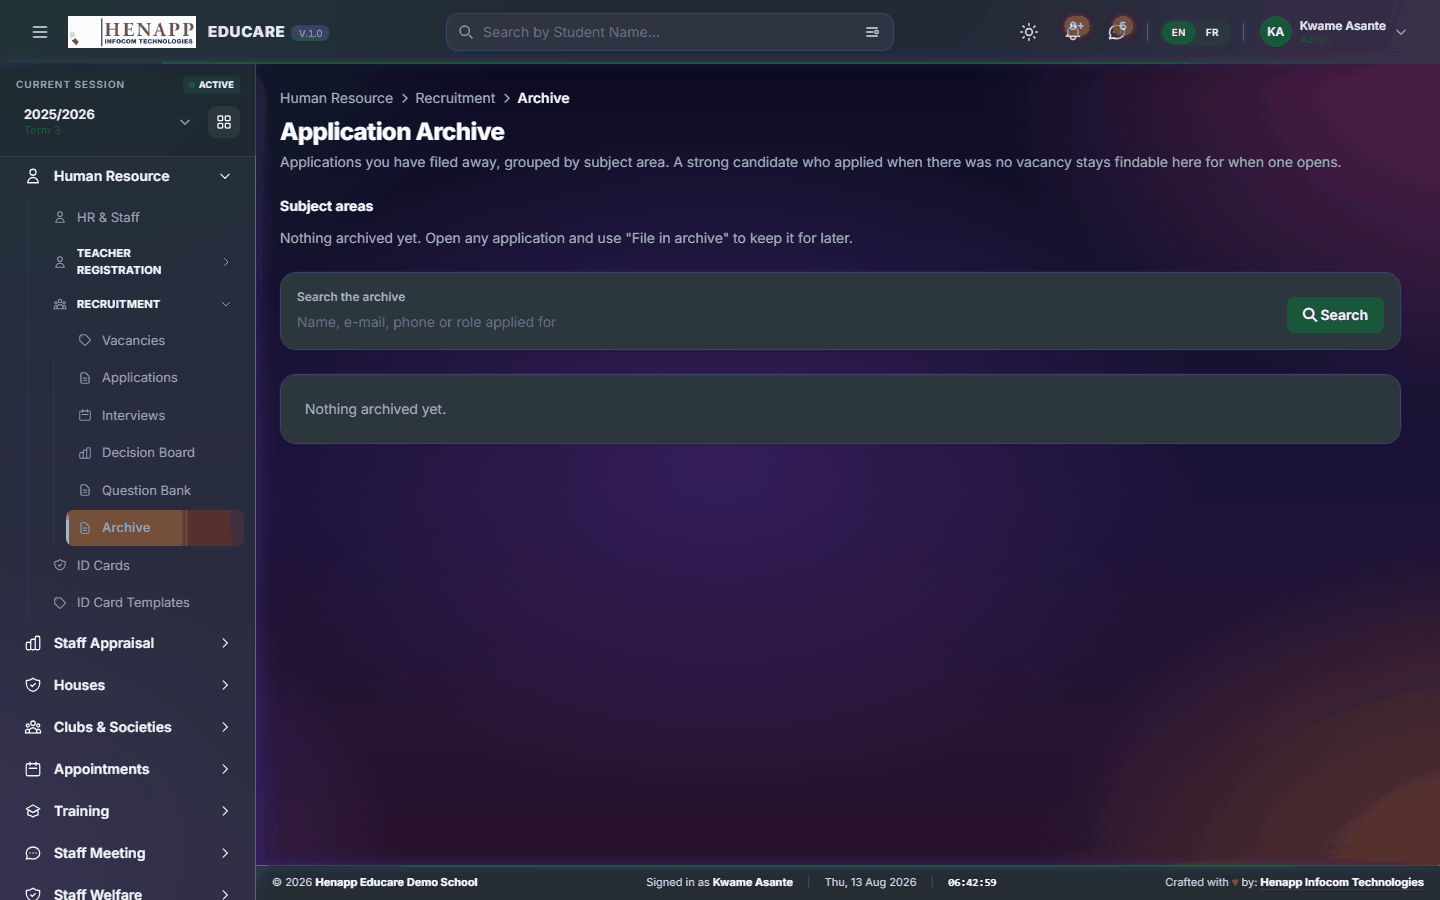
Closed vacancies and their applications, kept for the record.
How to use it
- Open Human Resource → Recruitment → Archive.
- Filter by vacancy or year to retrieve a past exercise.
21.4 ID Cards
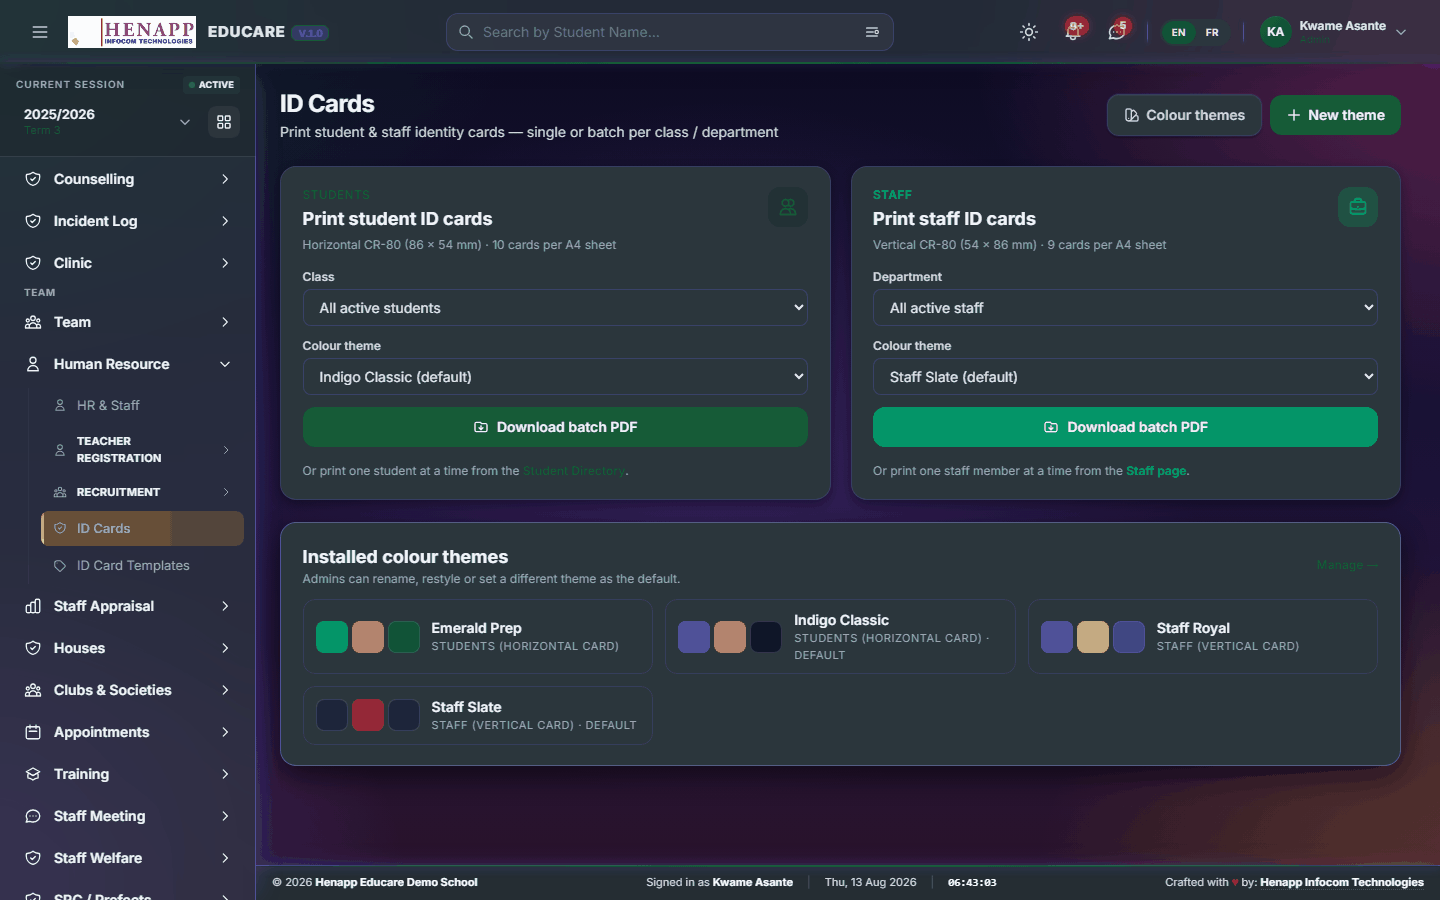
Printable ID cards for learners and staff, generated from their records and photographs.
How to use it
- Open Human Resource → ID Cards.
- Choose the template, then the class or the staff group.
- Preview the cards and check the photographs have come through.
- Generate the PDF and print it.
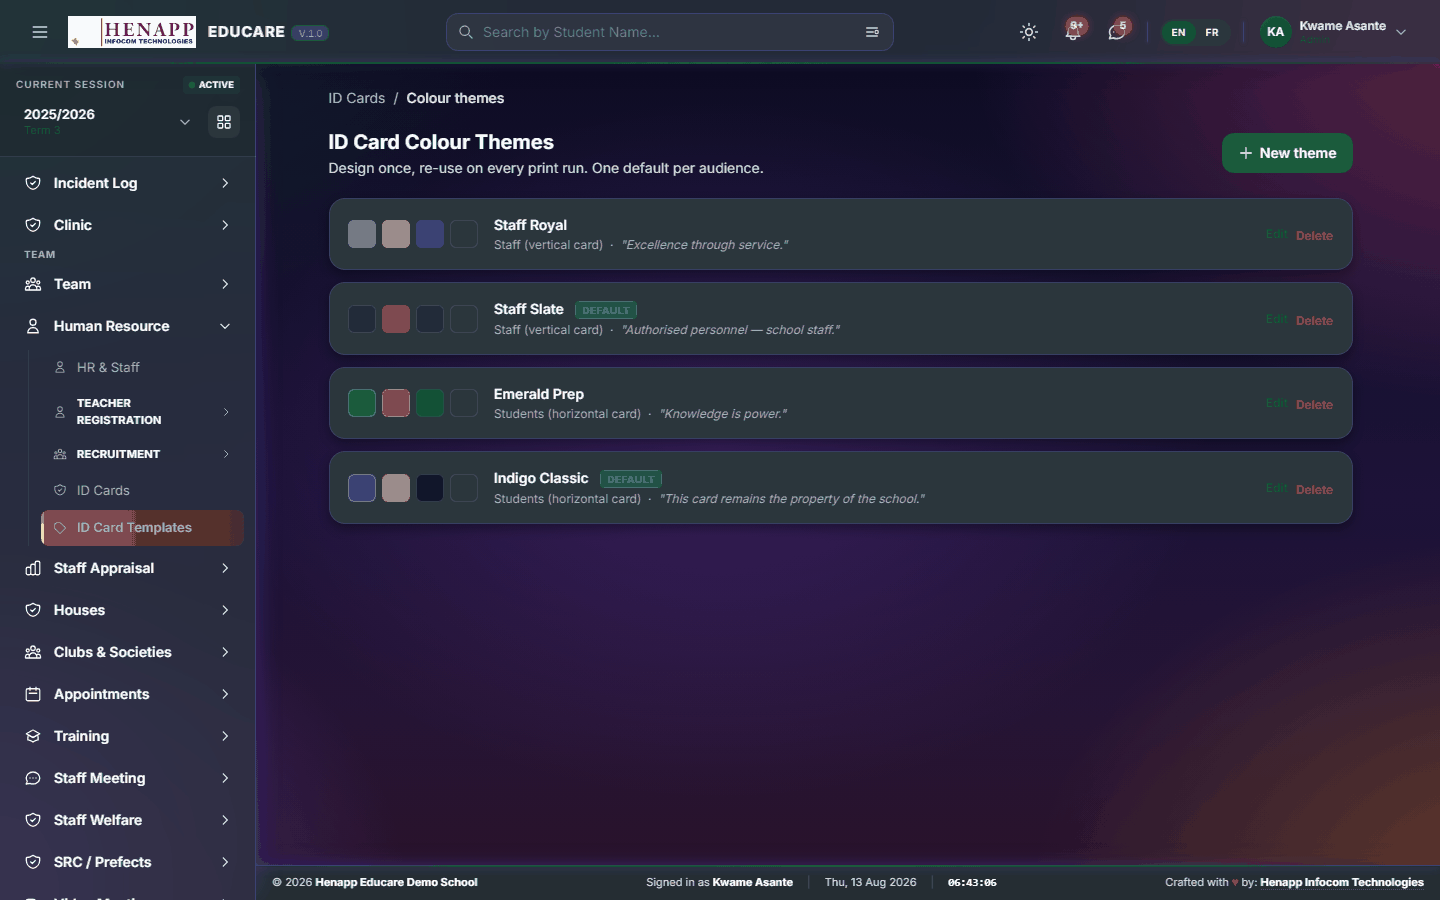
21.5 ID Card Templates
The card designs — layout, colours, logo, and which fields print.
How to use it
- Open Human Resource → ID Card Templates.
- Create or edit a template.
- Set the size, background, logo and the fields that appear.
- Save, then preview a card before printing a batch.
22. Houses
School houses: the houses themselves, which learner belongs to which, and the house leadership.
Find it in the sidebar under Team → Houses.
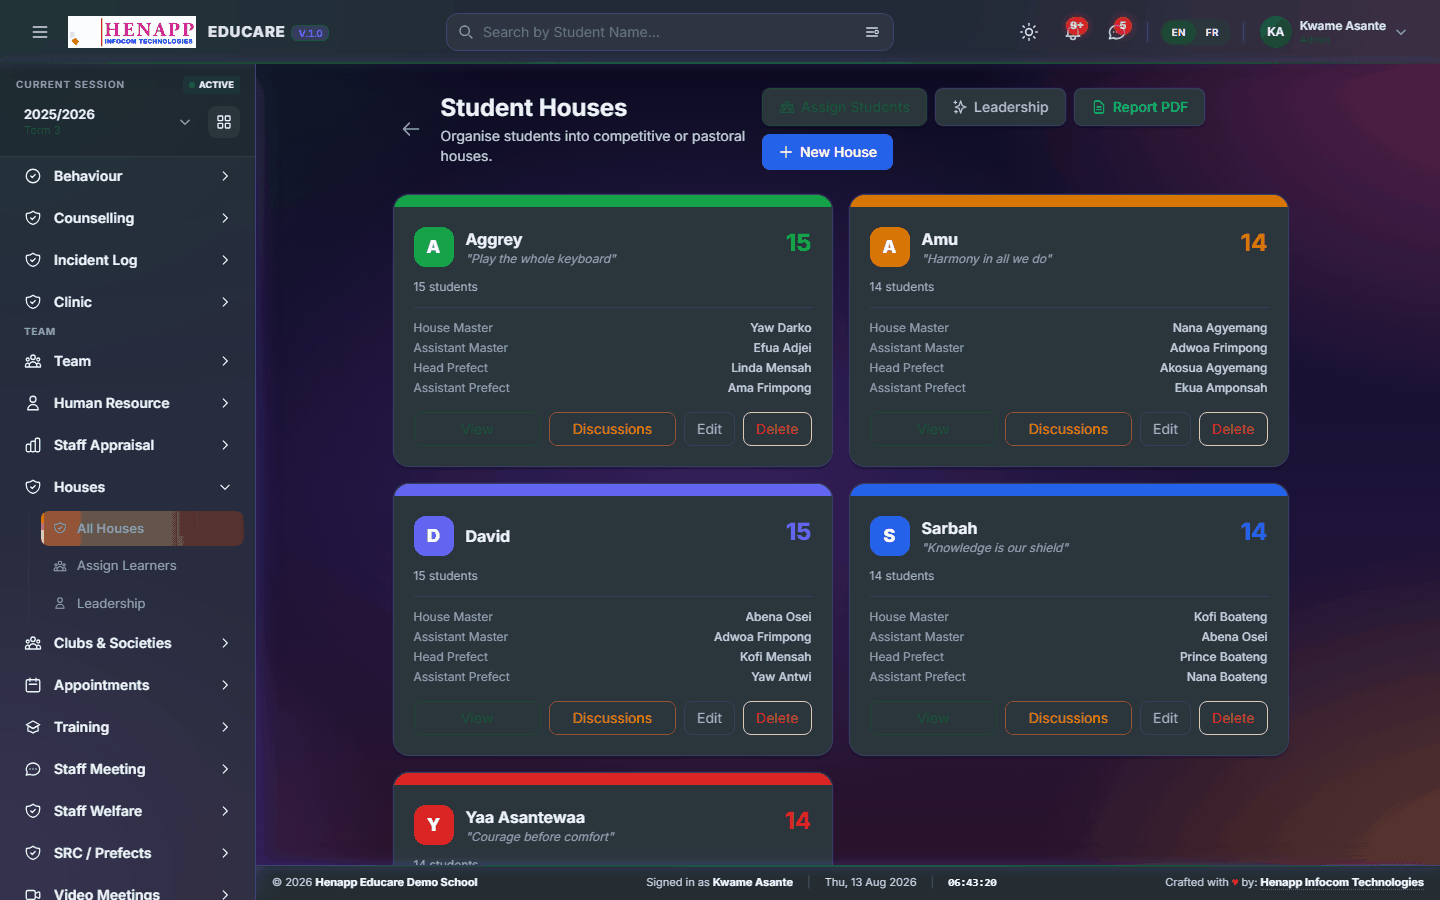
22.1 All Houses
The school houses, with their names, colours and mottos.
How to use it
- Open Houses → All Houses.
- Click Add House, set its name, colour and motto, then save.
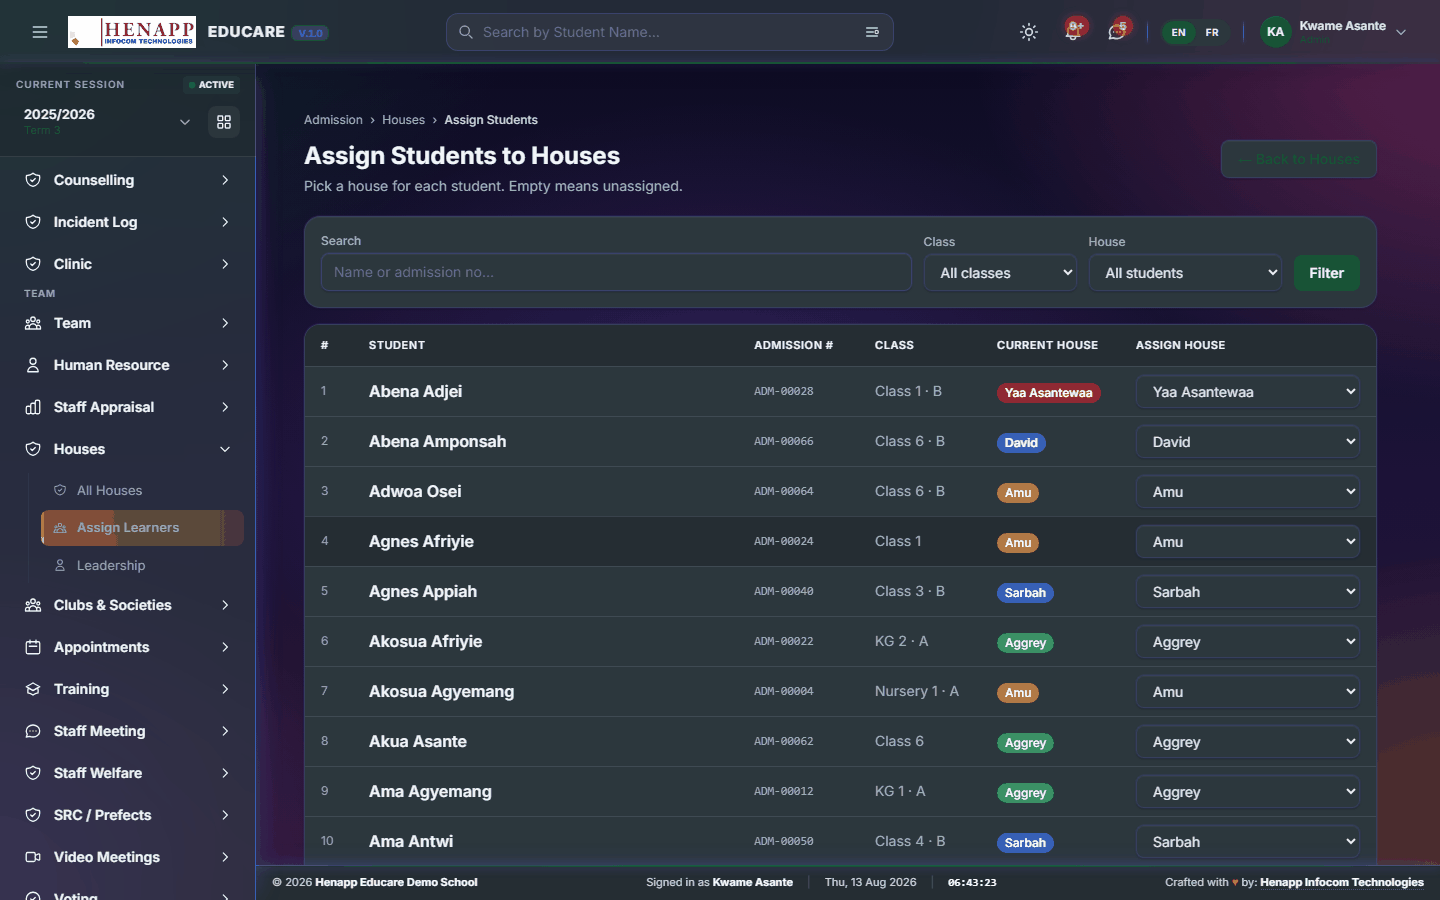
22.2 Assign Learners
Placing learners in houses, individually or a class at a time.
How to use it
- Open Houses → Assign Learners.
- Choose the class.
- Assign each learner to a house, or distribute the class evenly in one action.
- Save.
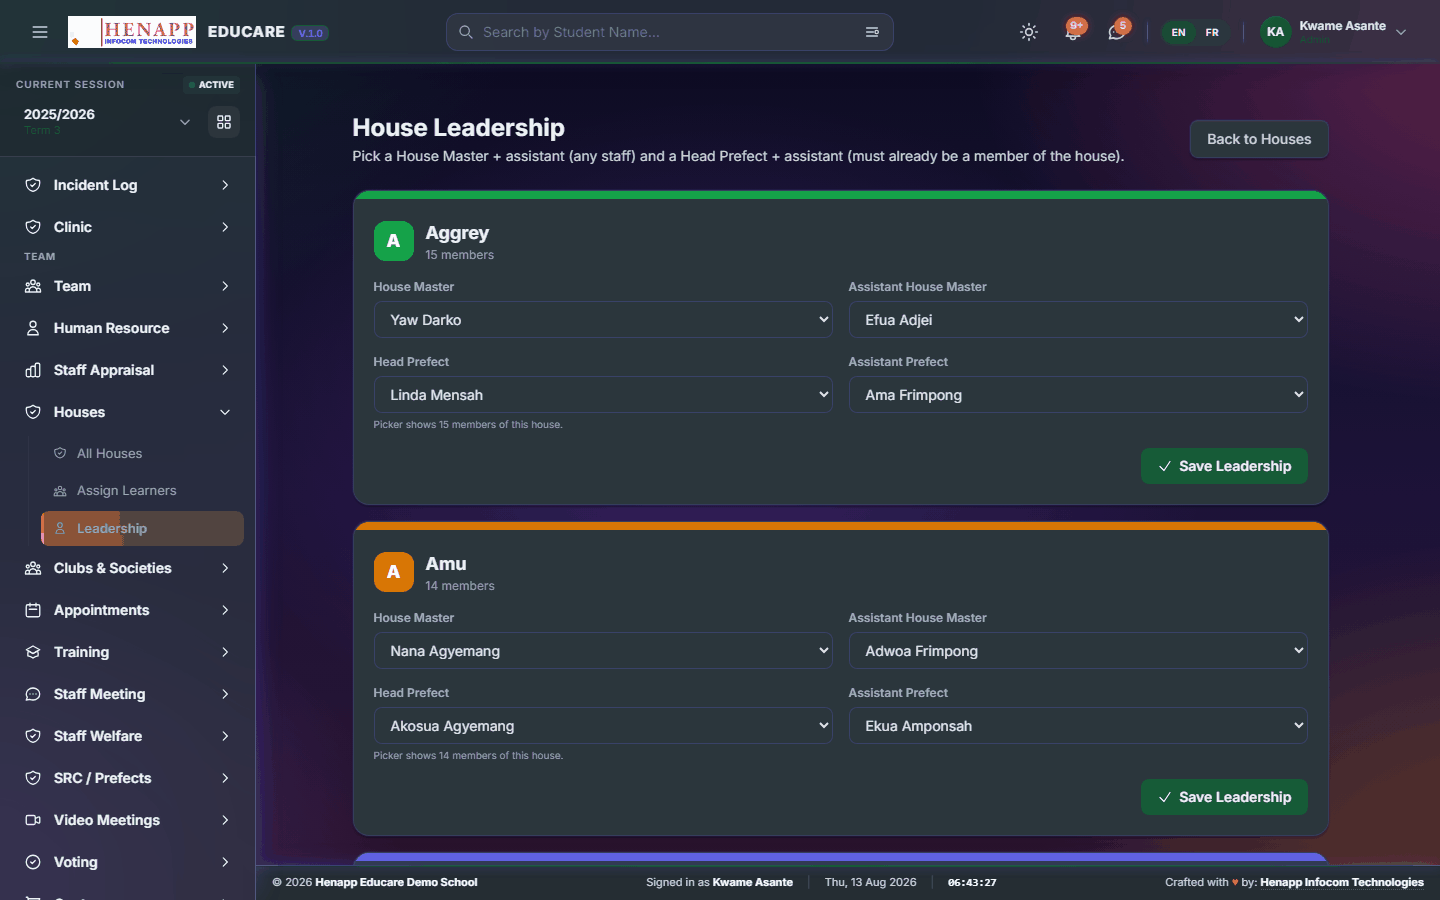
22.3 Leadership
House captains and their staff patrons.
How to use it
- Open Houses → Leadership.
- Pick the house and appoint its captain, vice-captain and patron.
- Save.
23. Clubs & Societies
Clubs and societies, and who belongs to each.
Find it in the sidebar under Team → Clubs & Societies.
23.1 All Clubs
The clubs and societies the school runs, with their patrons and meeting times.

How to use it
- Open Clubs & Societies → All Clubs.
- Click Add Club and set its name, patron, meeting day and description.
- Save.
23.2 Assign Members
Club membership.
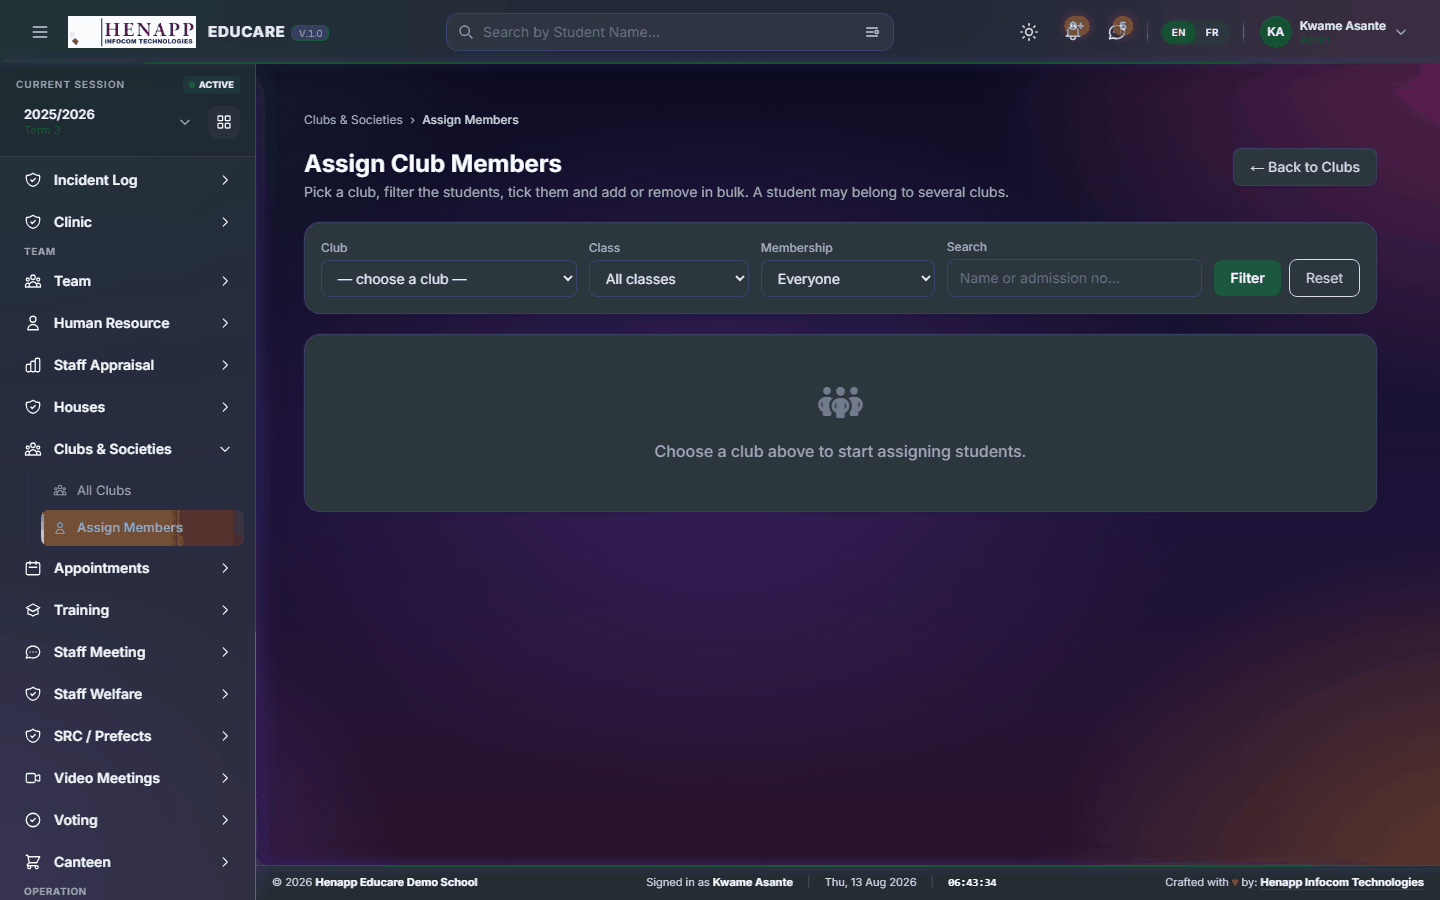
How to use it
- Open Clubs & Societies → Assign Members.
- Choose the club, then add learners to it.
- Save. The membership list can be exported for a register.
24. Training
Staff professional development — the programmes on offer, who has attended, and the certificates that follow.
Find it in the sidebar under Team → Training.
24.1 Browse Trainings
Training programmes on offer to staff.
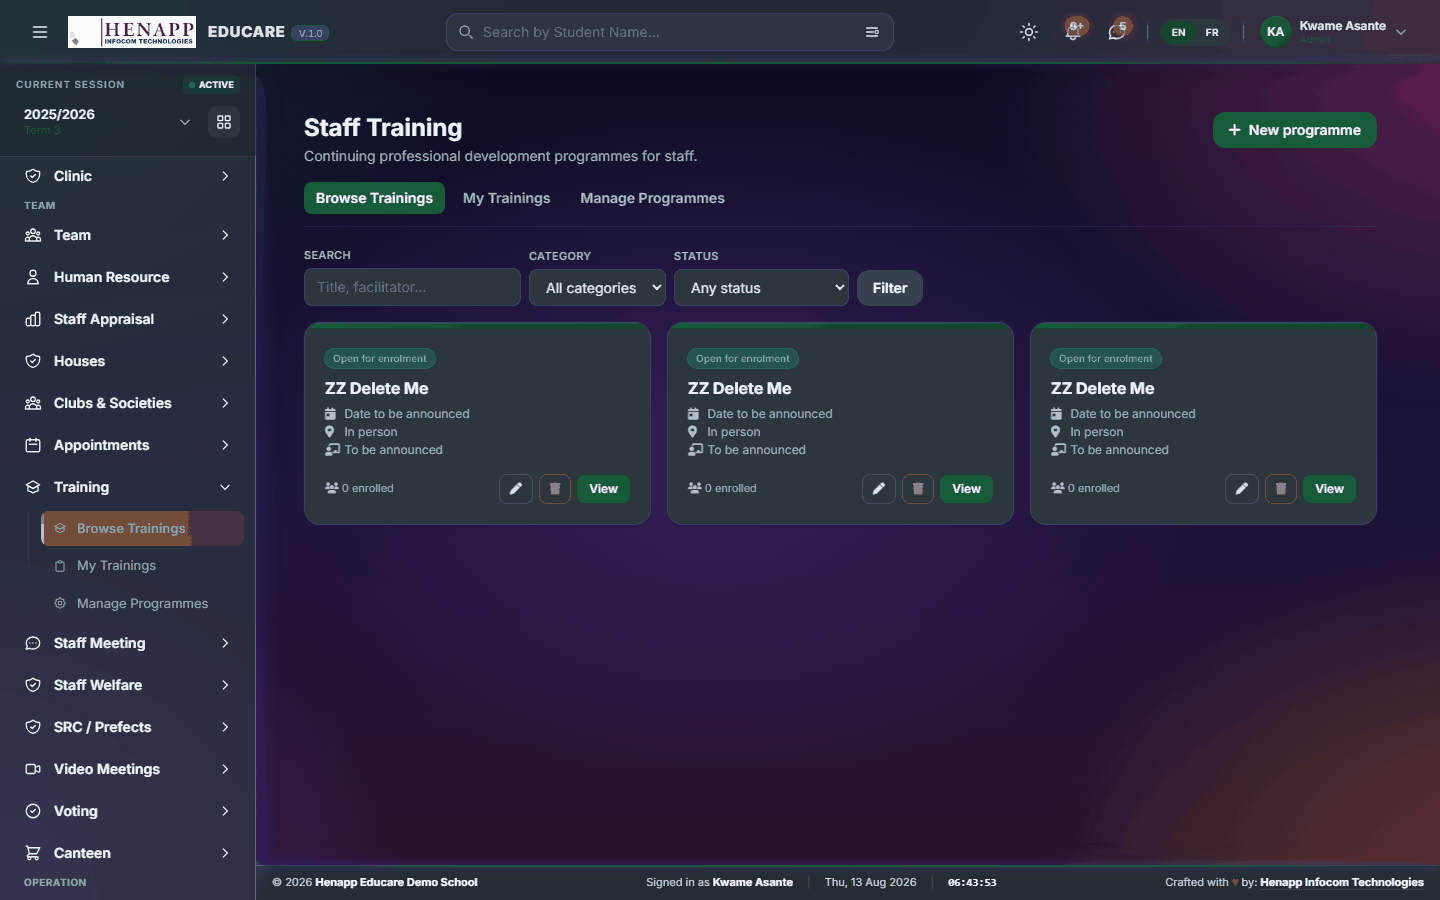
How to use it
- Open Training → Browse Trainings.
- Read what is available and its dates.
- Enrol on anything open to you.
24.2 My Trainings
Training you have enrolled on or completed, and the certificates earned.

How to use it
- Open Training → My Trainings.
- Read your enrolments and their status.
- Download the certificate for anything completed.
25. Staff Meeting
The staff noticeboard — announcements, minutes and documents circulated to the whole staff.
Find it in the sidebar under Team → Staff Meeting.
25.1 Staff Board
The staff noticeboard — announcements, minutes and circulated documents.
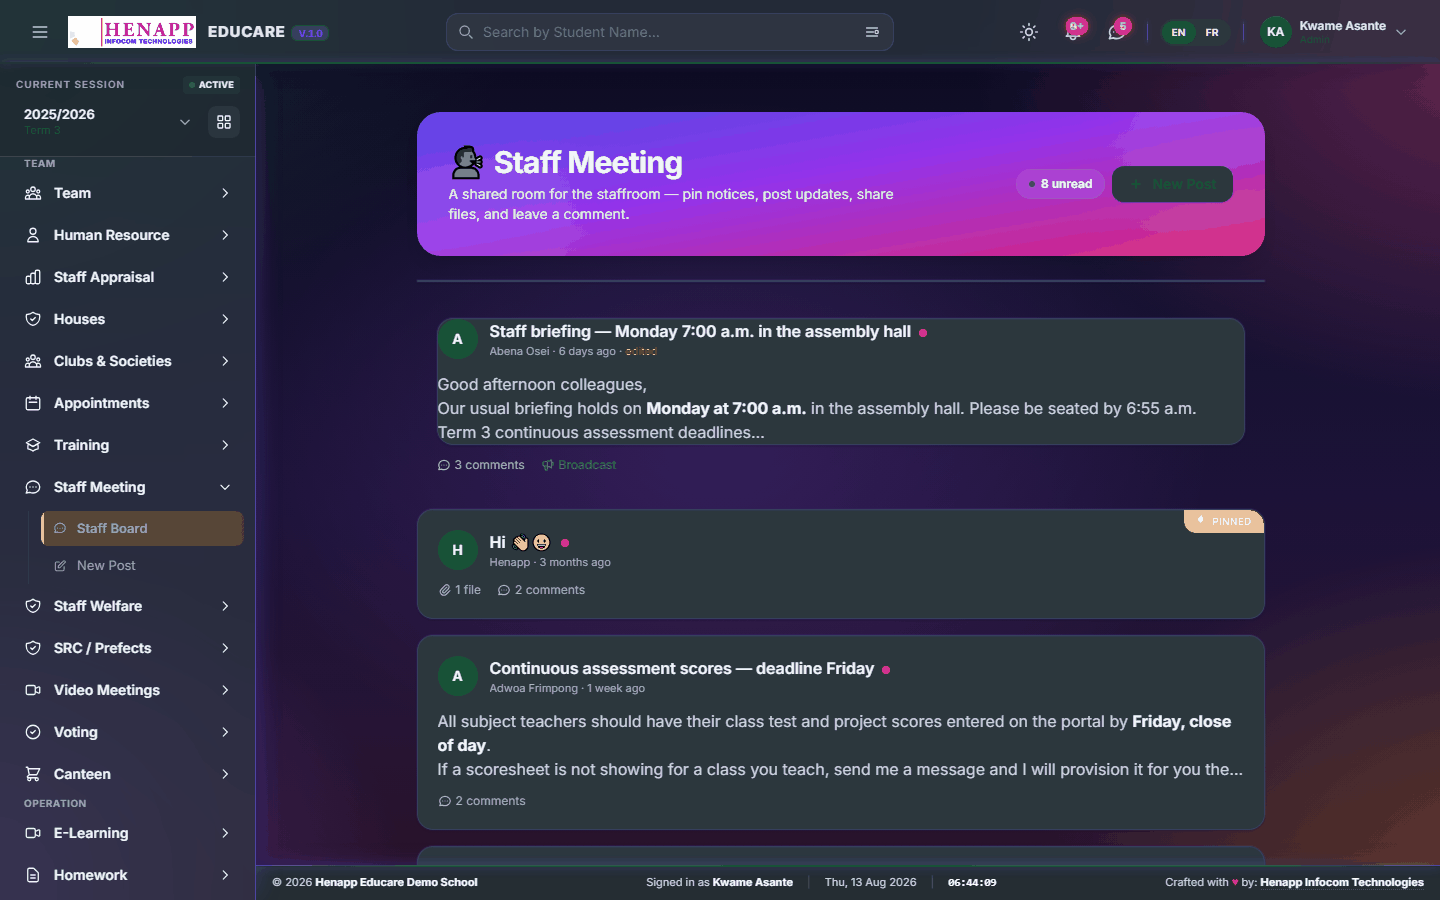
How to use it
- Open Staff Meeting → Staff Board.
- Read the posts, newest first.
- Open a post for its full text and attachments.
- Comment where discussion is invited.
25.2 New Post
Post to the staff board.

How to use it
- Open Staff Meeting → New Post.
- Give it a title and write the message.
- Attach any documents — minutes, an agenda, a circular.
- Choose who it goes to, then Publish. Staff are notified.
26. Staff Welfare
The staff welfare scheme — contributions, claims and the fund's position.
Find it in the sidebar under Team → Staff Welfare.
26.1 Staff Welfare
The staff welfare fund — contributions in, claims out, and the balance.
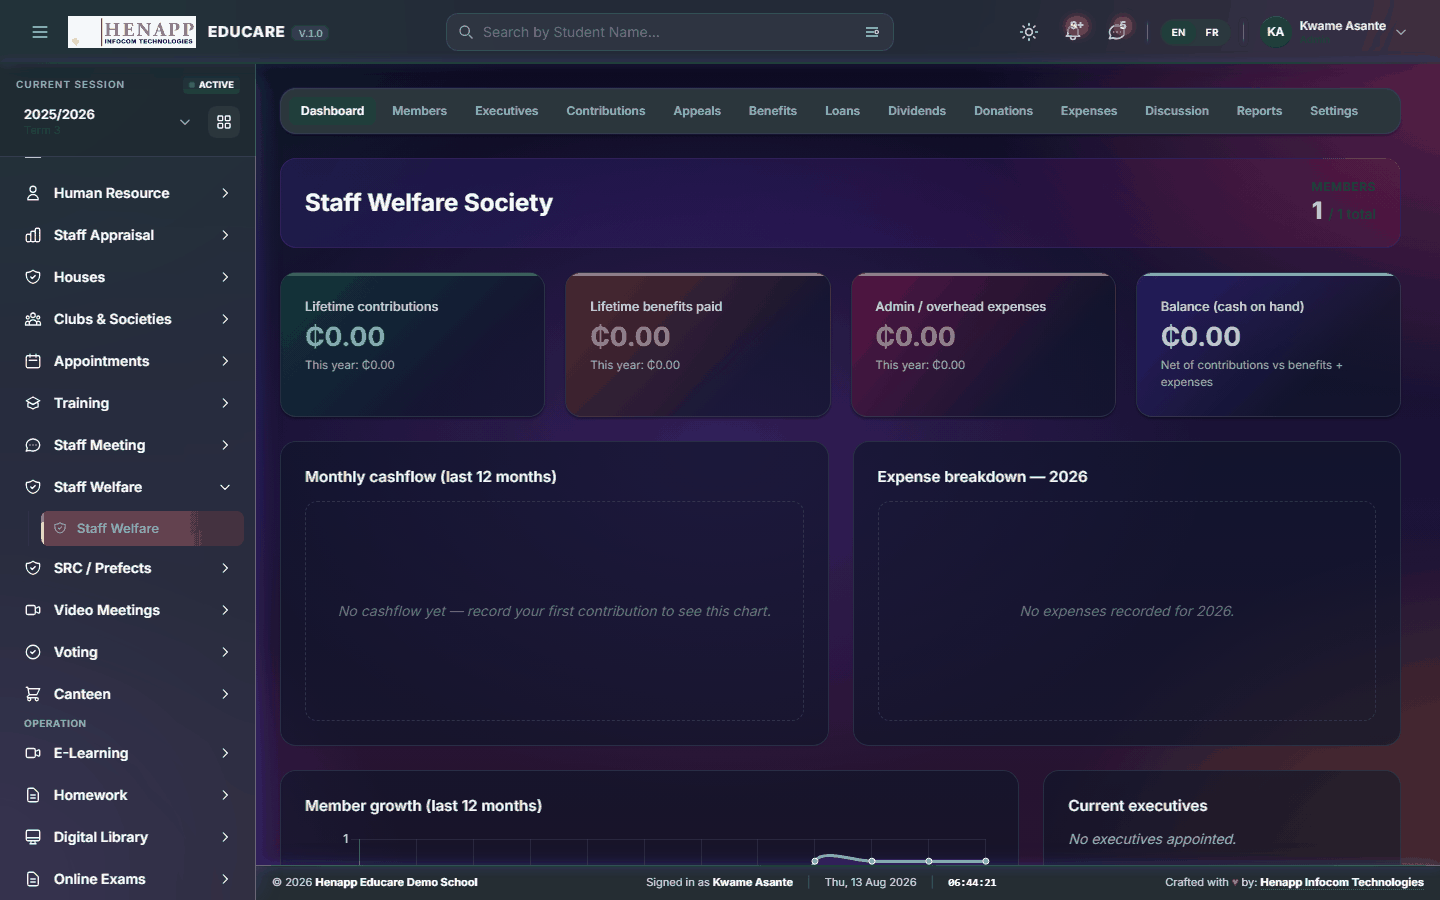
How to use it
- Open Staff Welfare.
- Read the fund position and your own contributions.
- Submit a claim with its reason and supporting documents.
- Administrators approve claims and record payments from the same page.
27. SRC / Prefects
Student leadership: prefect positions, the learners holding them, their forum and their elections.
Find it in the sidebar under Team → SRC / Prefects.
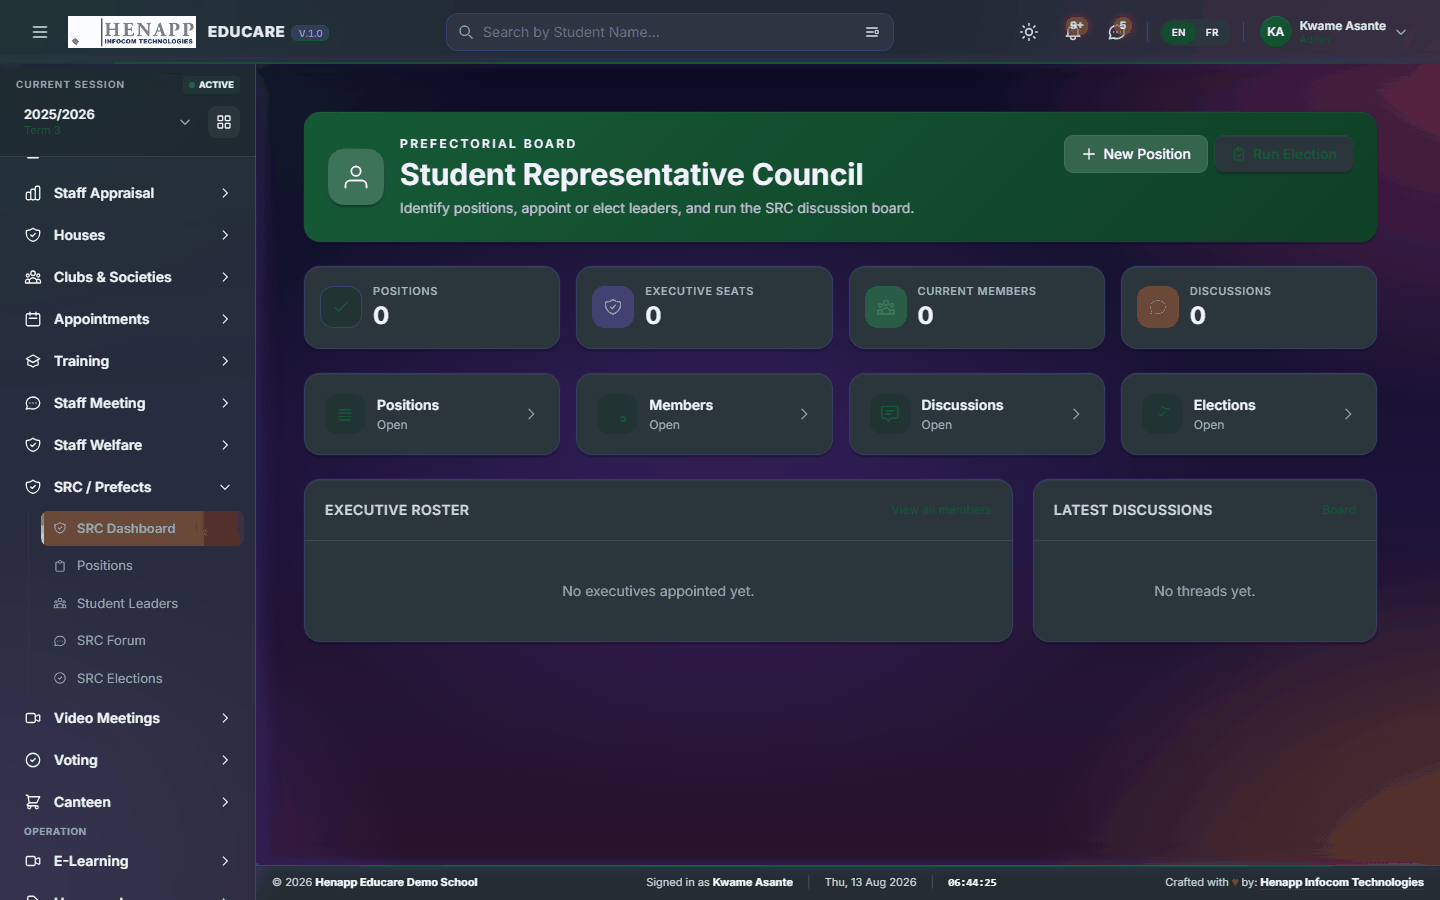
27.1 SRC Dashboard
Student leadership at a glance — positions filled and outstanding.
How to use it
- Open SRC / Prefects → SRC Dashboard.
- Read the current leadership and any vacancy.
27.2 Positions
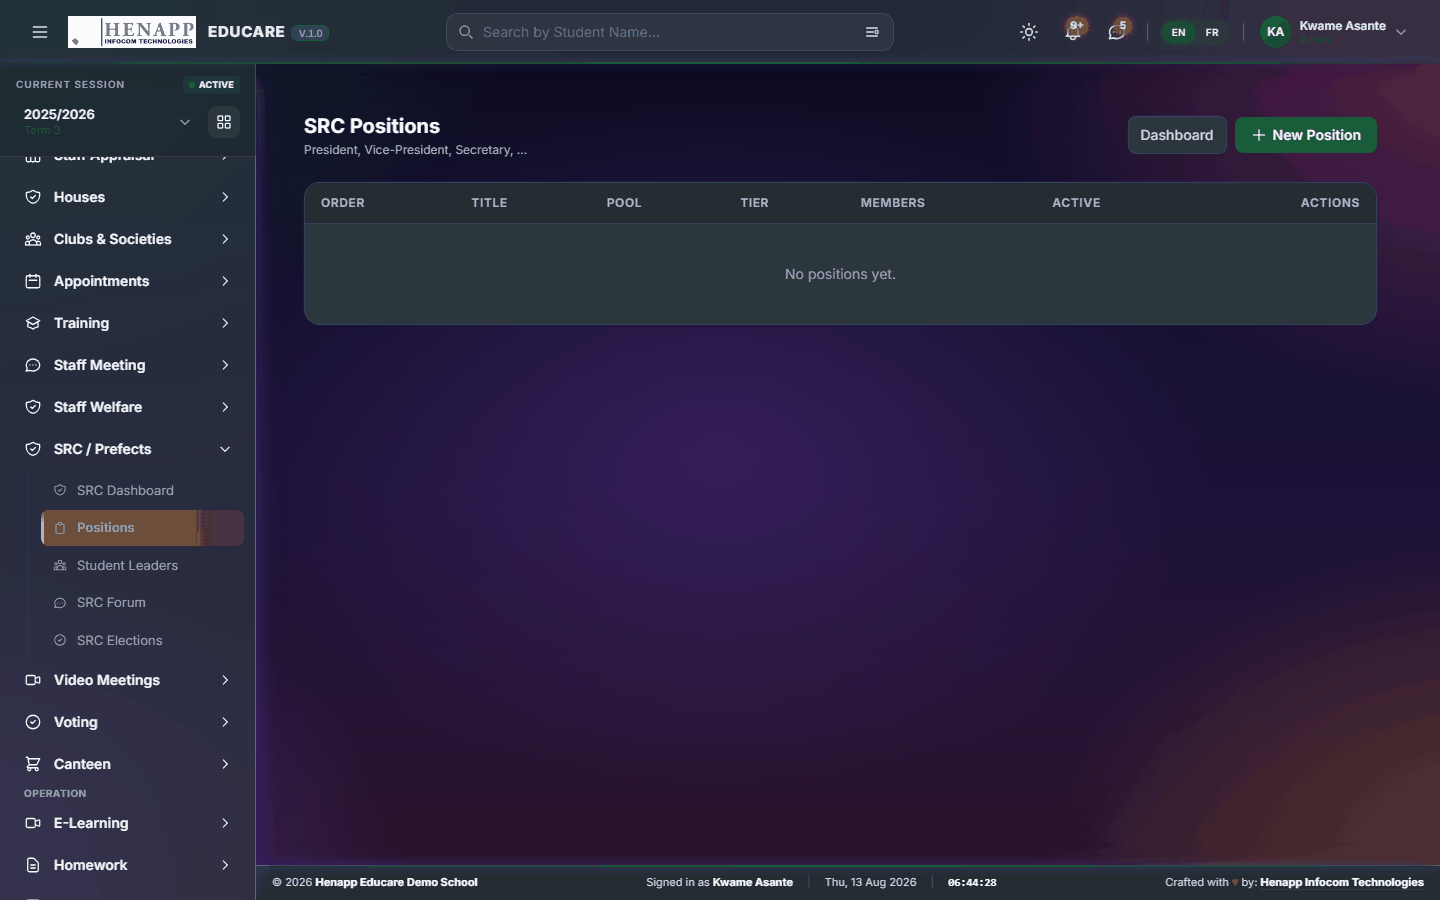
The leadership positions themselves and what each is responsible for.
How to use it
- Open SRC / Prefects → Positions.
- Add each position with its title and duties.
- Save.
27.3 Student Leaders
The learners holding each position.

How to use it
- Open SRC / Prefects → Student Leaders.
- Appoint a learner to a position and set the term of office.
- Save.
27.4 SRC Elections
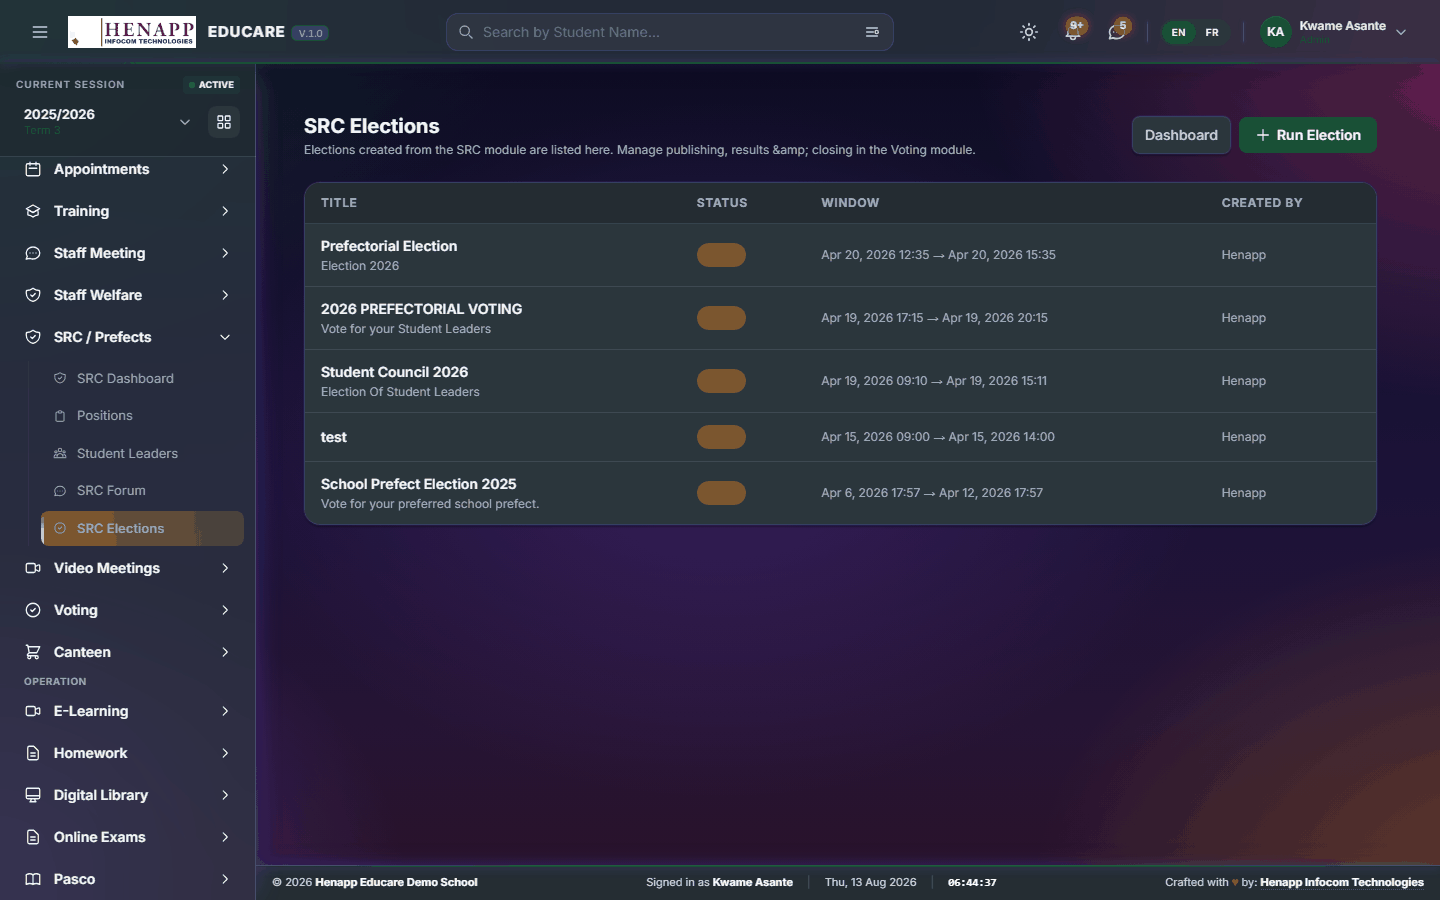
Elections for student leadership — candidates, voting and the result.
How to use it
- Open SRC / Prefects → SRC Elections.
- Create the election and set which positions are contested.
- Add the candidates for each position.
- Set who may vote and when voting opens and closes.
- Publish the result when voting closes.
28. Video Meetings
Video meetings scheduled and joined from inside the portal.
Find it in the sidebar under Team → Video Meetings.
28.1 Meetings (Meet/Zoom)
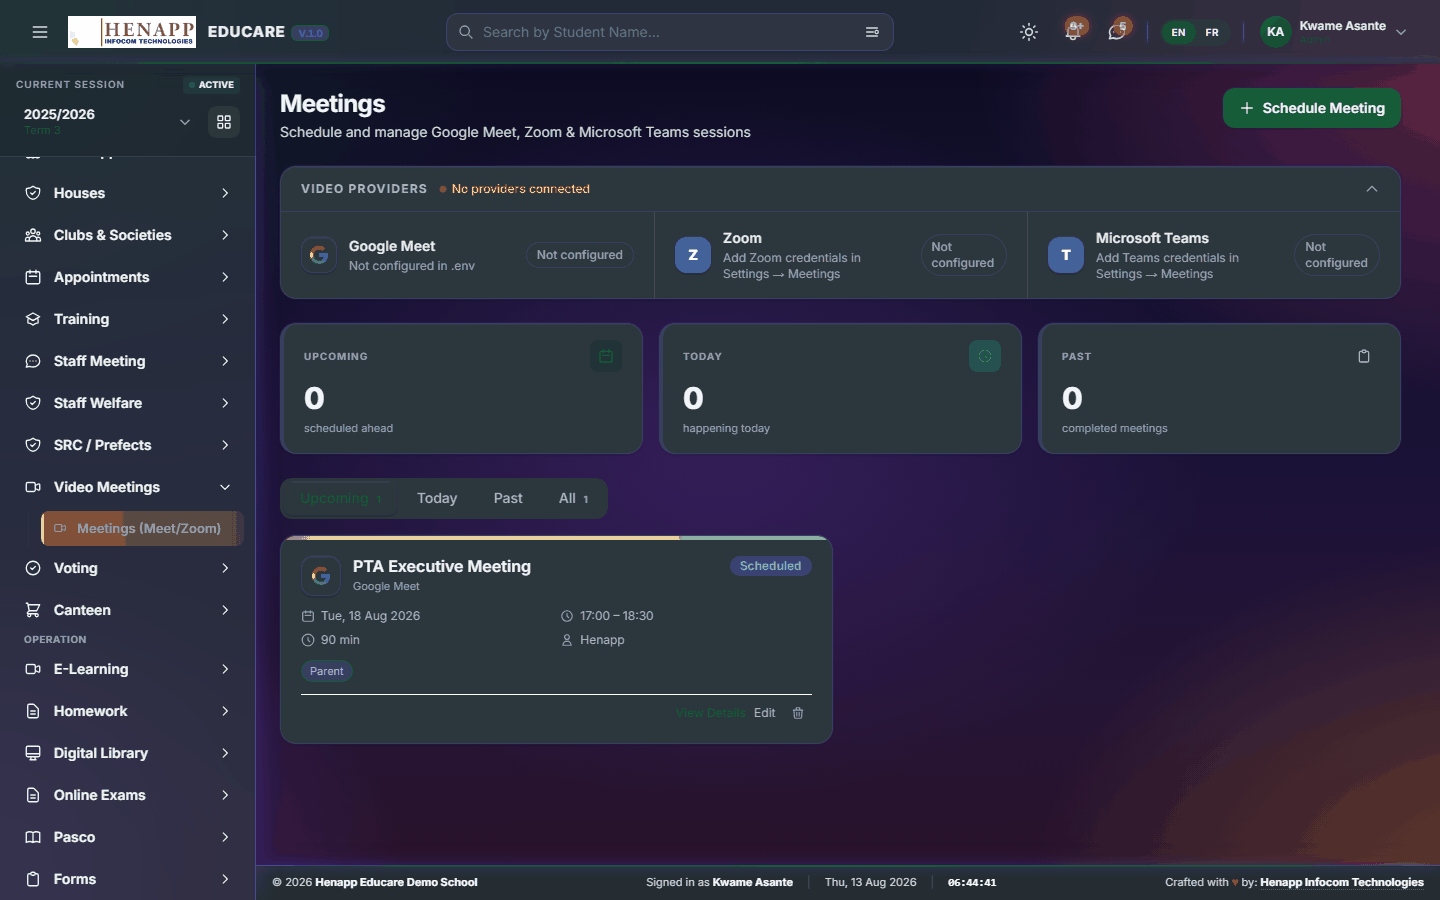
Video meetings scheduled in the portal and joined by one link.
How to use it
- Open Video Meetings → Meetings.
- Click New Meeting and set the title, date and time.
- Choose the platform and paste the meeting link.
- Choose who is invited, then save. They are notified and see a Join button when it is time.
29. Voting
Elections and polls run inside the system, with one vote per eligible voter and a result nobody has to tally by hand.
Find it in the sidebar under Team → Voting.
29.1 Voting Dashboard
Open votes and their turnout.
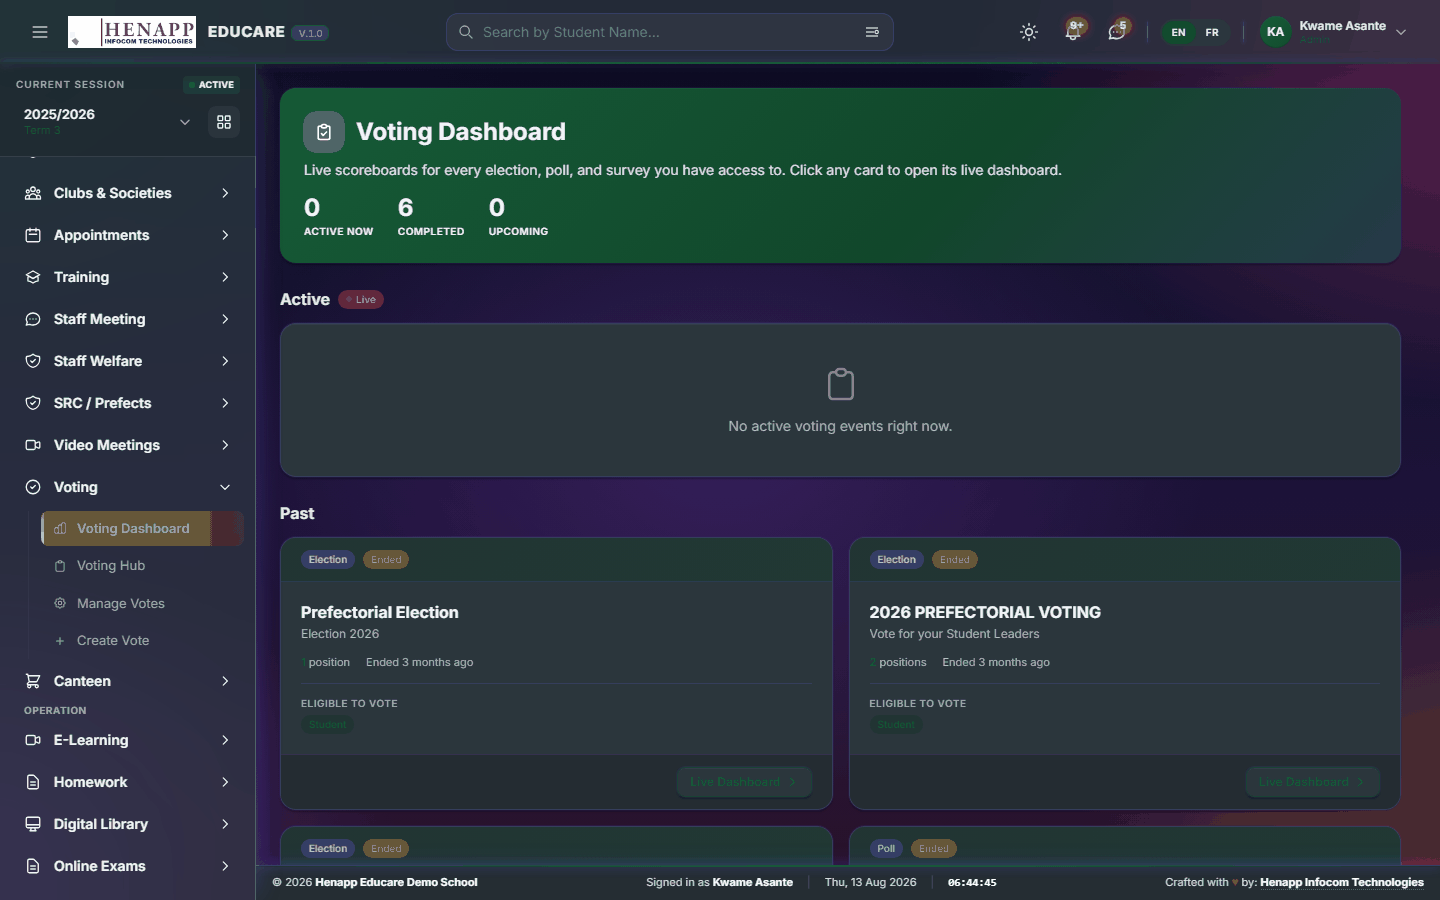
How to use it
- Open Voting → Voting Dashboard.
- Read the open votes and how many have voted so far.
29.2 Voting Hub
Where you cast your own vote.

How to use it
- Open Voting → Voting Hub.
- Open a vote you are eligible for.
- Choose your candidate or option and Submit.
- A vote cannot be changed once submitted, so check before confirming.
30. Canteen
The canteen as a stock operation — what is bought in, what is issued out, and what it costs against budget.
Find it in the sidebar under Team → Canteen.
30.1 Canteen Dashboard
The canteen at a glance — stock position and the month against budget.
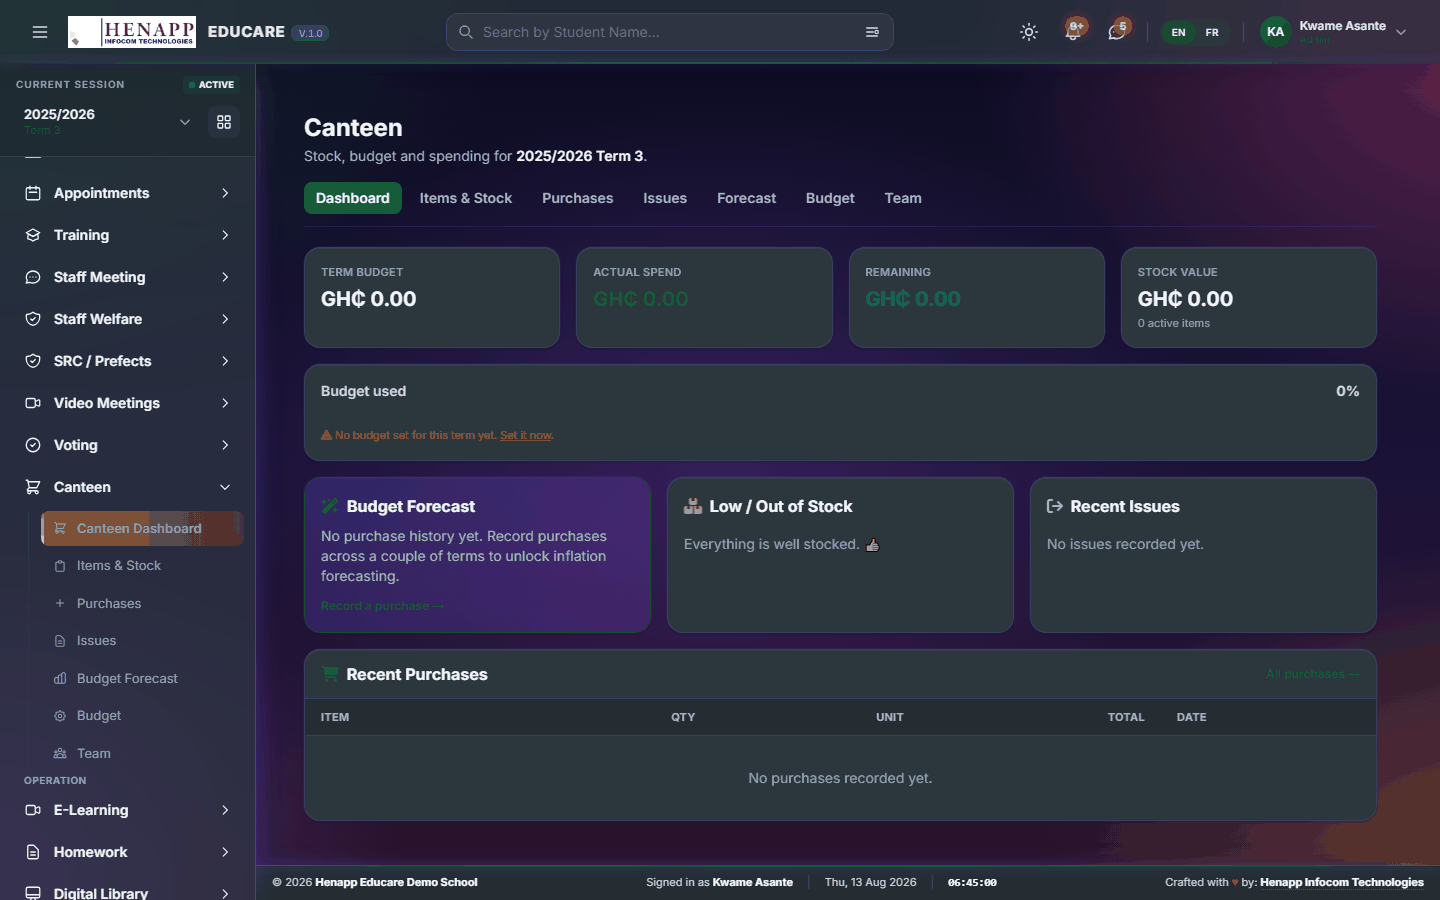
How to use it
- Open Canteen → Canteen Dashboard.
- Read the stock and spending figures.
30.2 Items & Stock
What the canteen stocks, and how much of each is on hand.

How to use it
- Open Canteen → Items & Stock.
- Add each item with its unit and reorder level.
- Current quantities update as purchases and issues are recorded.
- Items at or below their reorder level are flagged.
30.3 Purchases
Stock bought in.
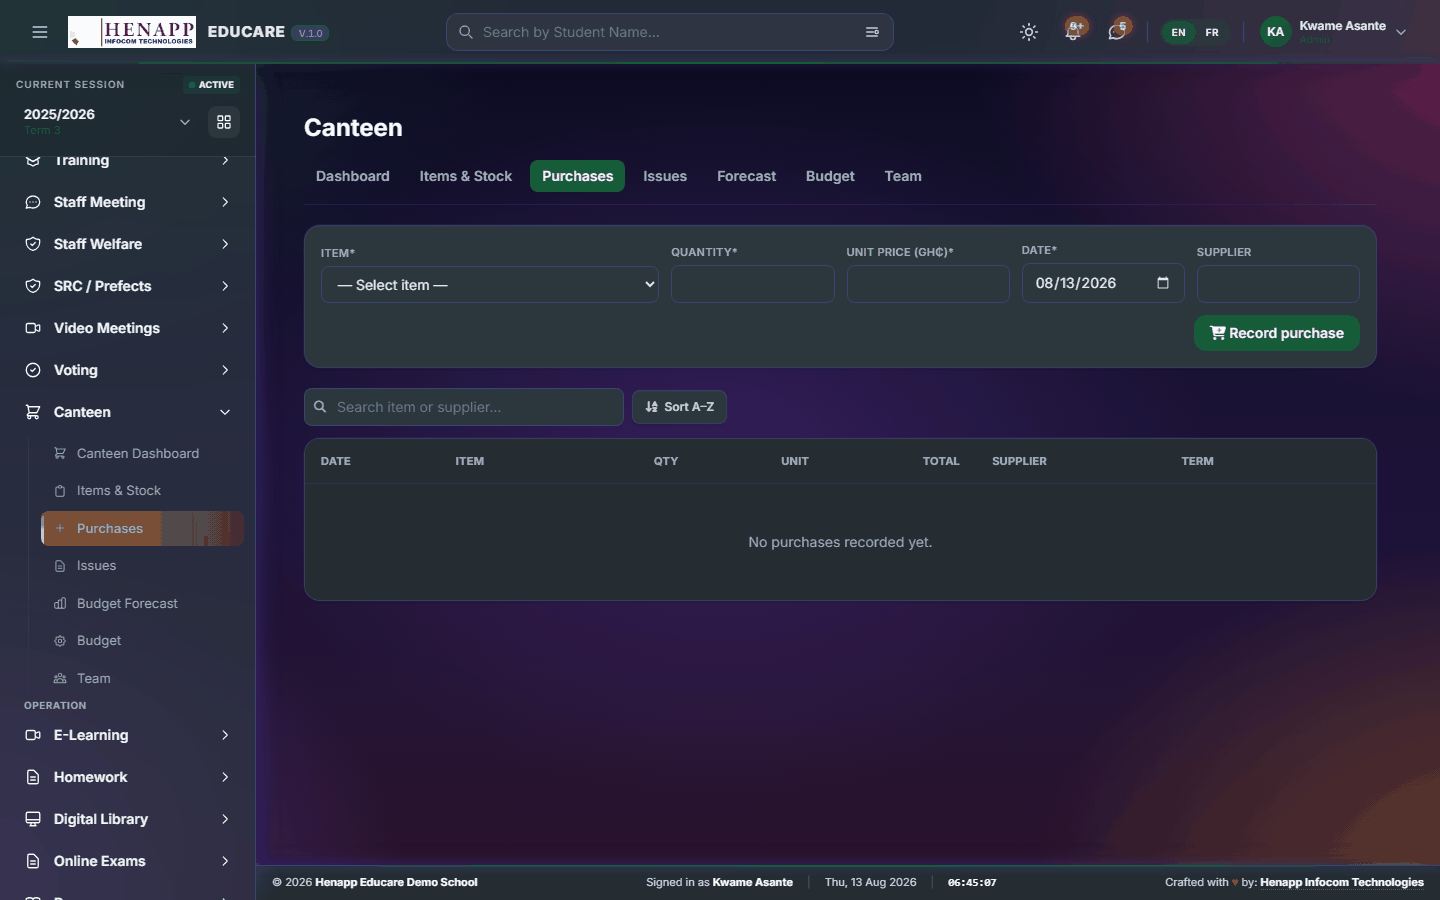
How to use it
- Open Canteen → Purchases.
- Click New Purchase, choose the supplier and add each item with quantity and cost.
- Save. Stock levels rise and the cost is recorded against the budget.
30.4 Issues
Stock issued out to the kitchen.
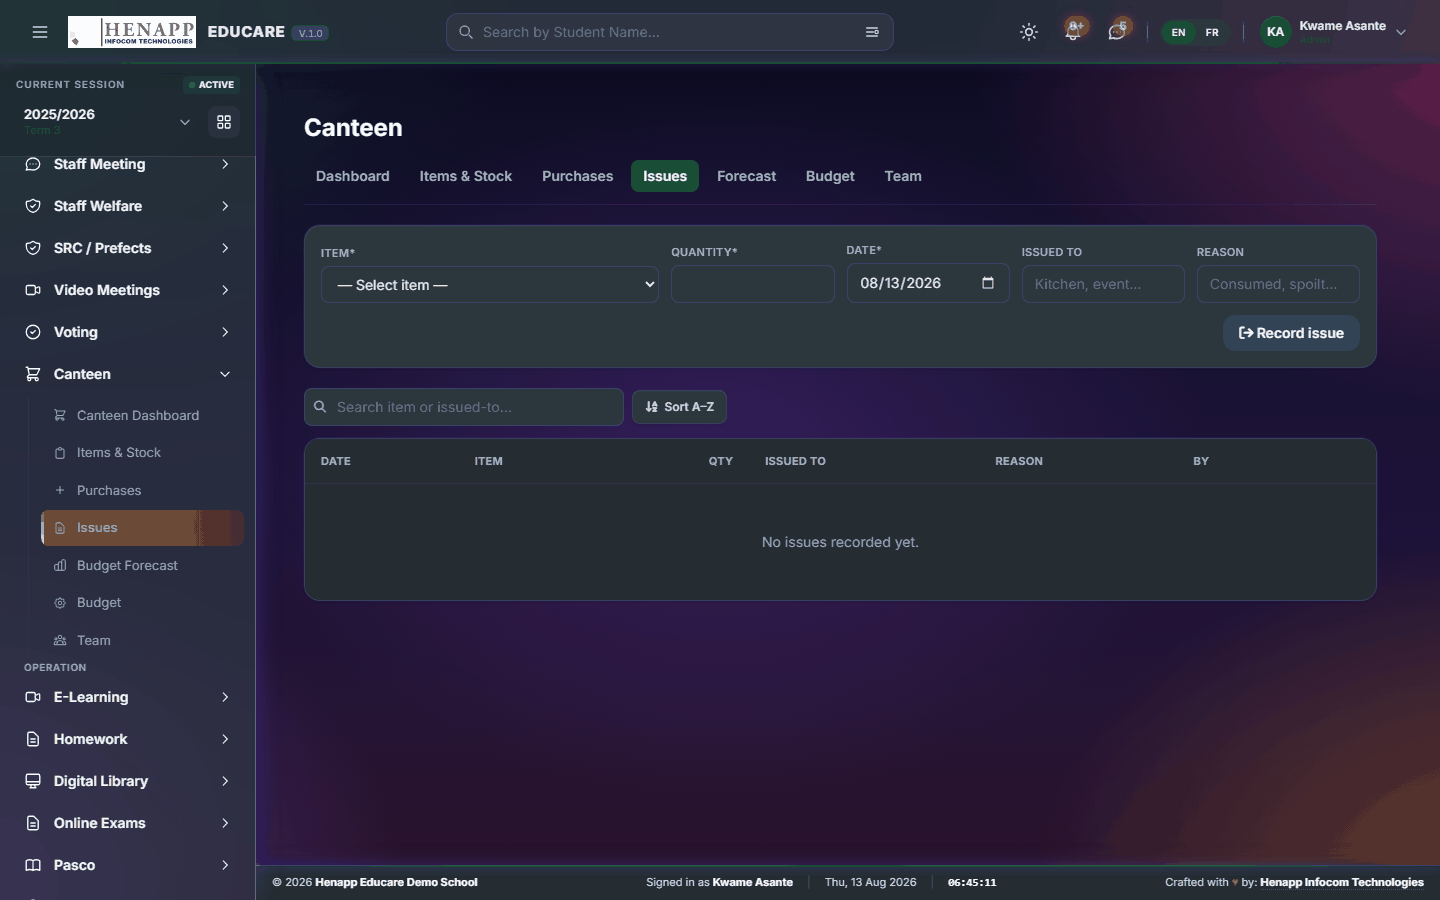
How to use it
- Open Canteen → Issues.
- Record each issue with the item, quantity and date.
- Save. Stock levels fall accordingly.
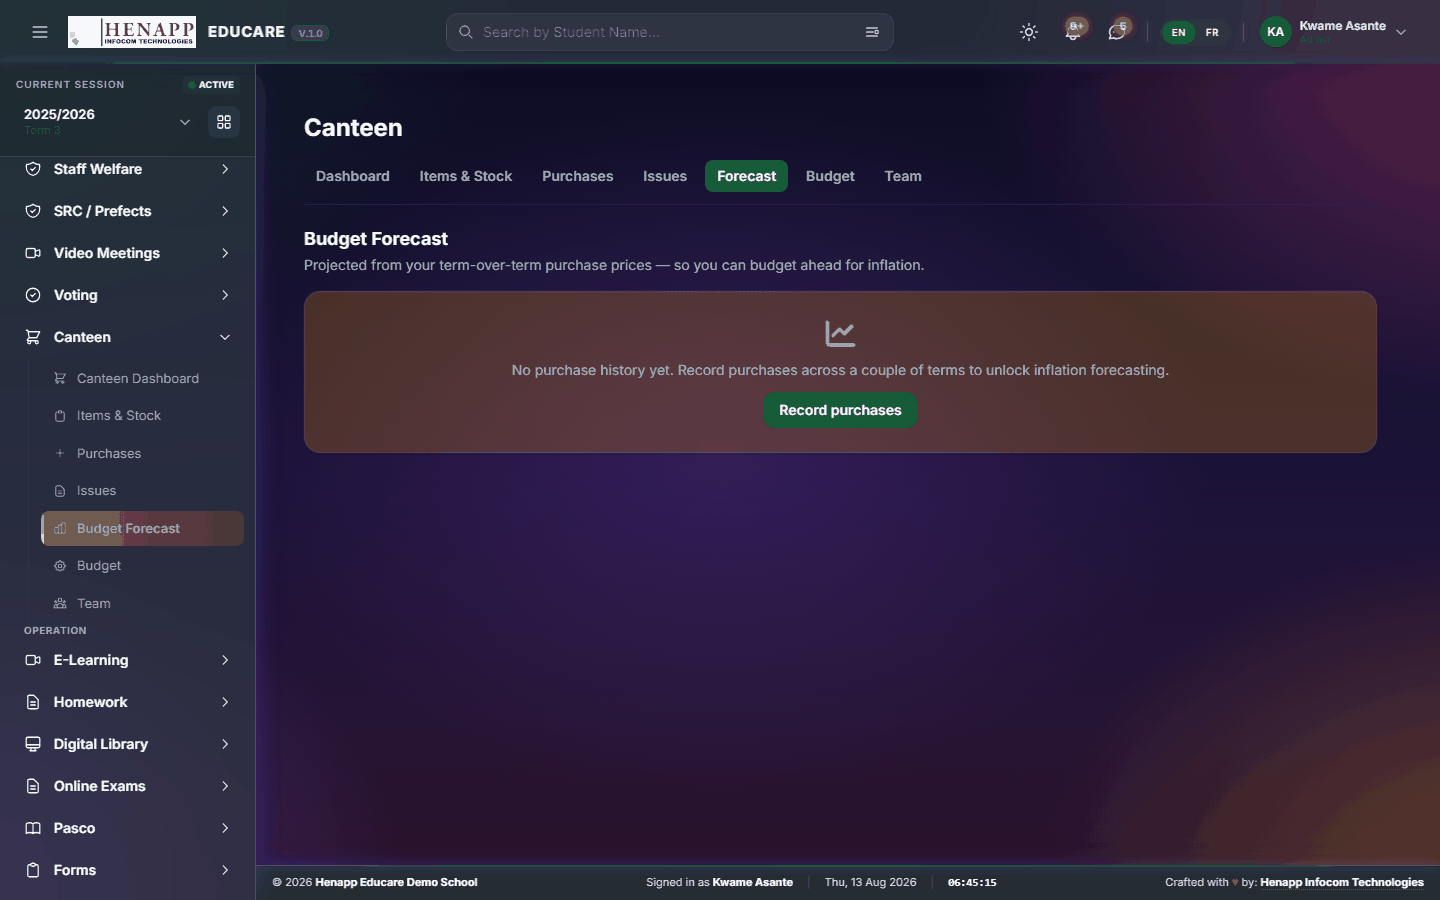
30.5 Budget Forecast
Projected consumption and spend from the pattern so far.
How to use it
- Open Canteen → Budget Forecast.
- Choose the period.
- Read the projection against the budget.
30.6 Budget
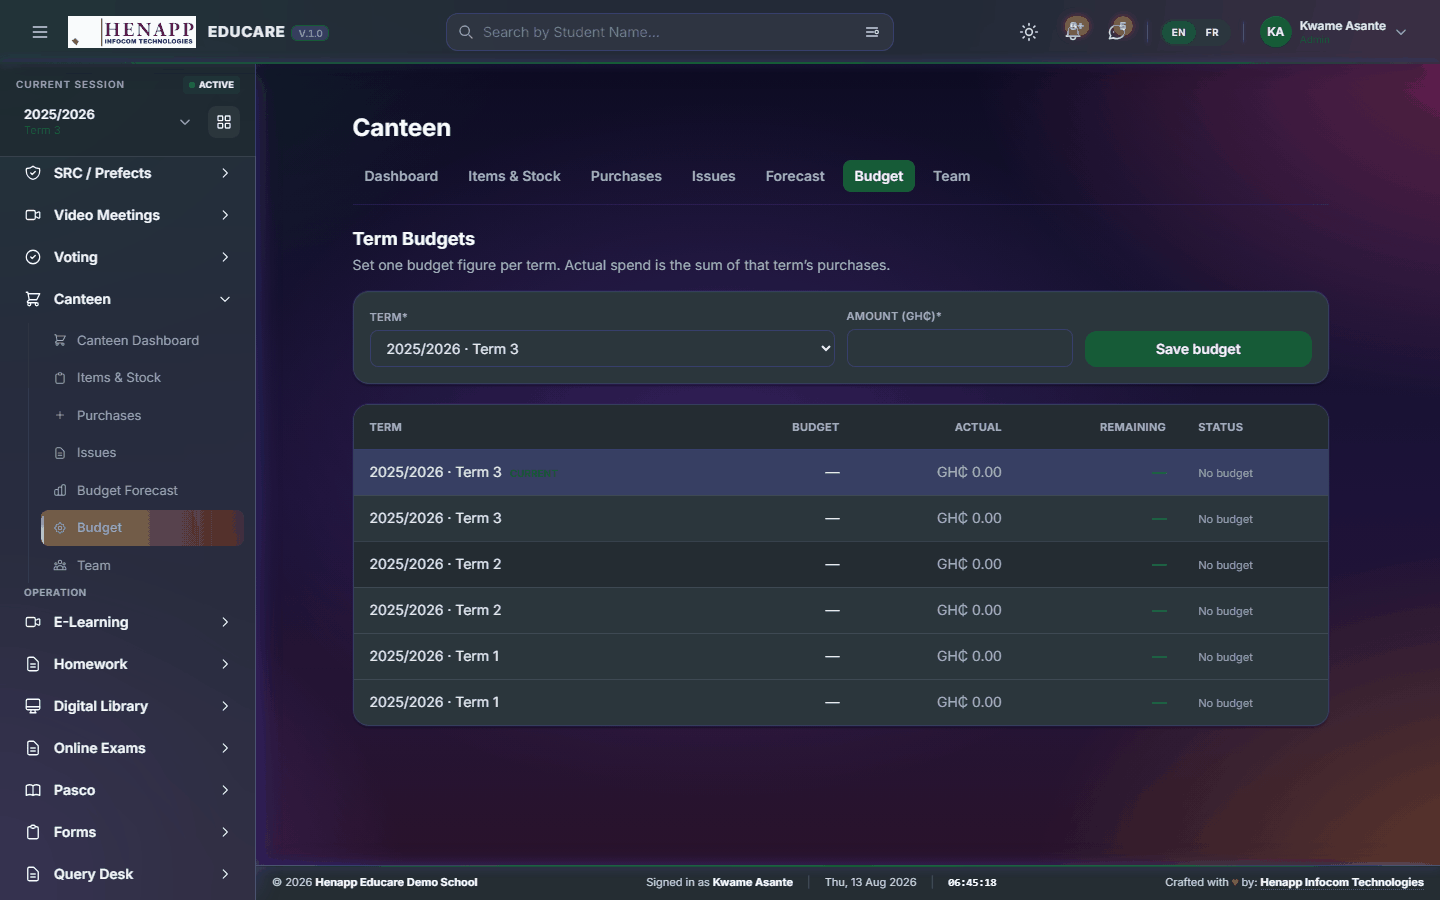
The canteen budget and how much of it has been used.
How to use it
- Open Canteen → Budget.
- Set the budget for the period.
- Save. Spending is tracked against it.
30.7 Team
The canteen staff and what each may do in the module.

How to use it
- Open Canteen → Team.
- Add staff to the canteen team and set their access.
- Save.
31. Shops
The school shops — bookshop, uniforms, stationery and cafeteria — each with its own stock and till.
Find it in the sidebar under Others → Shops.
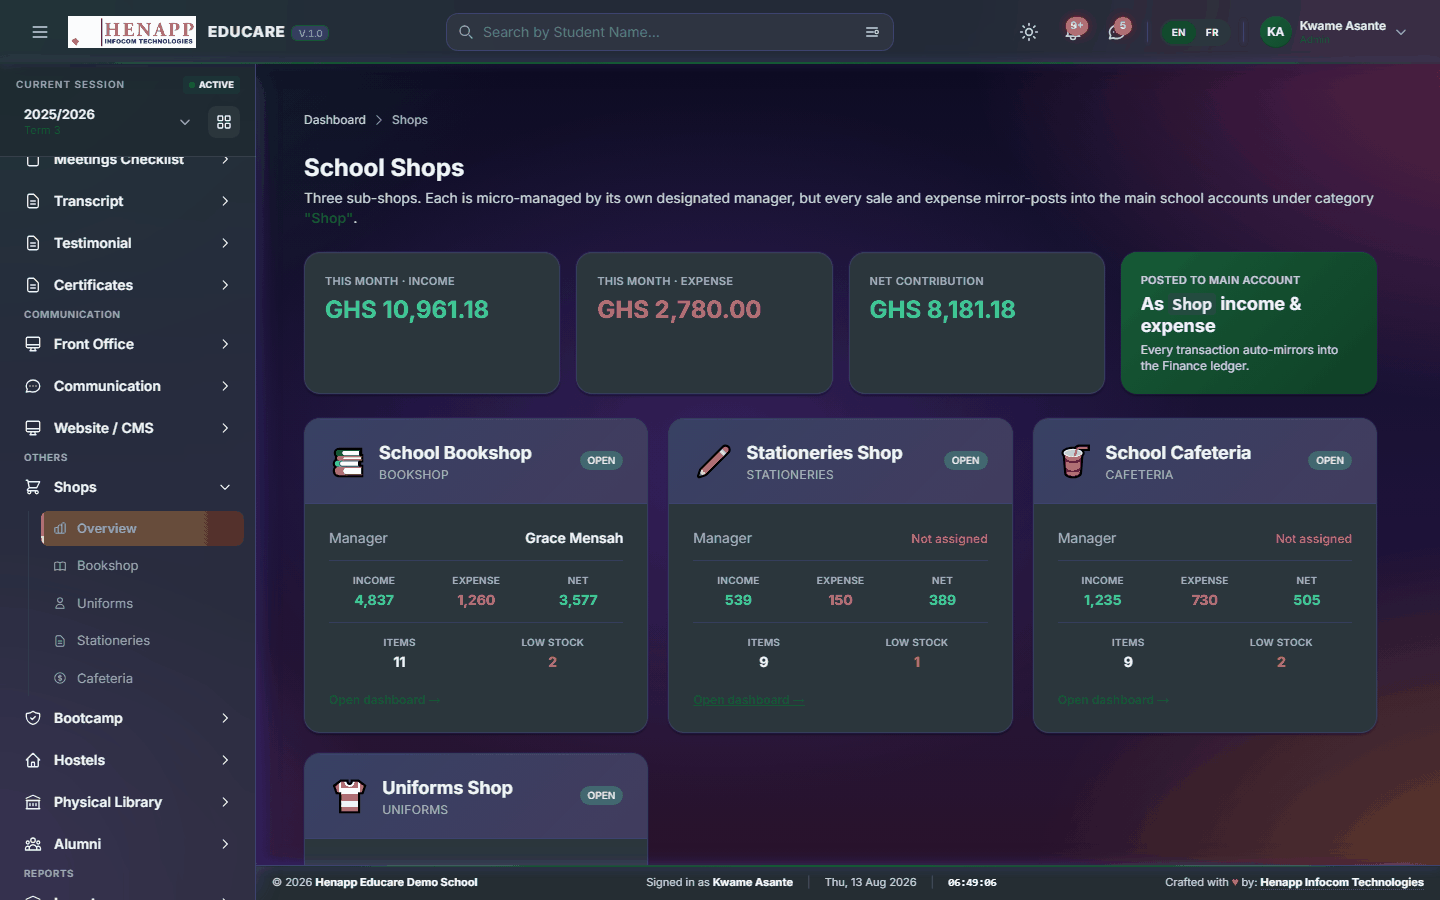
31.1 Overview
All shops together — stock and takings side by side.
How to use it
- Open Shops → Overview.
- Read each shop's takings and stock position.
- Click a shop for its detail.
32. Bootcamp
Holiday programmes and bootcamps run as a self-contained operation: registration, invoicing, payments, expenses and reporting.
Find it in the sidebar under Others → Bootcamp.
32.1 Dashboard
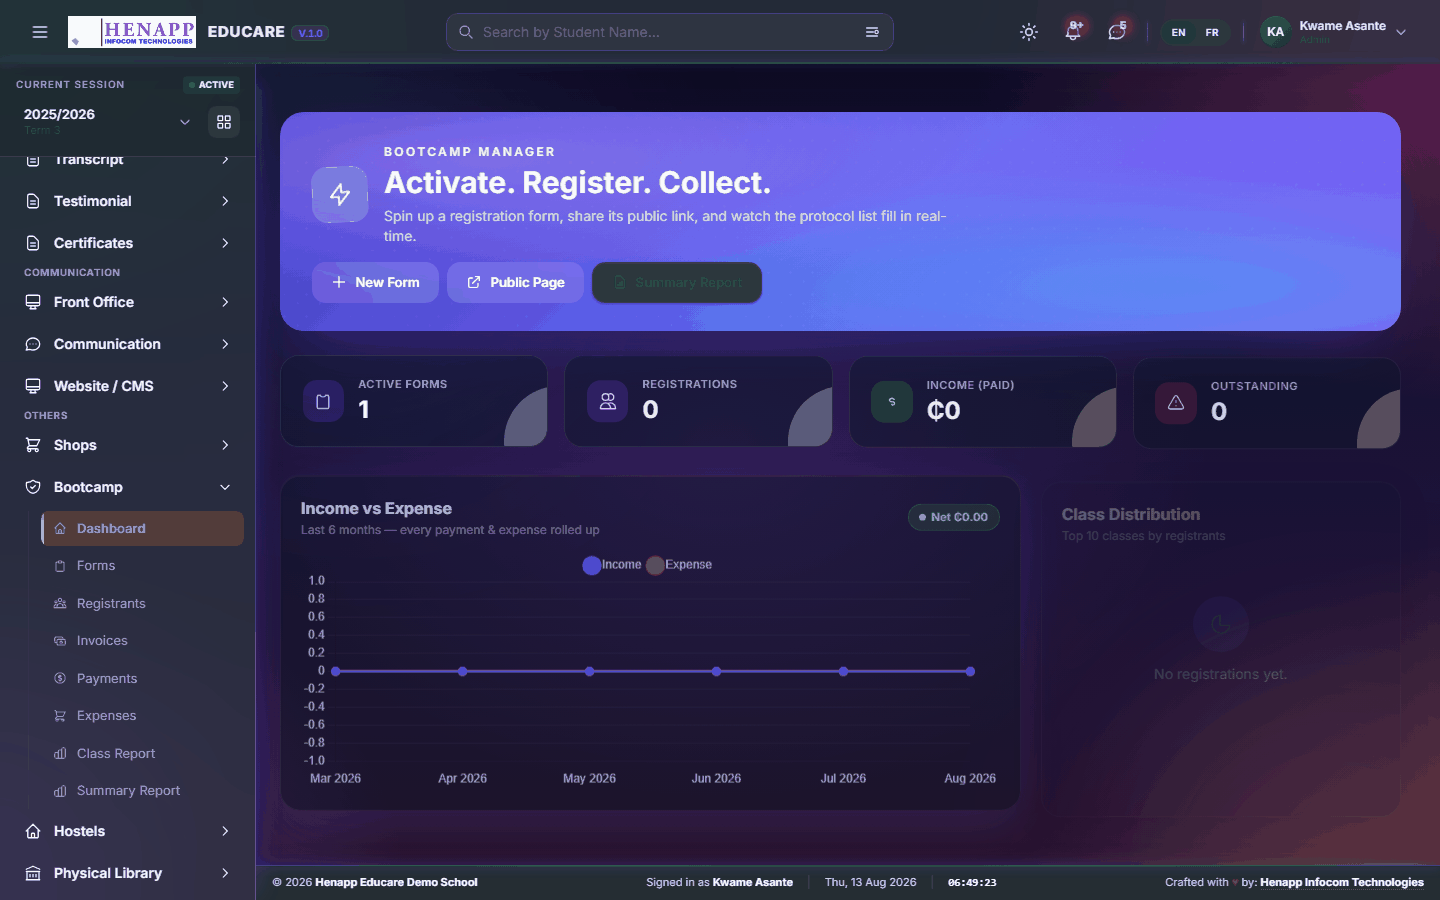
The bootcamp at a glance — registrants, income and spend.
How to use it
- Open Bootcamp → Dashboard.
- Read the headline figures for the current programme.
32.2 Forms
The registration form participants fill in.
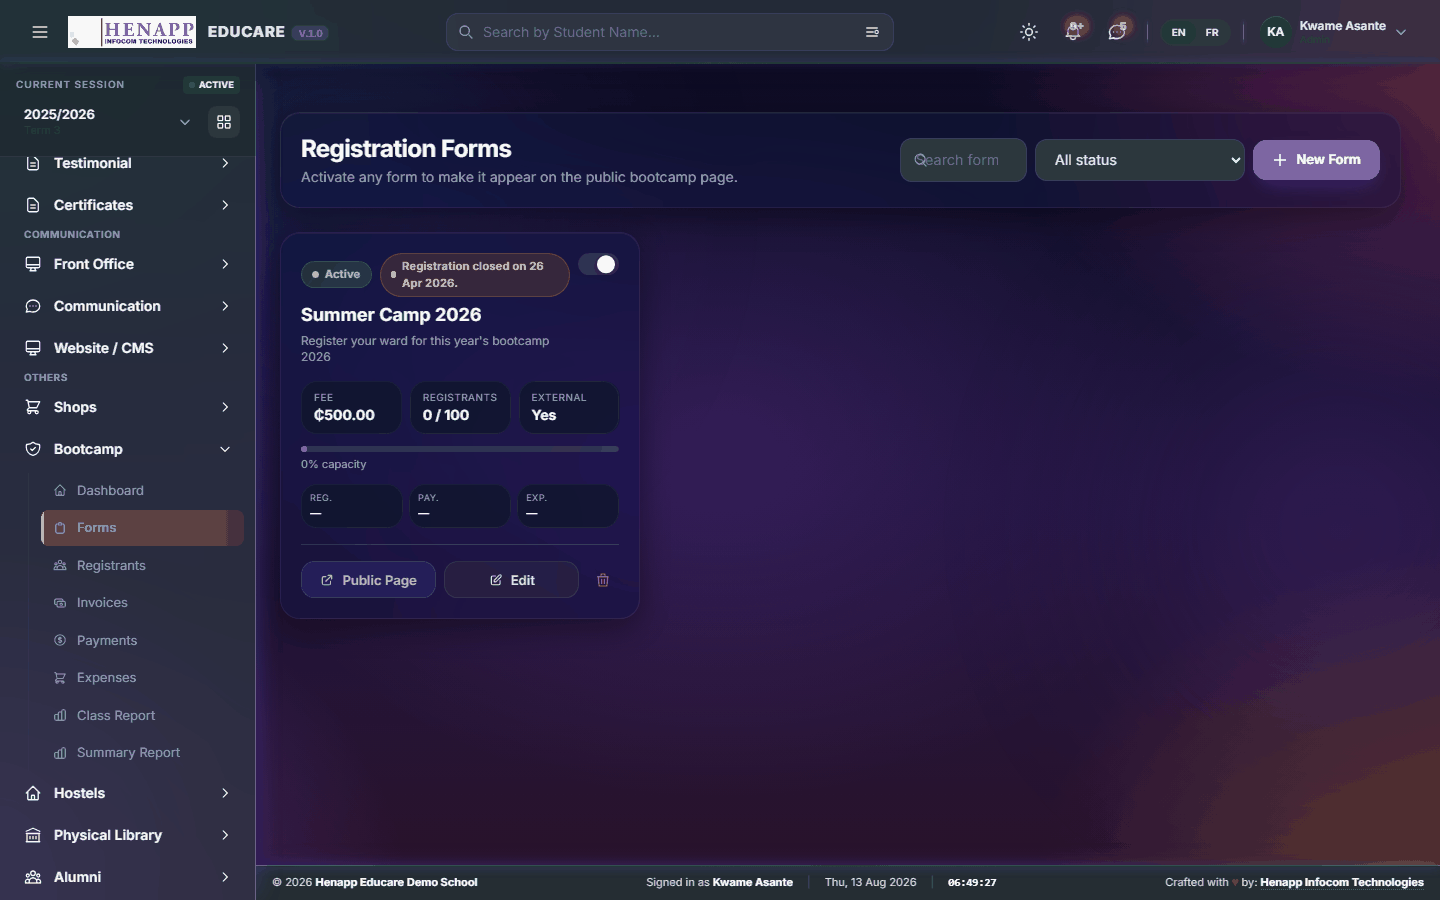
How to use it
- Open Bootcamp → Forms.
- Create the form and add the questions you need.
- Publish it and share the link.
32.3 Registrants
Who has registered.
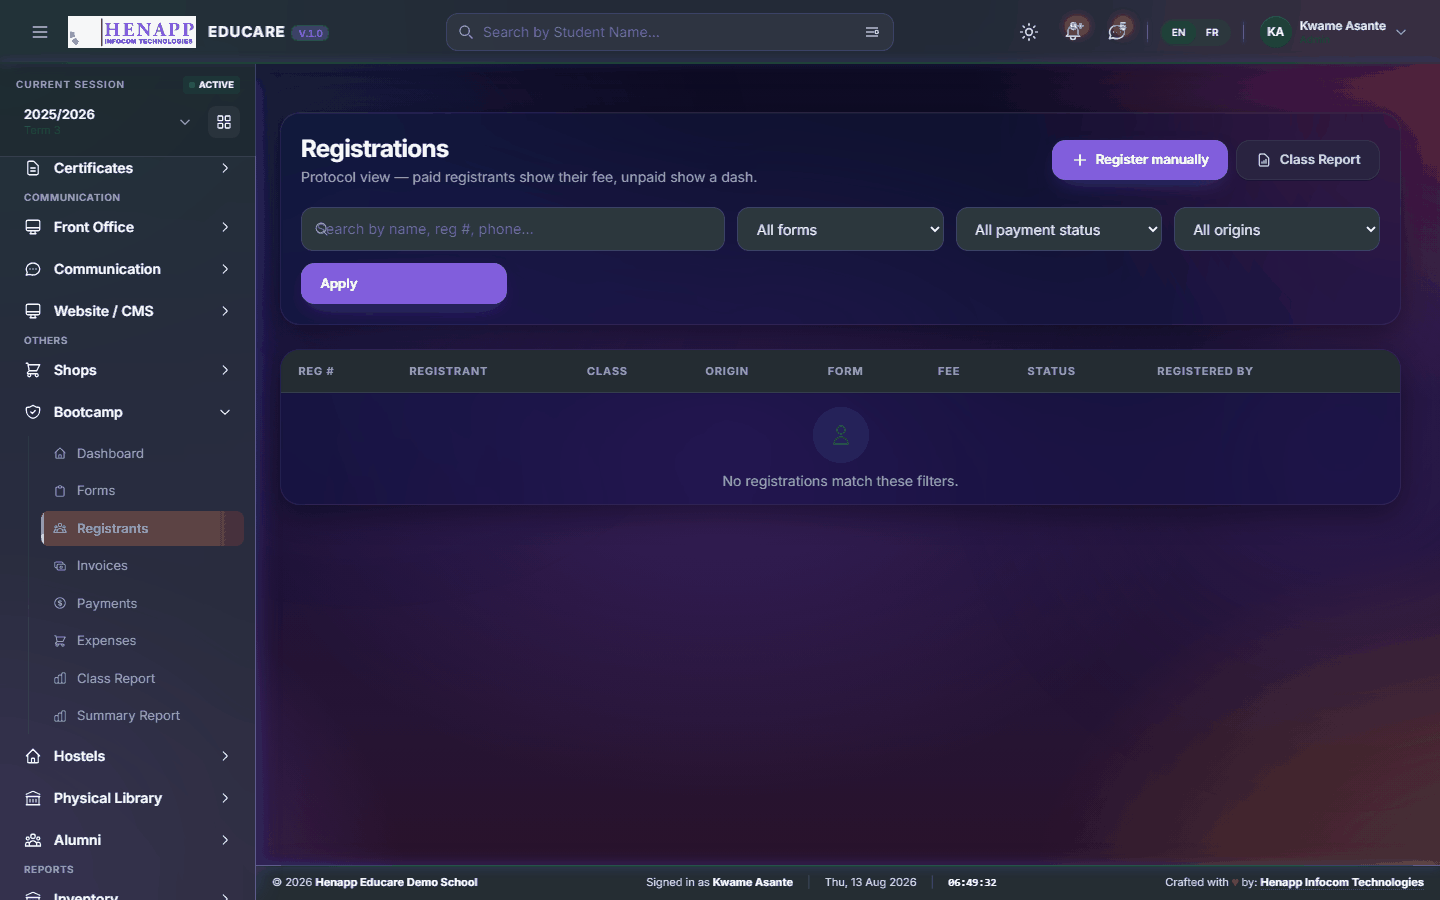
How to use it
- Open Bootcamp → Registrants.
- Review each registration and confirm or decline it.
- Export the list for attendance.
32.4 Invoices
Invoices raised for bootcamp fees.
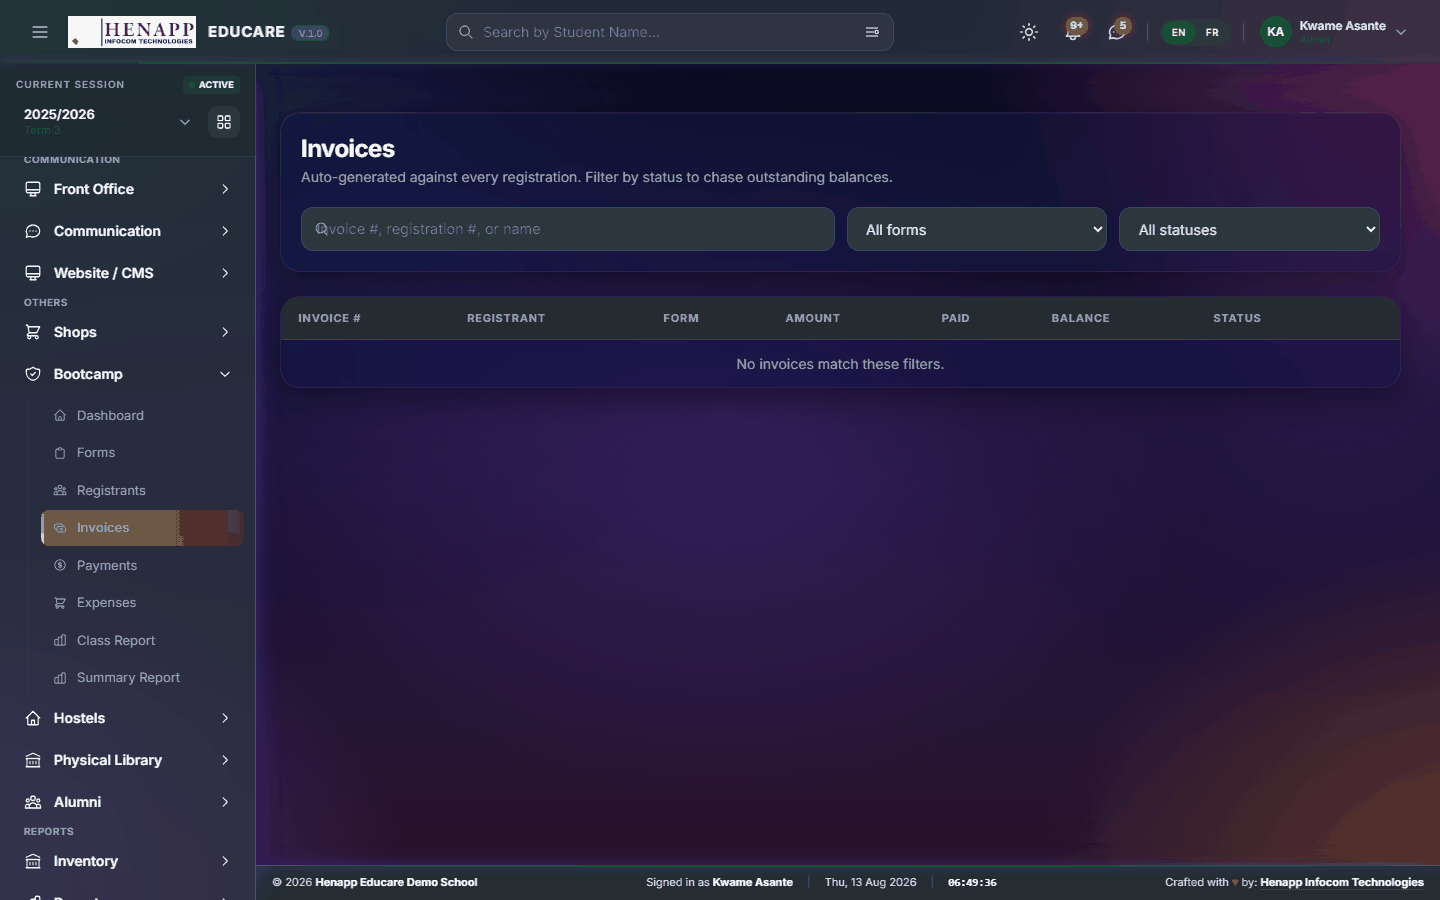
How to use it
- Open Bootcamp → Invoices.
- Raise invoices for confirmed registrants, singly or in bulk.
- Send them to participants.
32.5 Payments
Payments received against bootcamp invoices.
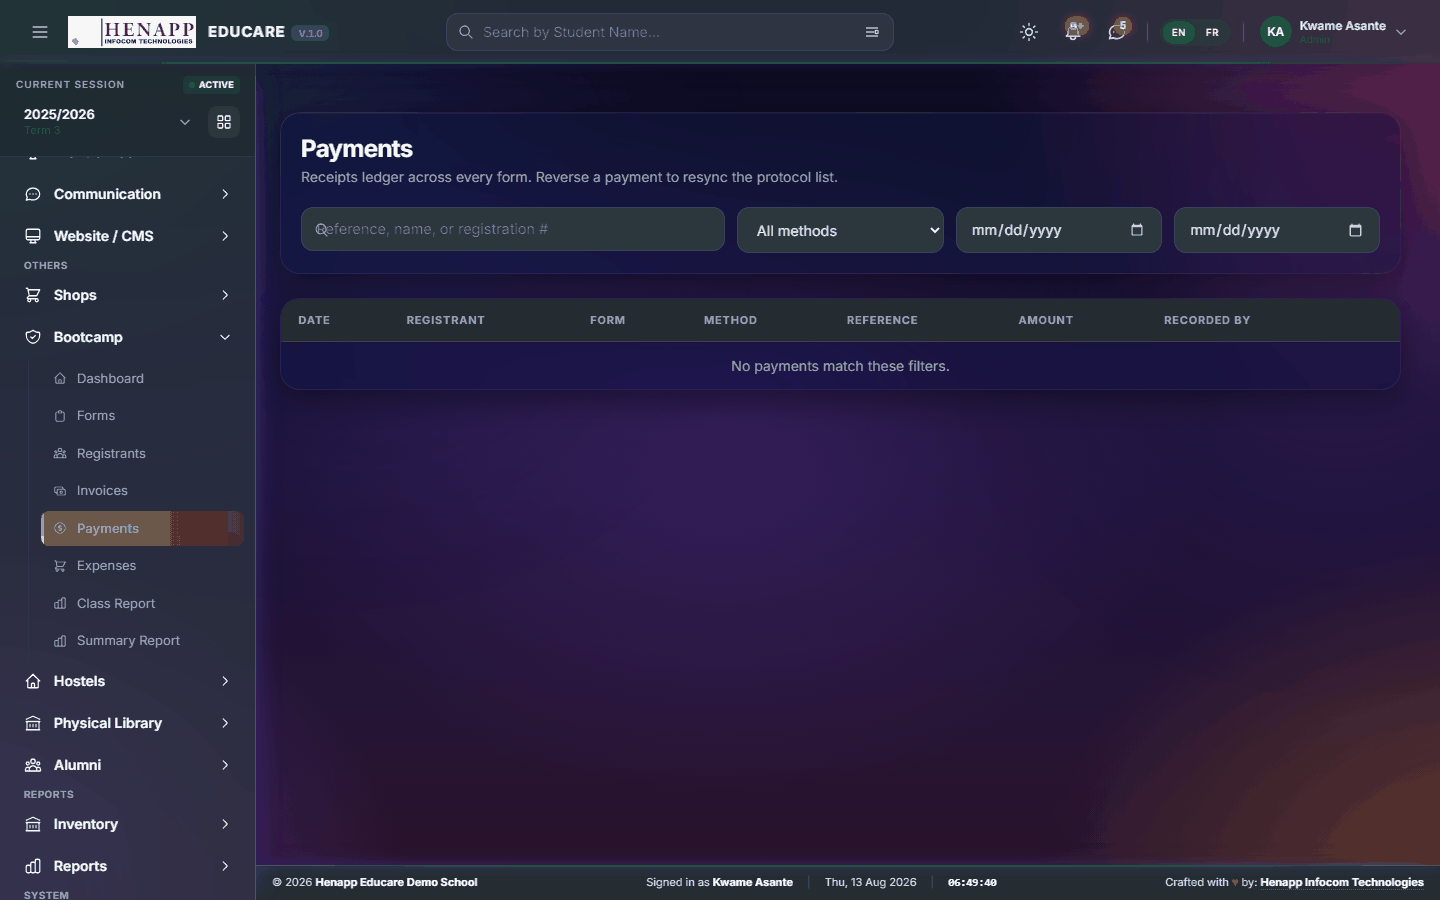
How to use it
- Open Bootcamp → Payments.
- Record each payment with its amount and method.
- Issue the receipt.
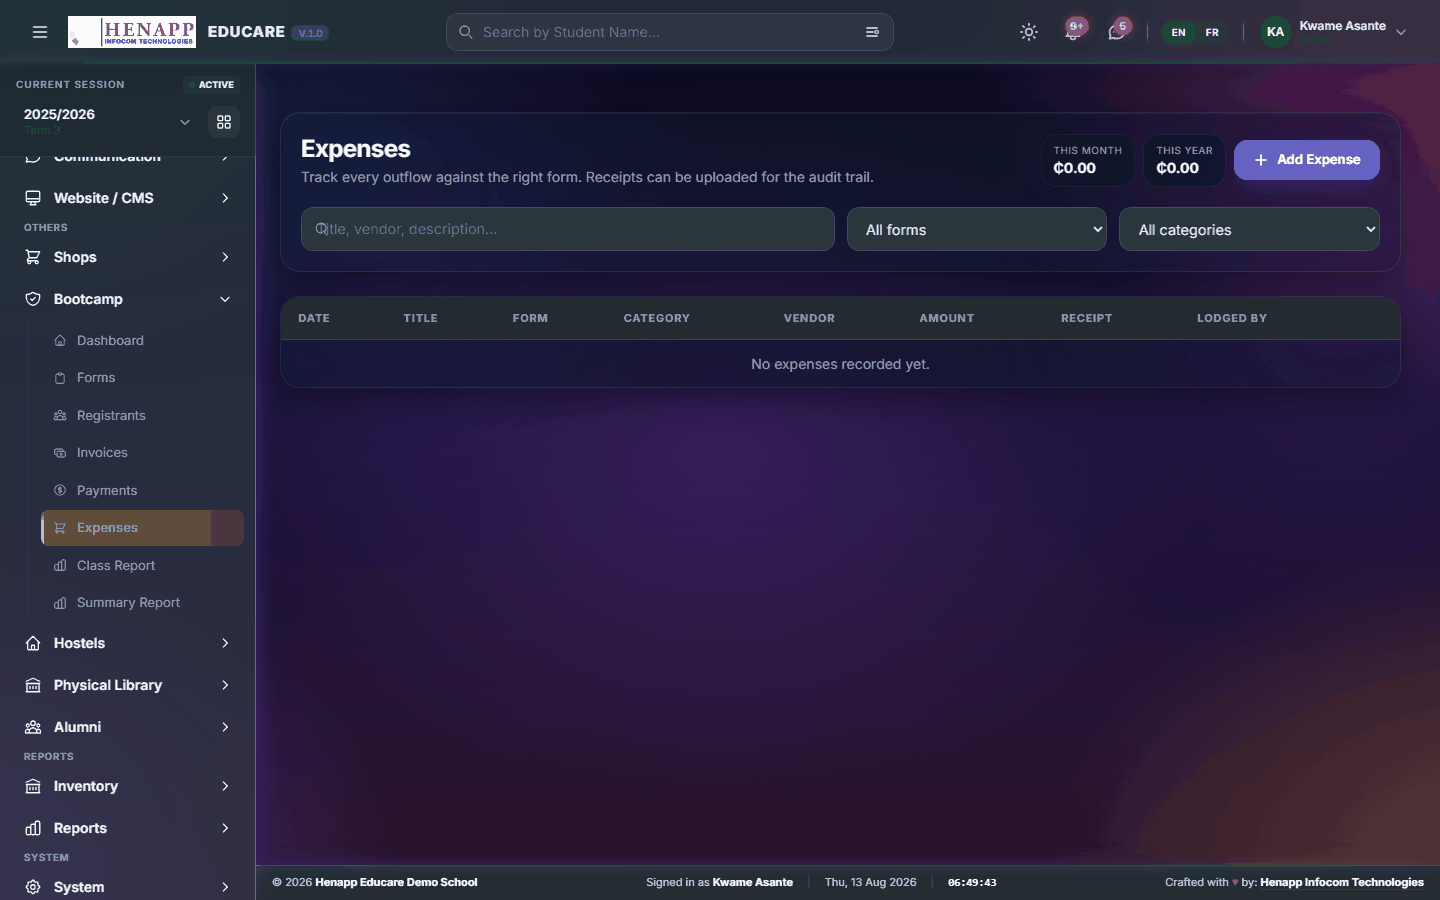
32.6 Expenses
What the bootcamp costs to run.
How to use it
- Open Bootcamp → Expenses.
- Record each expense with its category, amount and date.
- Save. Expenses feed the summary report.
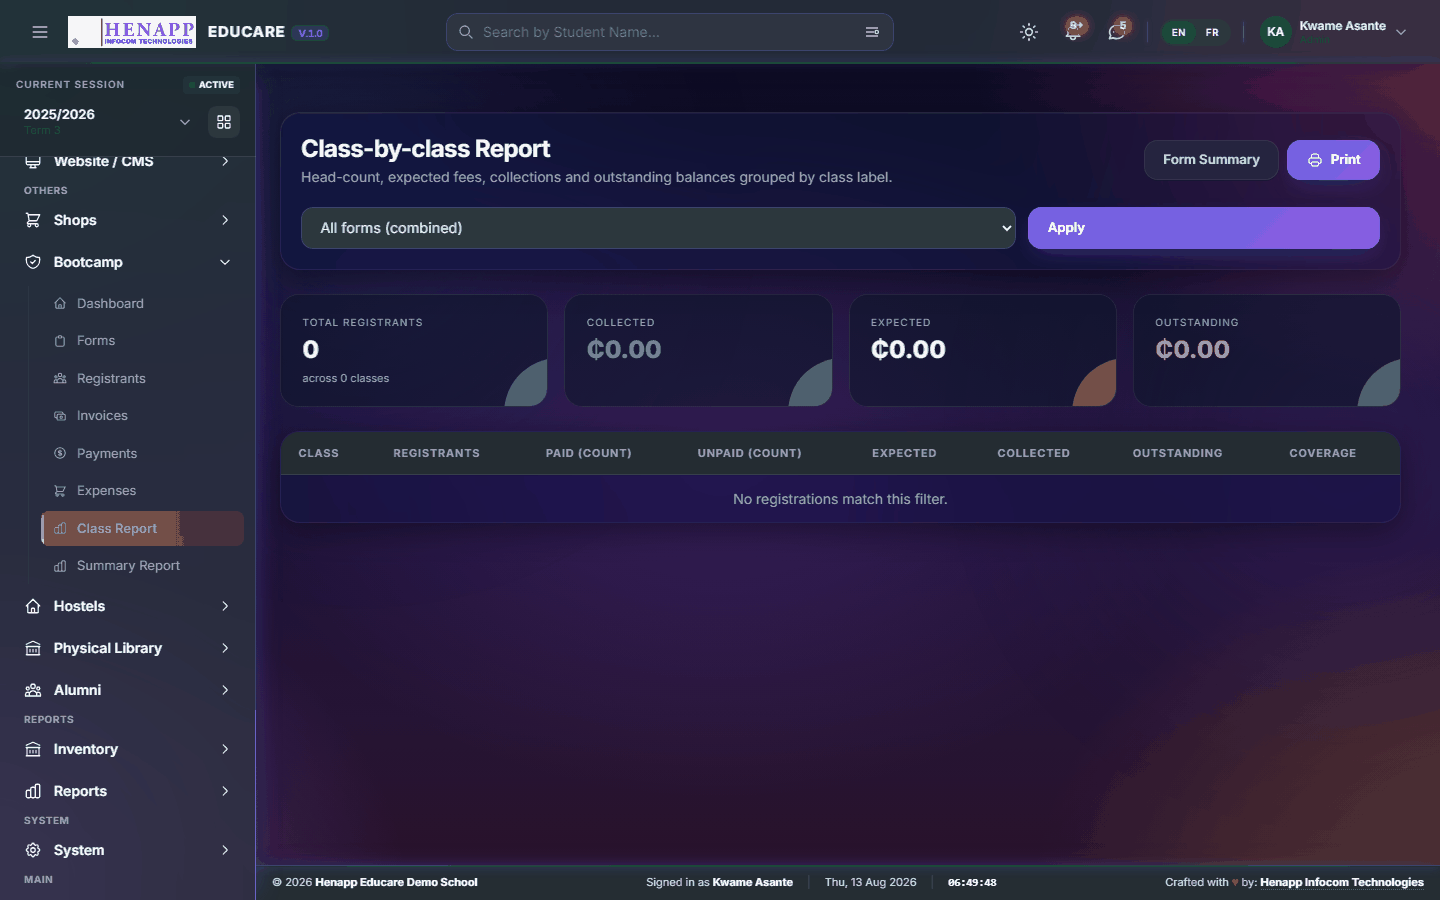
32.7 Class Report
Participation and performance by class or group.
How to use it
- Open Bootcamp → Class Report.
- Choose the programme and read the breakdown.
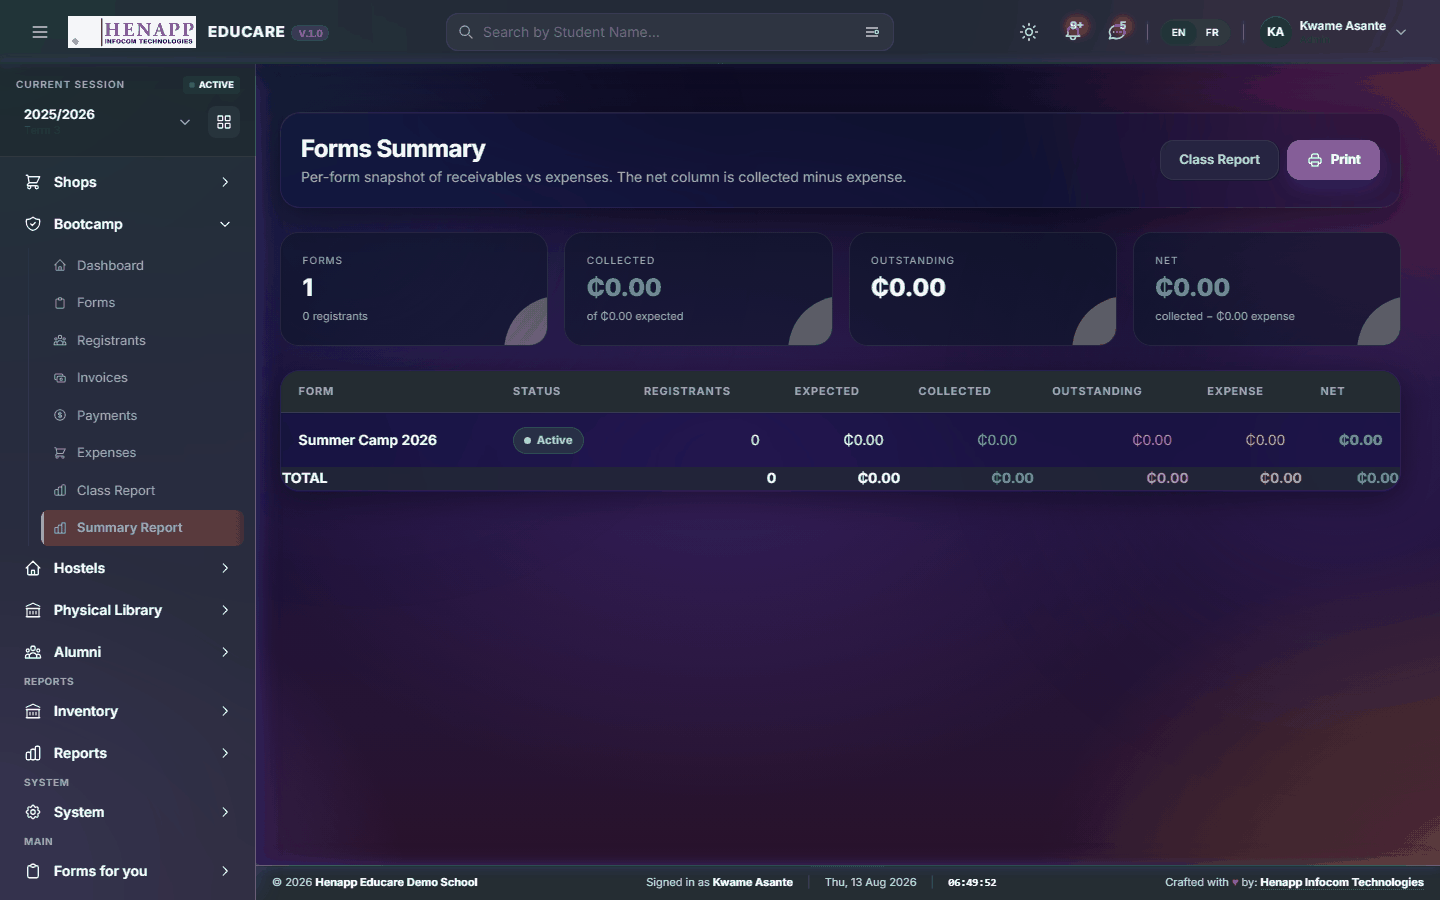
32.8 Summary Report
The whole programme — registrants, income, expenditure and the surplus.
How to use it
- Open Bootcamp → Summary Report.
- Choose the programme, read the summary and export it.
33. Hostels
Boarding — the hostels, their rooms and beds, who sleeps where, and what boarding costs.
Find it in the sidebar under Others → Hostels.
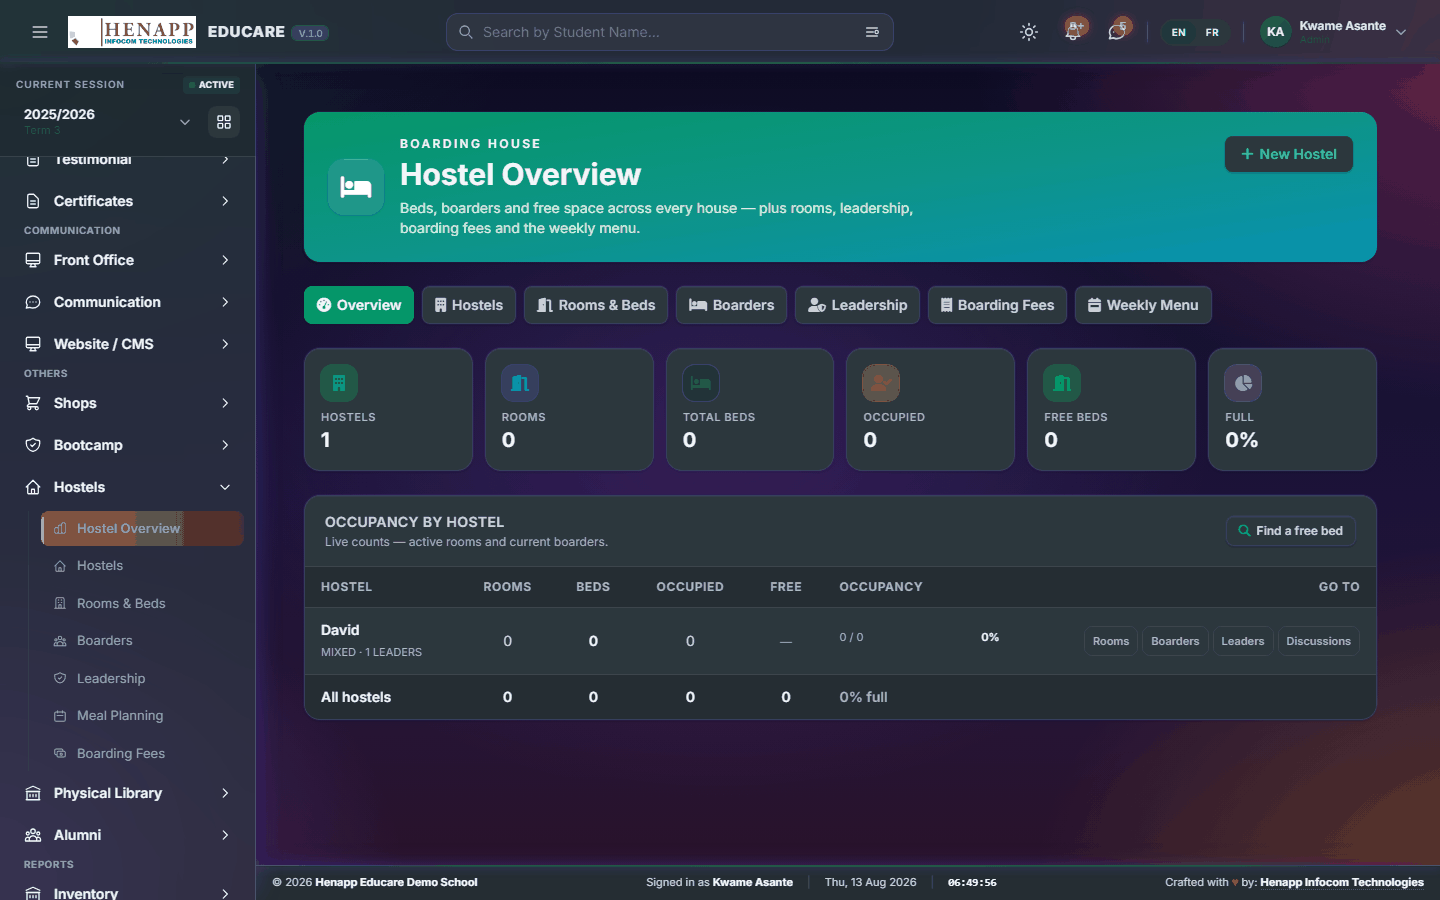
33.1 Hostel Overview
Boarding at a glance — occupancy and capacity.
How to use it
- Open Hostels → Hostel Overview.
- Read occupancy against capacity across the hostels.
33.2 Hostels
The hostels themselves.
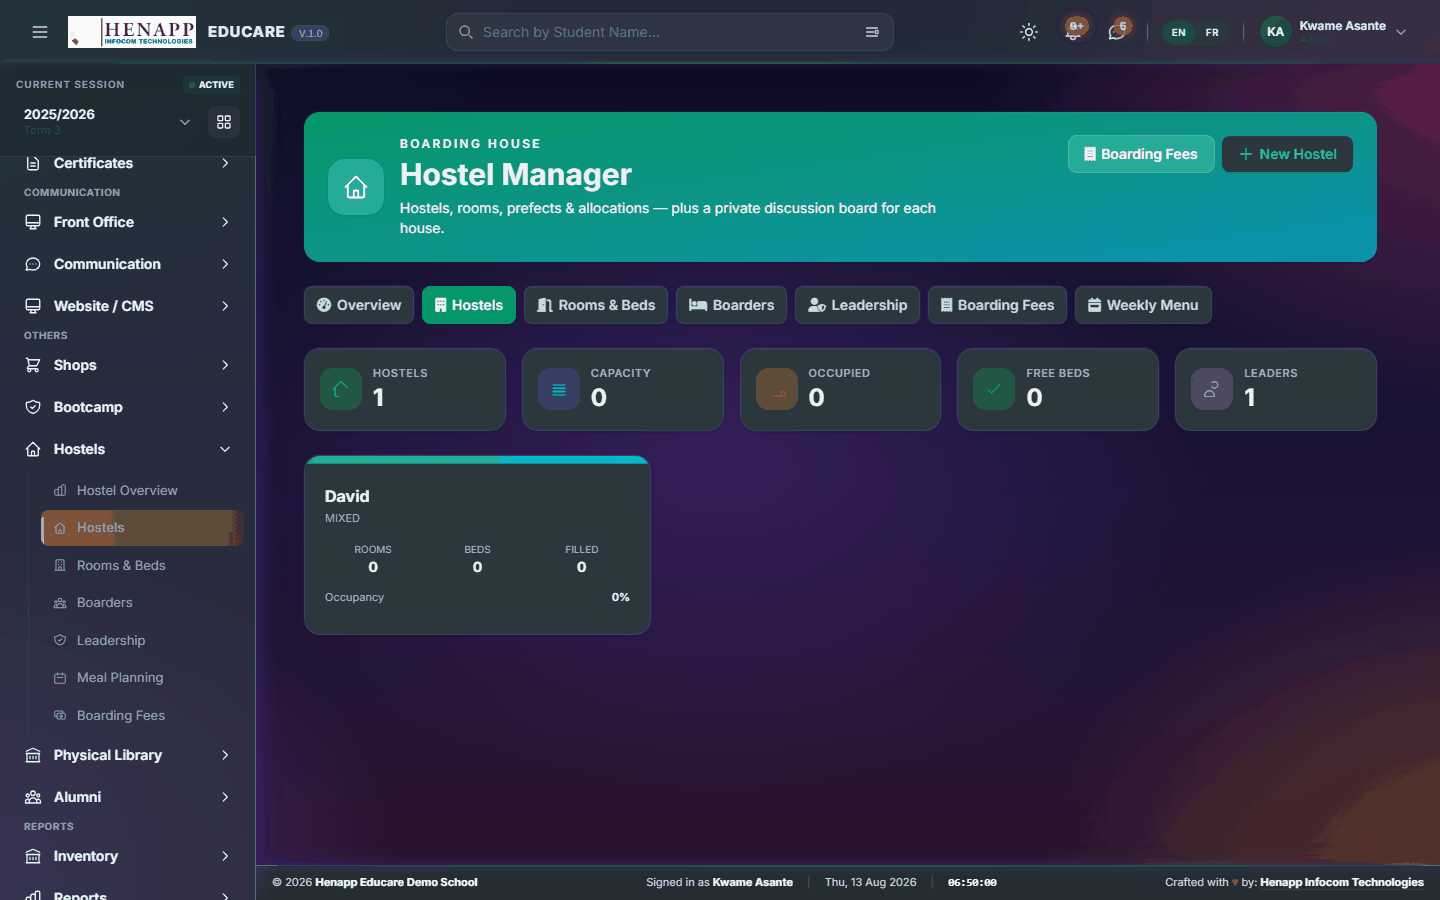
How to use it
- Open Hostels → Hostels.
- Add each hostel with its name, whether it is for boys or girls, and its warden.
- Save.
33.3 Rooms & Beds
Rooms and the beds in them.
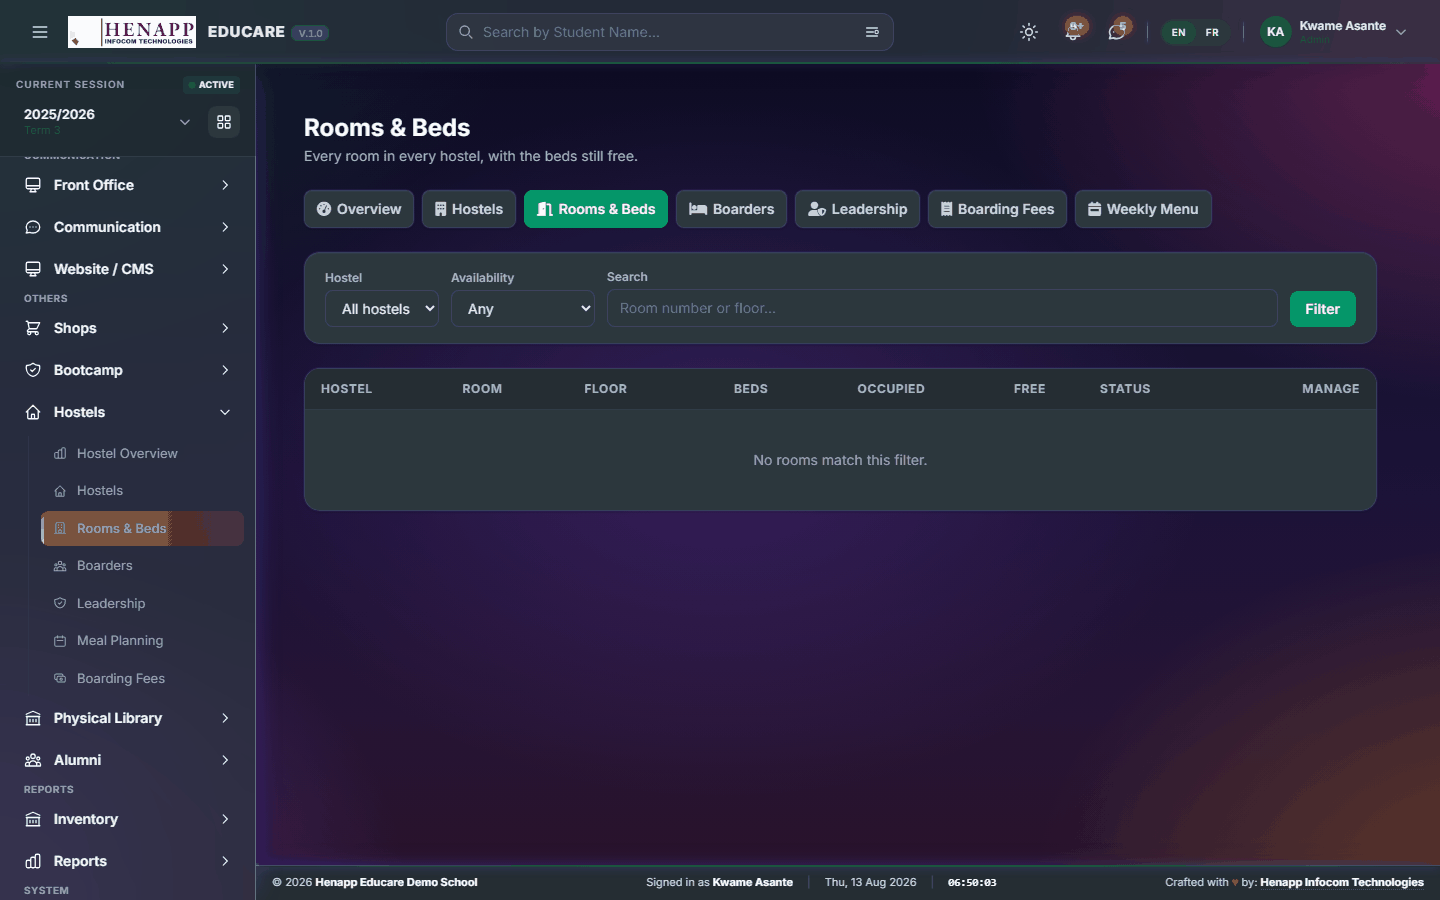
How to use it
- Open Hostels → Rooms & Beds.
- Add each room to its hostel with the number of beds.
- Save. Capacity updates automatically.
33.4 Boarders
Which boarder is in which bed.
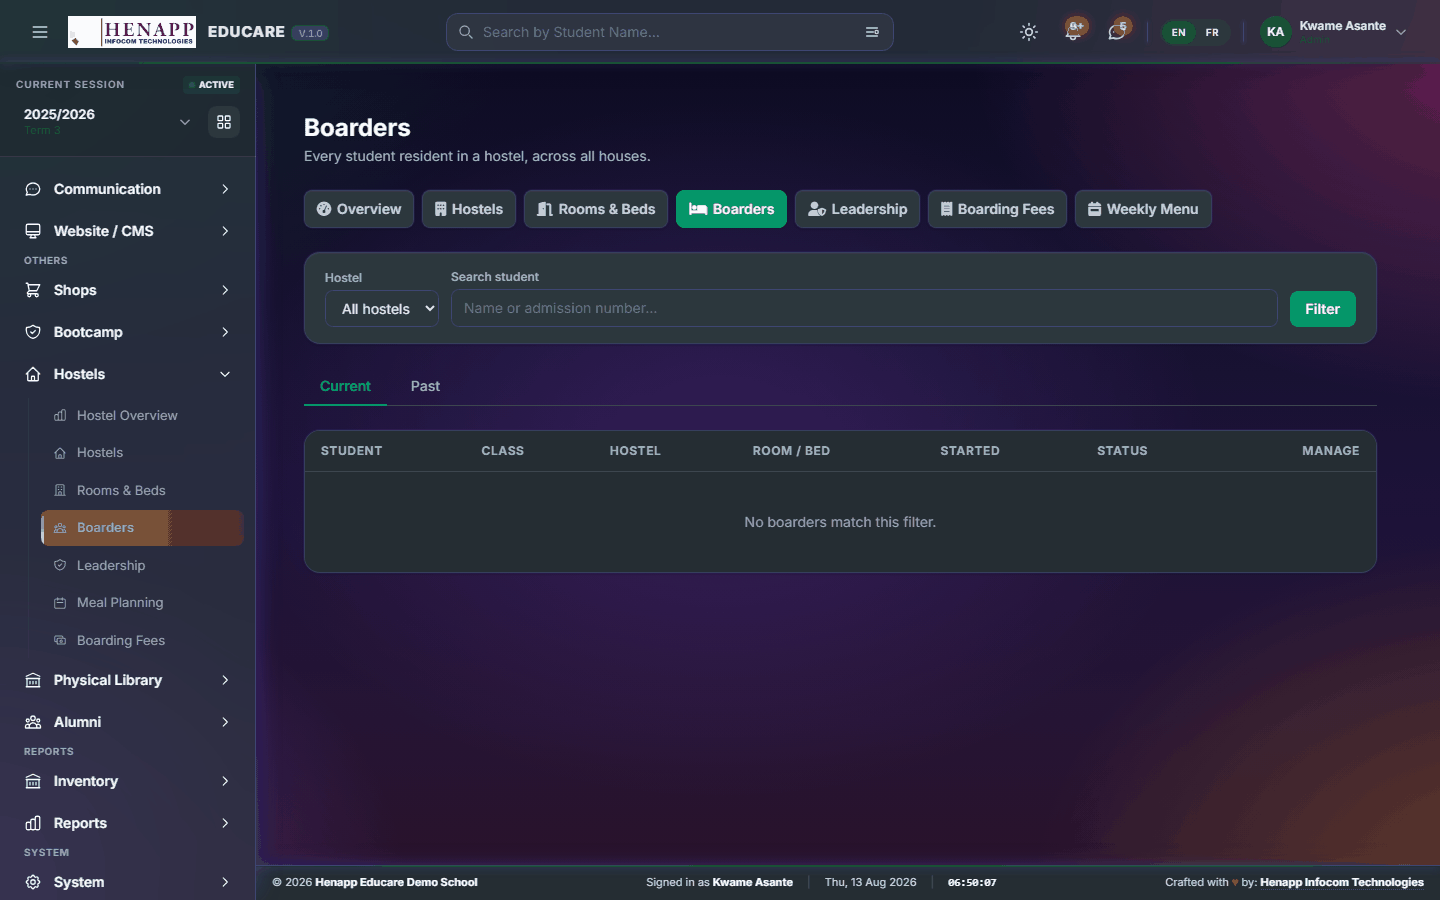
How to use it
- Open Hostels → Boarders.
- Choose the learner and allocate them a bed.
- Save. Move or release a boarder from the same page.
33.5 Leadership
House prefects and hostel leadership.
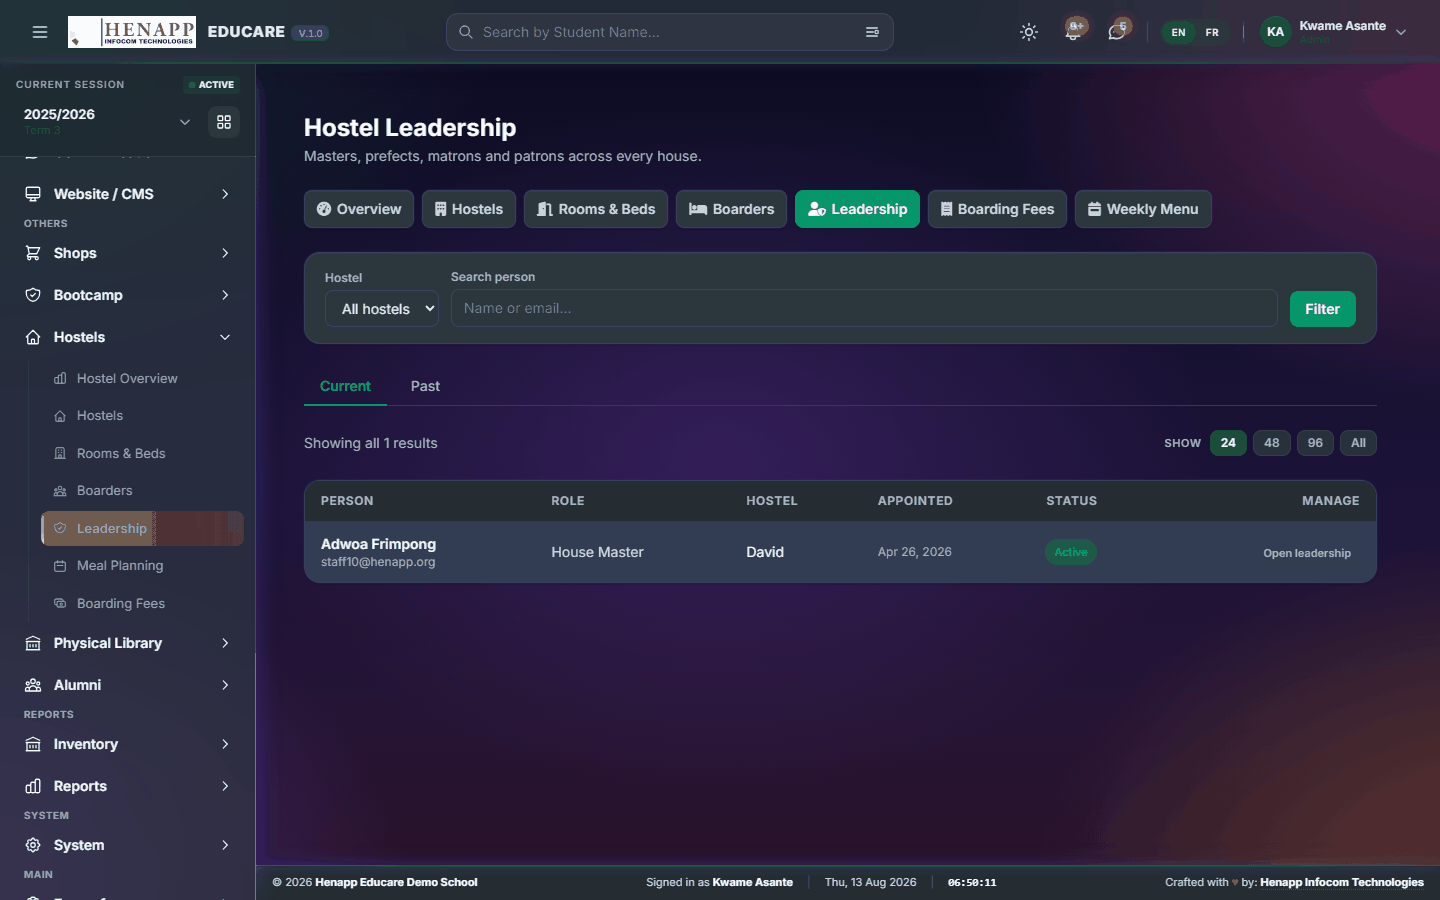
How to use it
- Open Hostels → Leadership.
- Appoint leaders for each hostel and save.
33.6 Meal Planning
The boarding meal plan for the week.
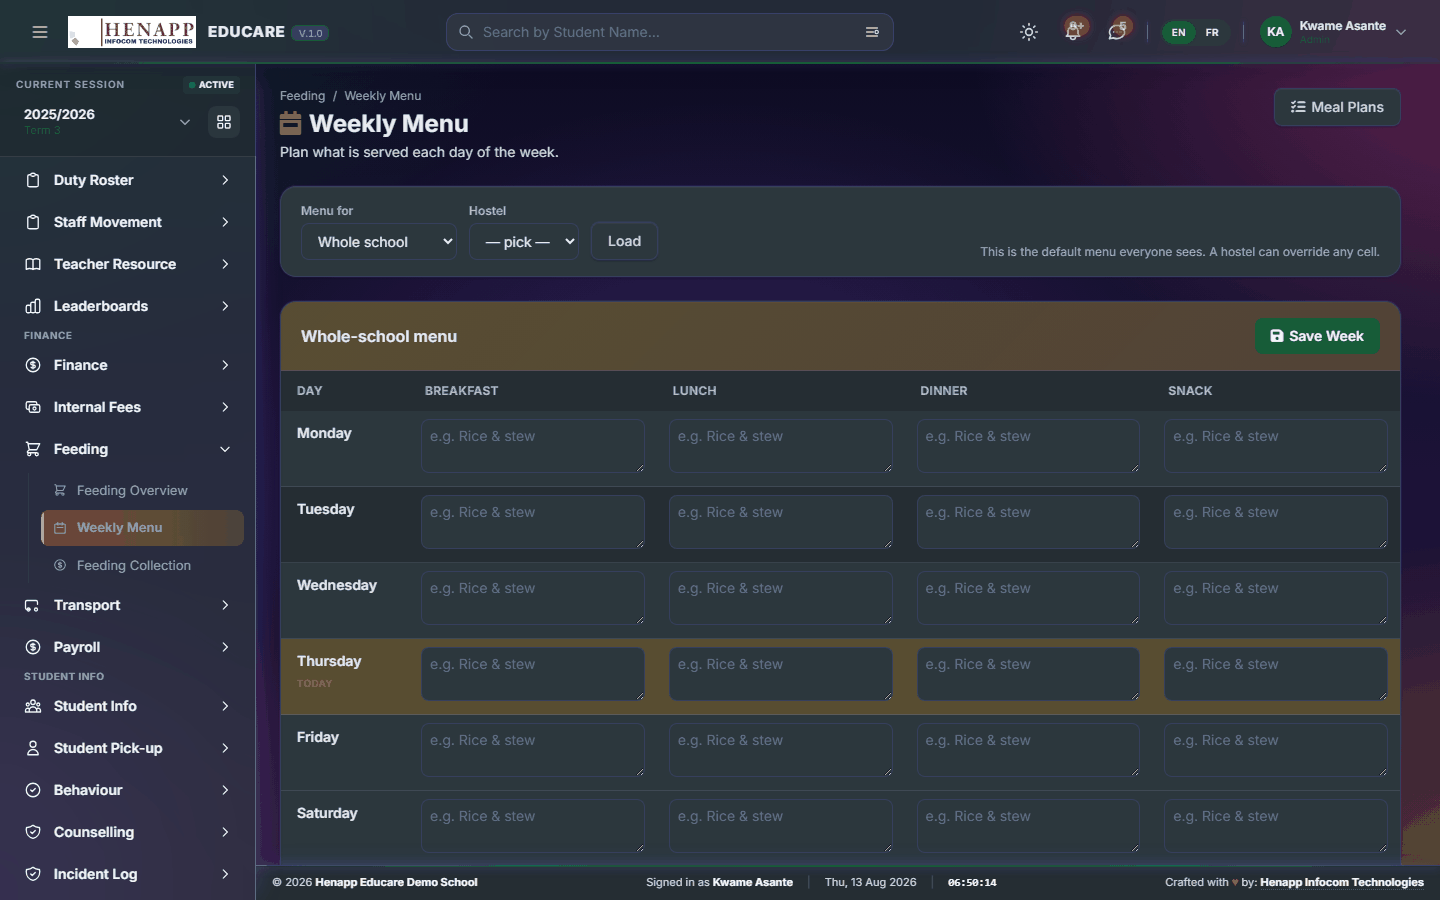
How to use it
- Open Hostels → Meal Planning.
- Set the meals for each day and save.
33.7 Boarding Fees
Boarding fees charged to boarders' accounts.
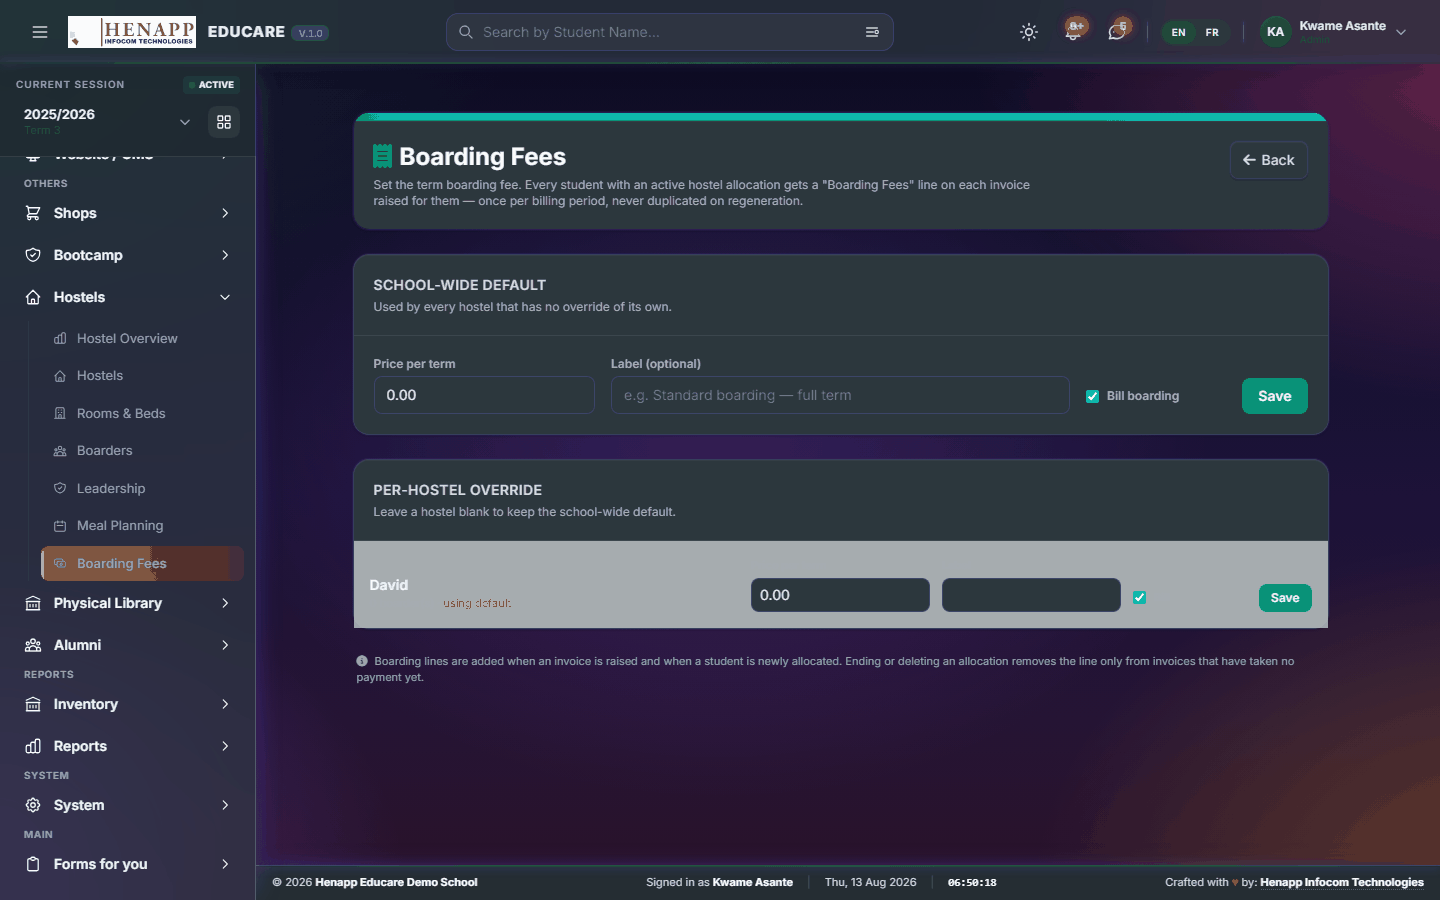
How to use it
- Open Hostels → Boarding Fees.
- Set the boarding fee for the term.
- Raise the charges for current boarders — they appear on the family account.
34. Physical Library
The physical library — the catalogue, loans and returns, fines and reservations.
Find it in the sidebar under Others → Physical Library.
34.1 Dashboard
The library at a glance — books out, overdue and reserved.
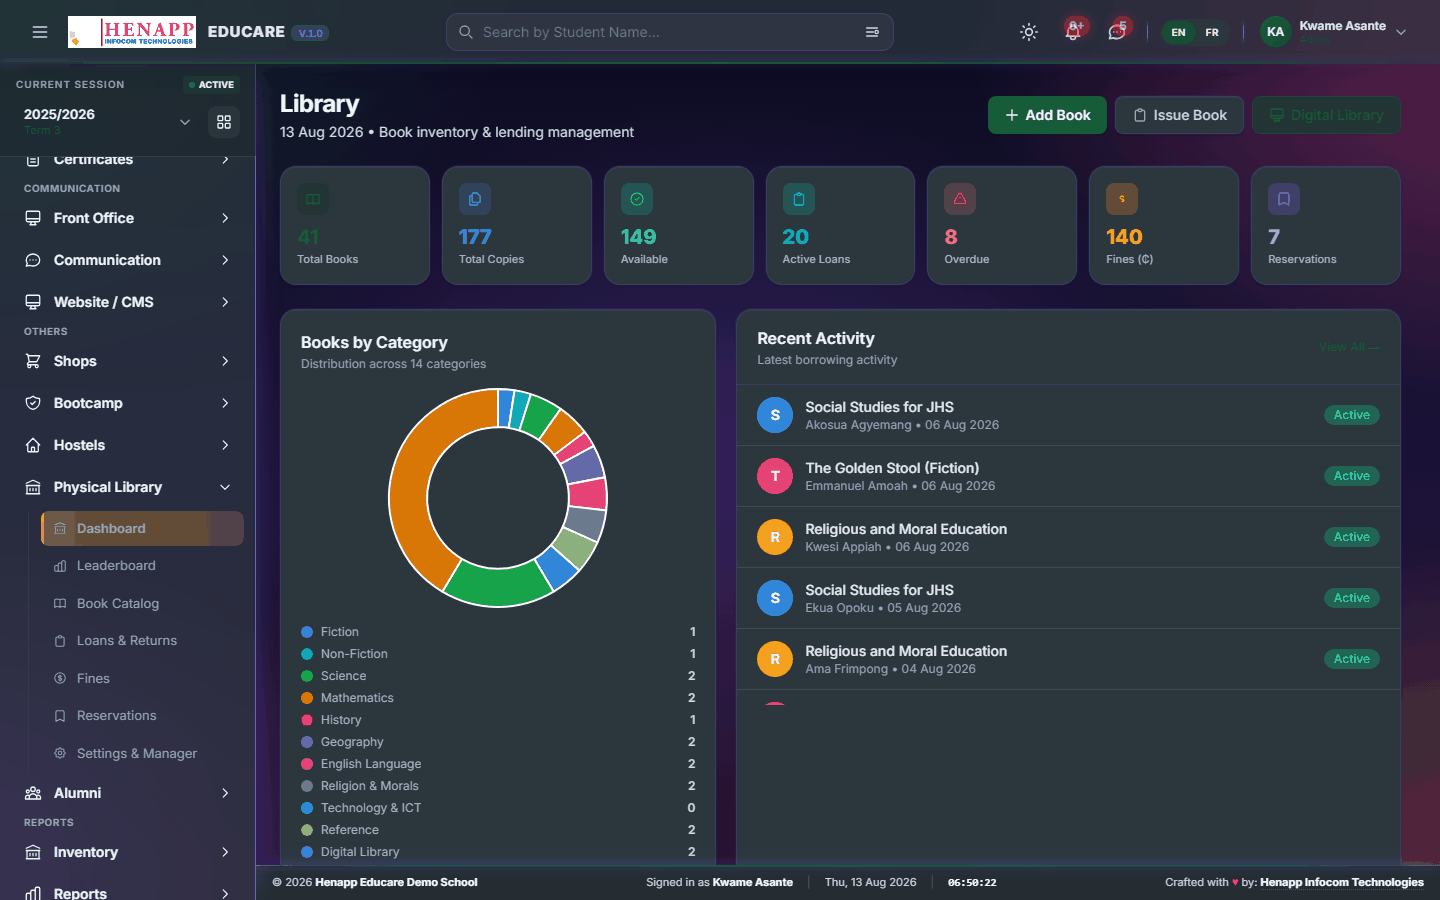
How to use it
- Open Physical Library → Dashboard.
- Read the loans, overdue items and reservations.
34.2 Leaderboard
The most active readers, by class and across the school.
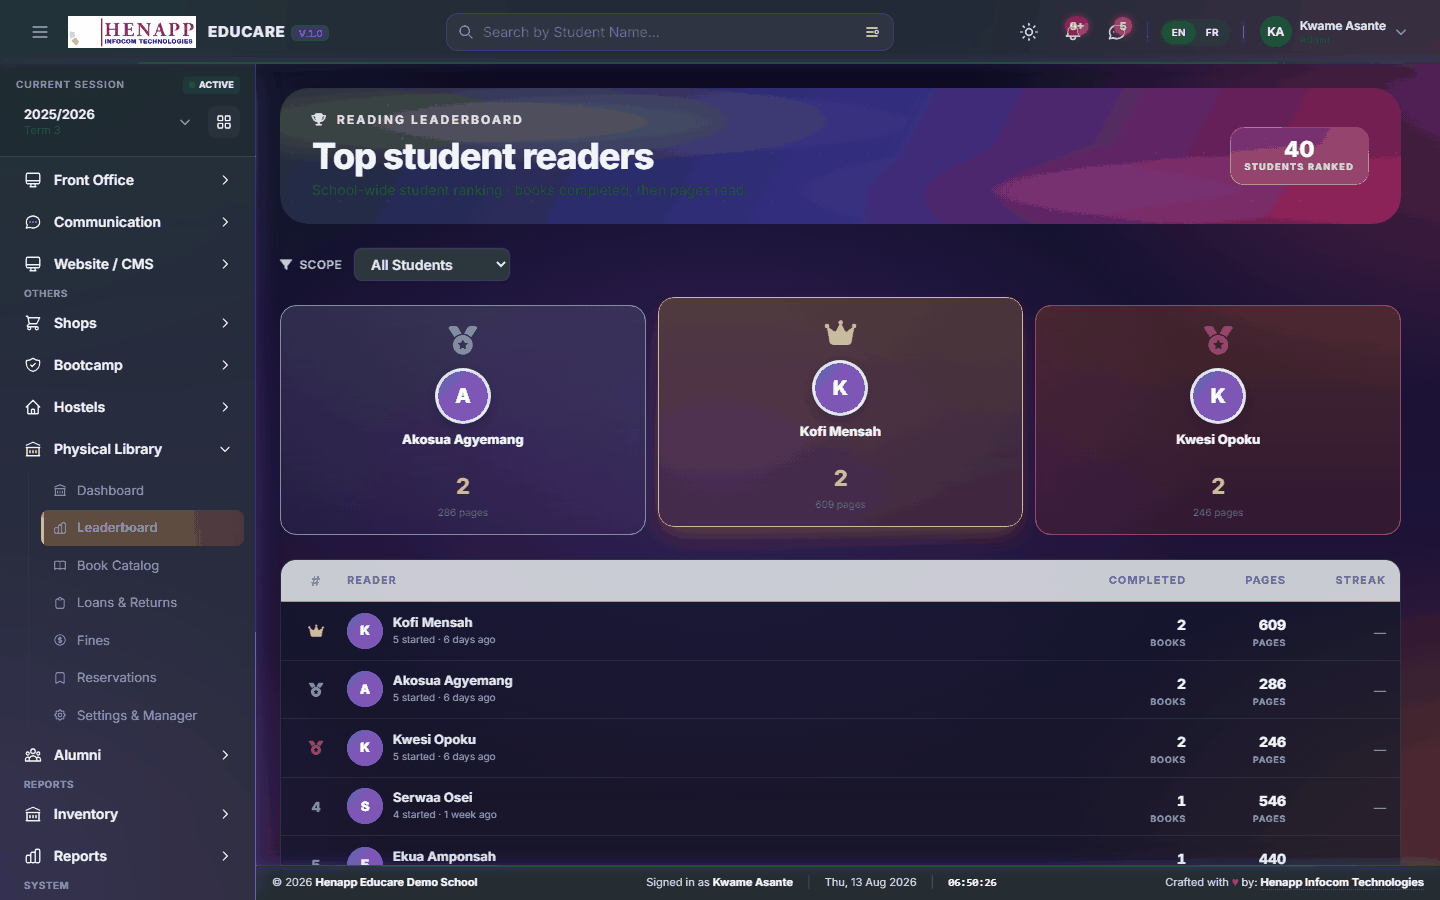
How to use it
- Open Physical Library → Leaderboard.
- Choose the period and read the standings.
34.3 Book Catalog
The catalogue — every title held, with its copies and where they are.
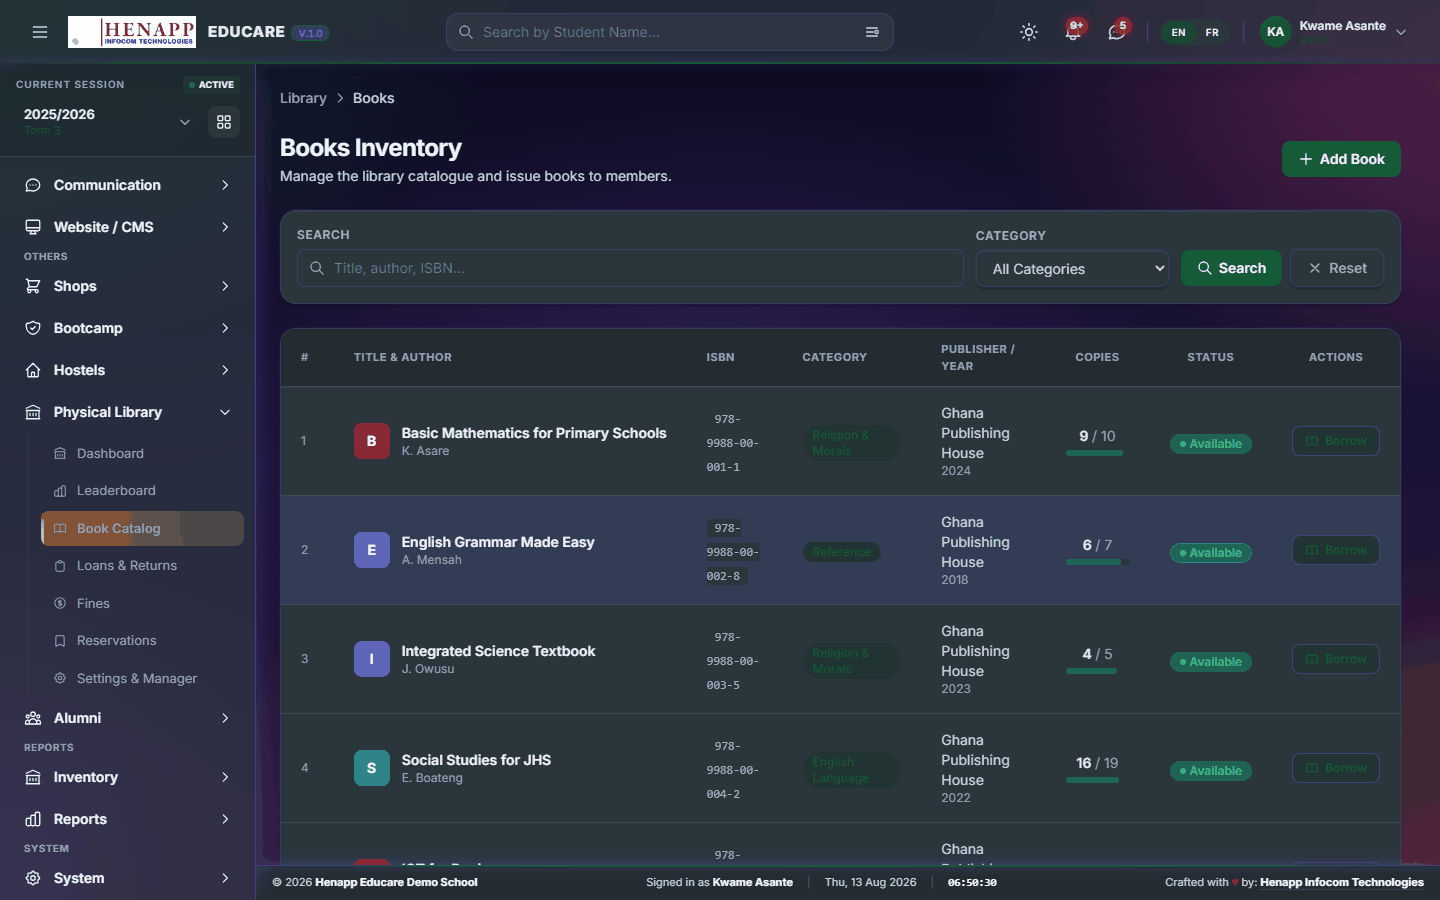
How to use it
- Open Physical Library → Book Catalog.
- Click Add Book and enter the title, author, ISBN, category and number of copies.
- Give it a shelf location so it can be found.
- Save. Search or filter the catalogue to find anything later.
34.4 Loans & Returns
Issuing books out and taking them back.
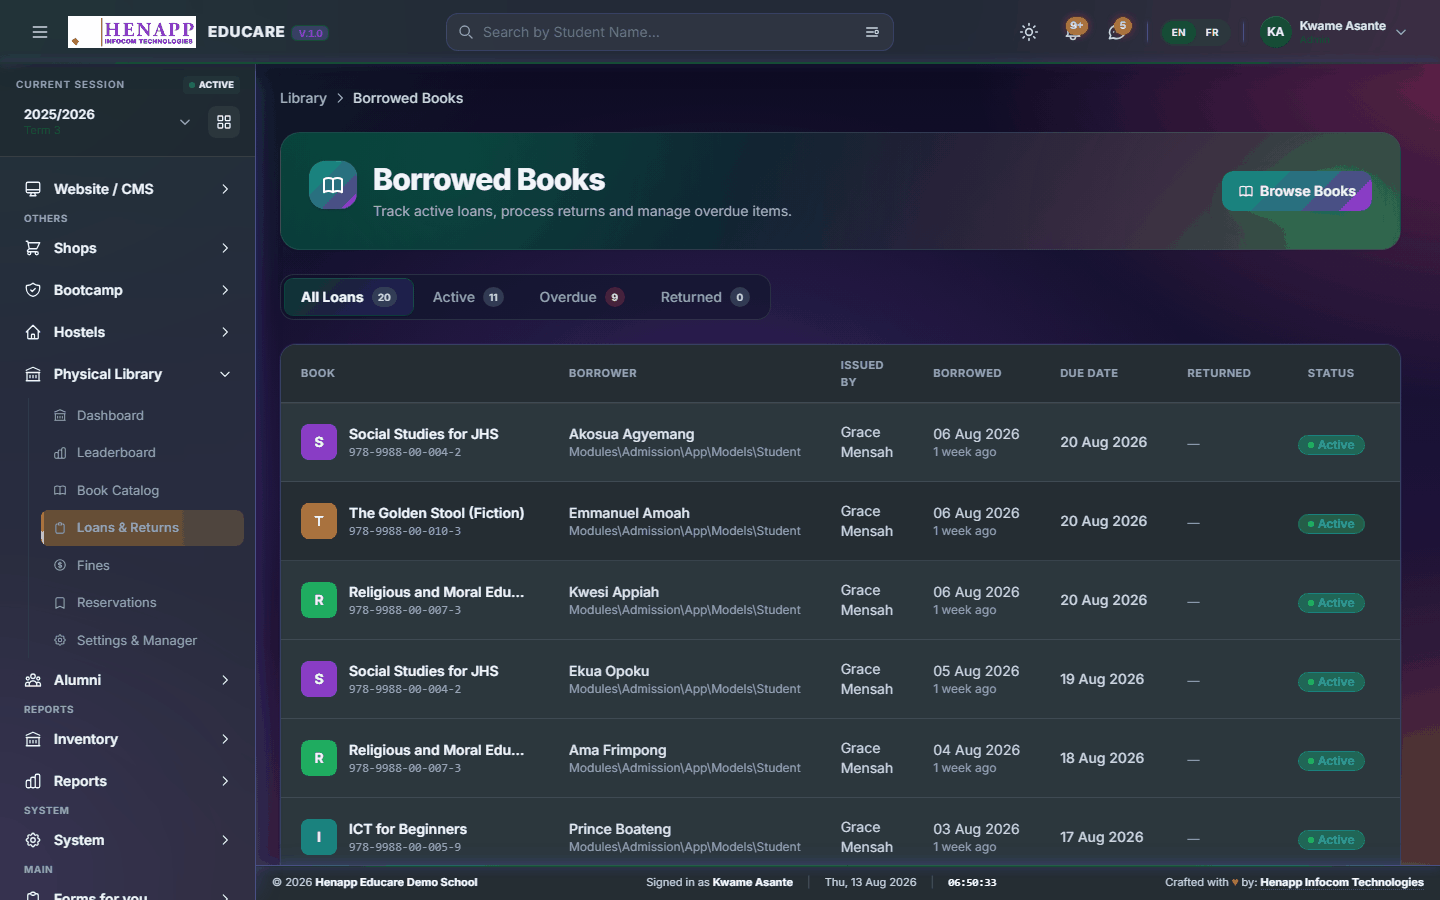
How to use it
- Open Physical Library → Loans & Returns.
- To issue: find the borrower, find the book, and confirm. The due date is set from your loan period.
- To return: find the loan and mark it returned. Any fine due is calculated then.
- Overdue loans are listed separately so they can be chased.
34.5 Fines
Charges for overdue or damaged books.
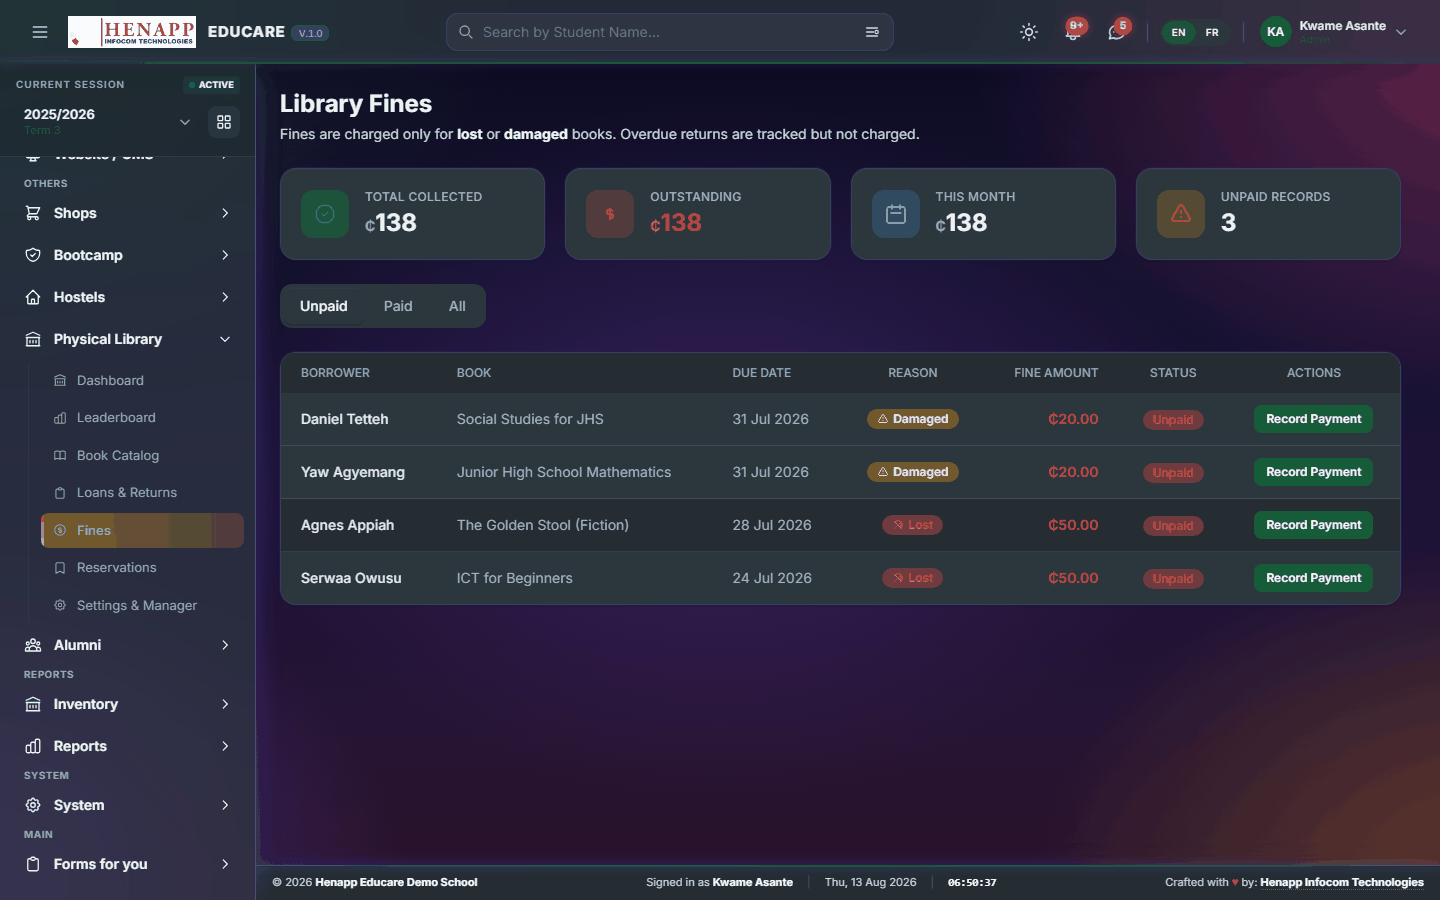
How to use it
- Open Physical Library → Fines.
- Review outstanding fines by borrower.
- Record payment, or waive a fine with a reason.
34.6 Reservations
Requests for books that are currently out.

How to use it
- Open Physical Library → Reservations.
- Review the queue for each title.
- When a copy comes back, notify the next person waiting.
34.7 My Orders
Books you have reserved and where you are in the queue.
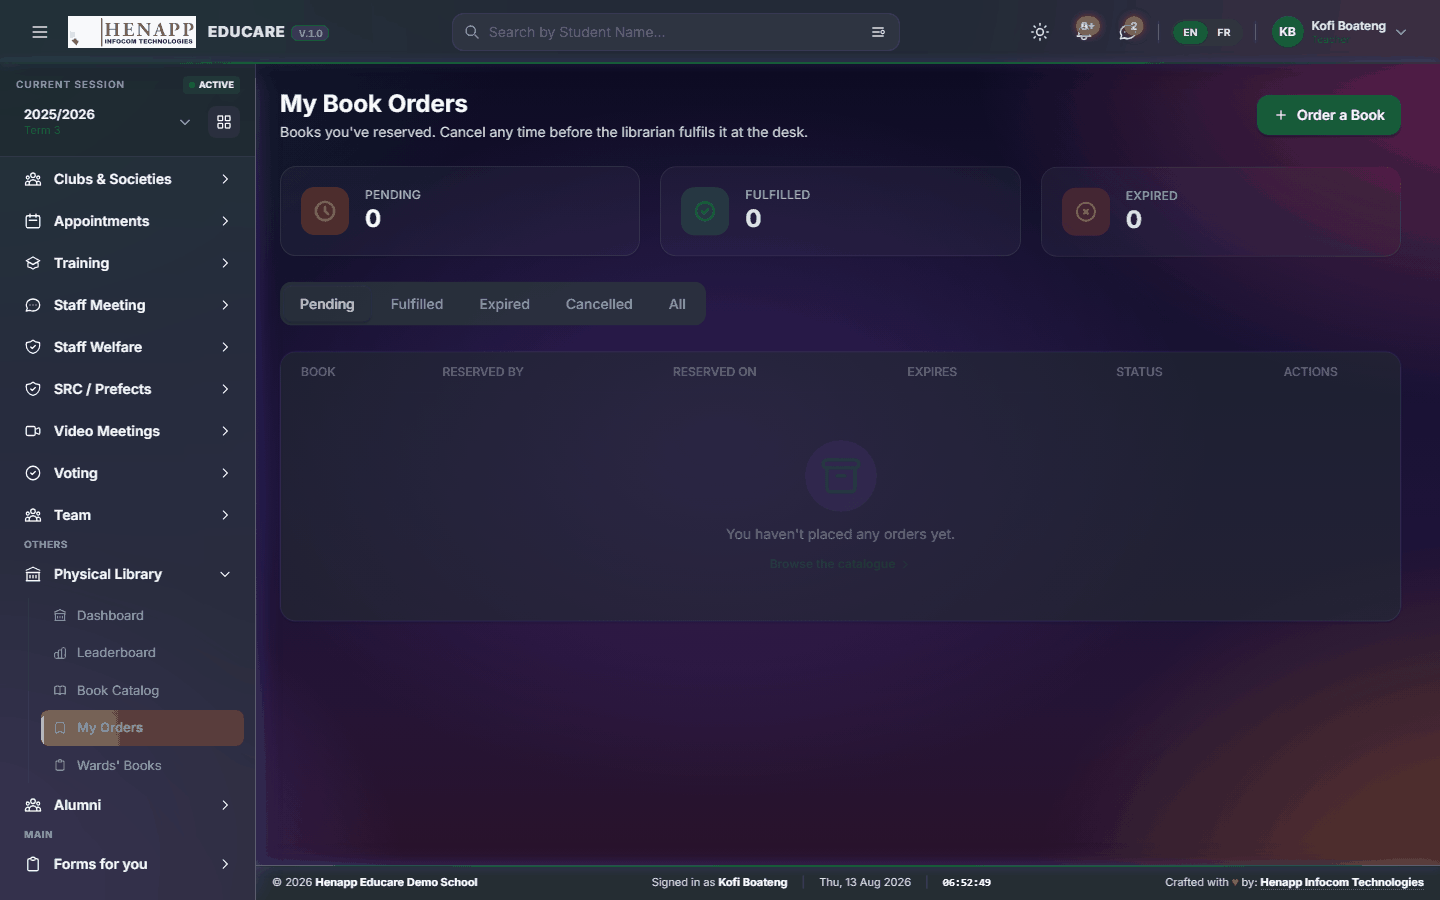
How to use it
- Open Physical Library → My Orders.
- Read your reservations and their position.
- Cancel one you no longer need.
34.8 Wards' Books
What your children — or the learners you teach — currently have on loan.
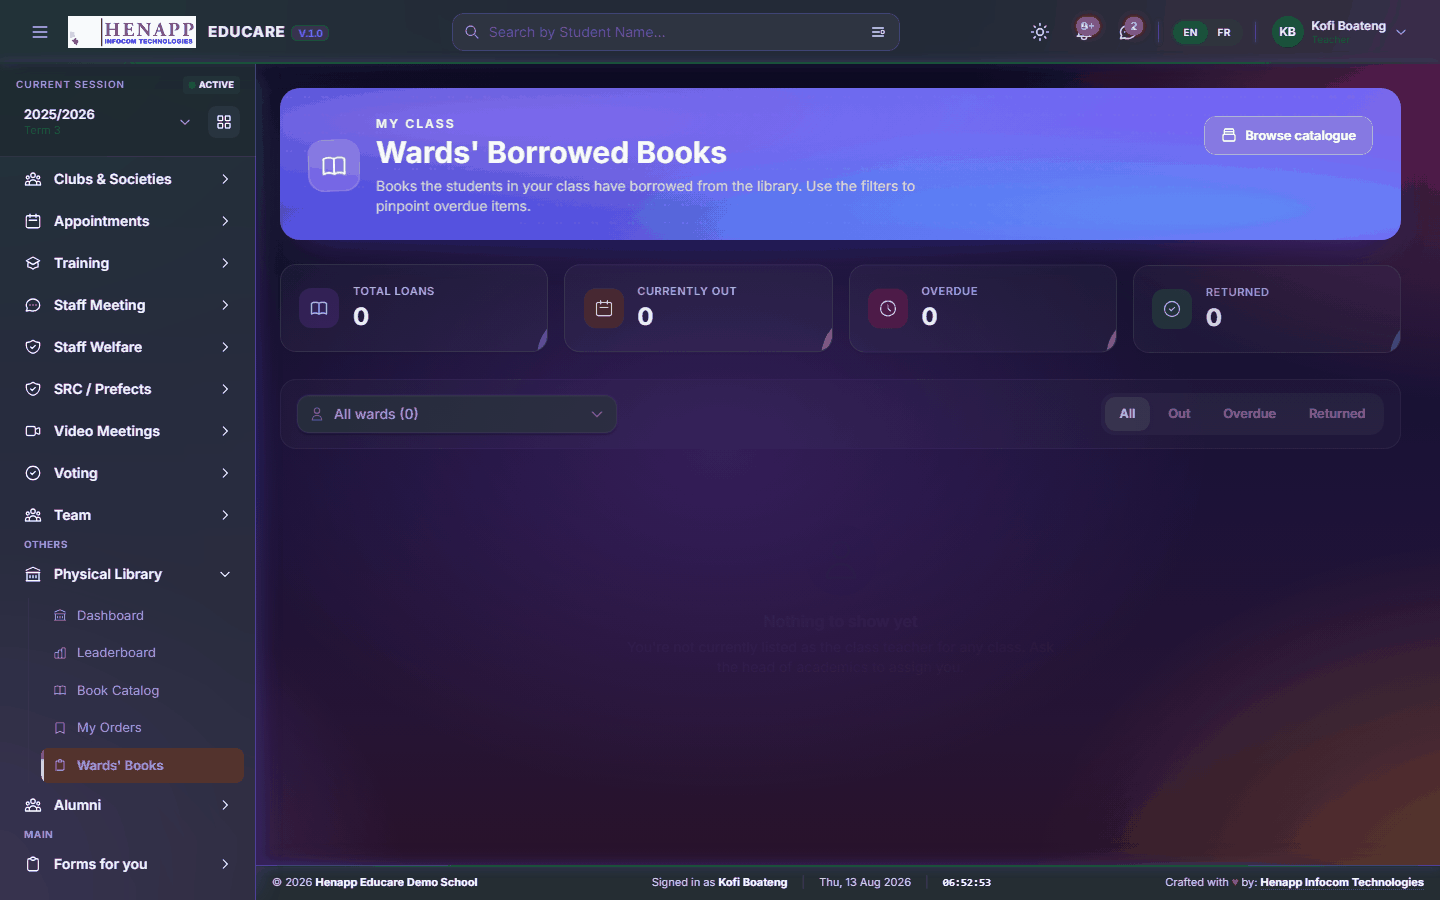
How to use it
- Open Physical Library → Wards' Books.
- Read the loans and their due dates.
- Anything overdue is flagged.
34.9 Settings & Manager
How the library runs — loan periods, borrowing limits and fine rates.
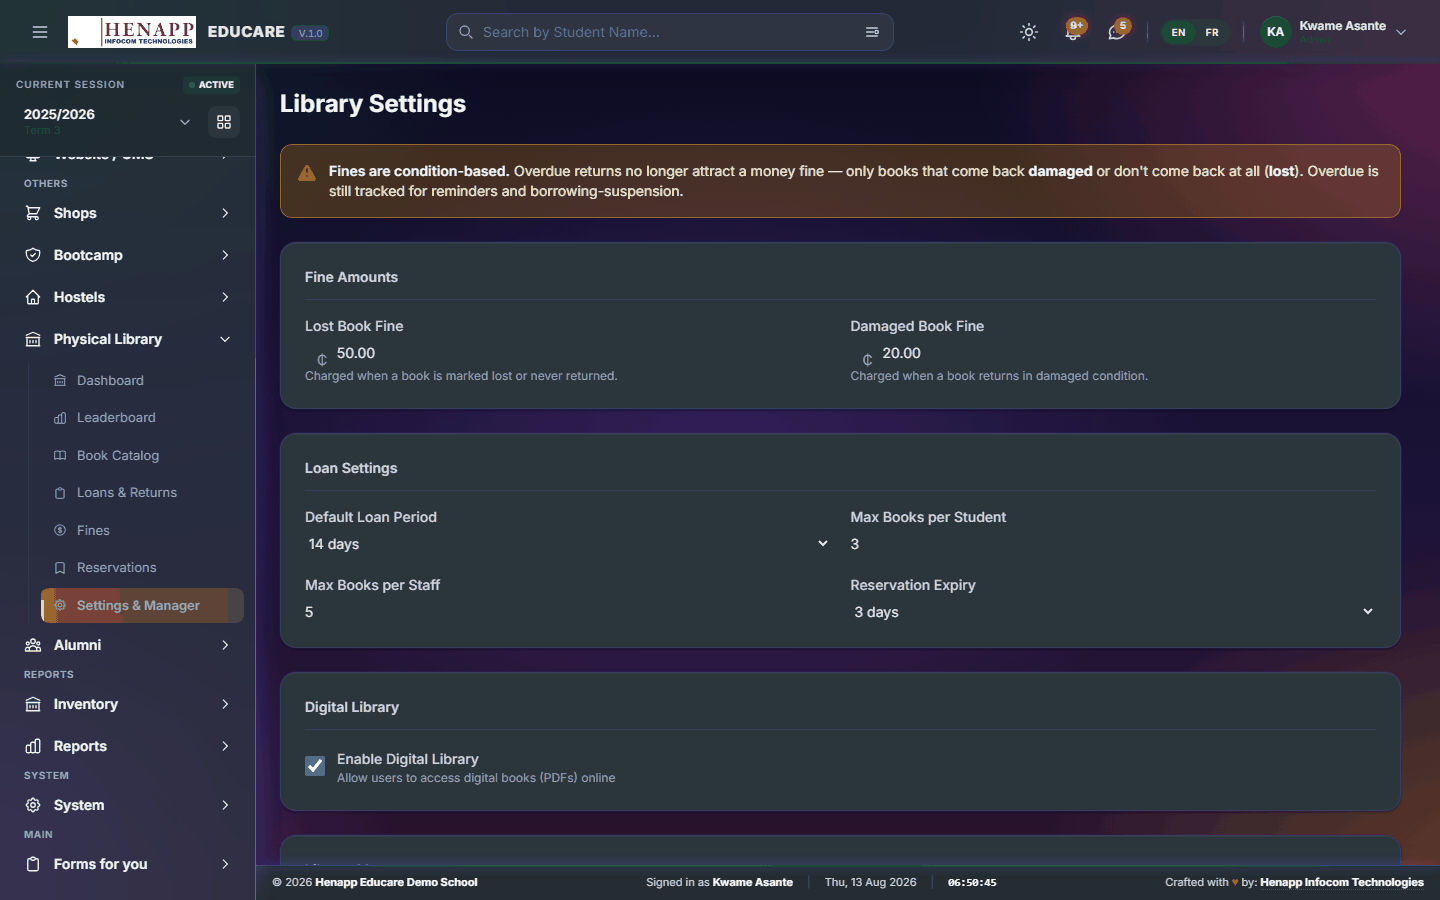
How to use it
- Open Physical Library → Settings & Manager.
- Set the loan period and how many books each category of borrower may hold.
- Set the fine rate for overdue items.
- Save.
35. Alumni
Former learners: year groups, members, events, dues and the association's own leadership.
Find it in the sidebar under Others → Alumni.
35.1 Alumni Dashboard
The alumni association at a glance.
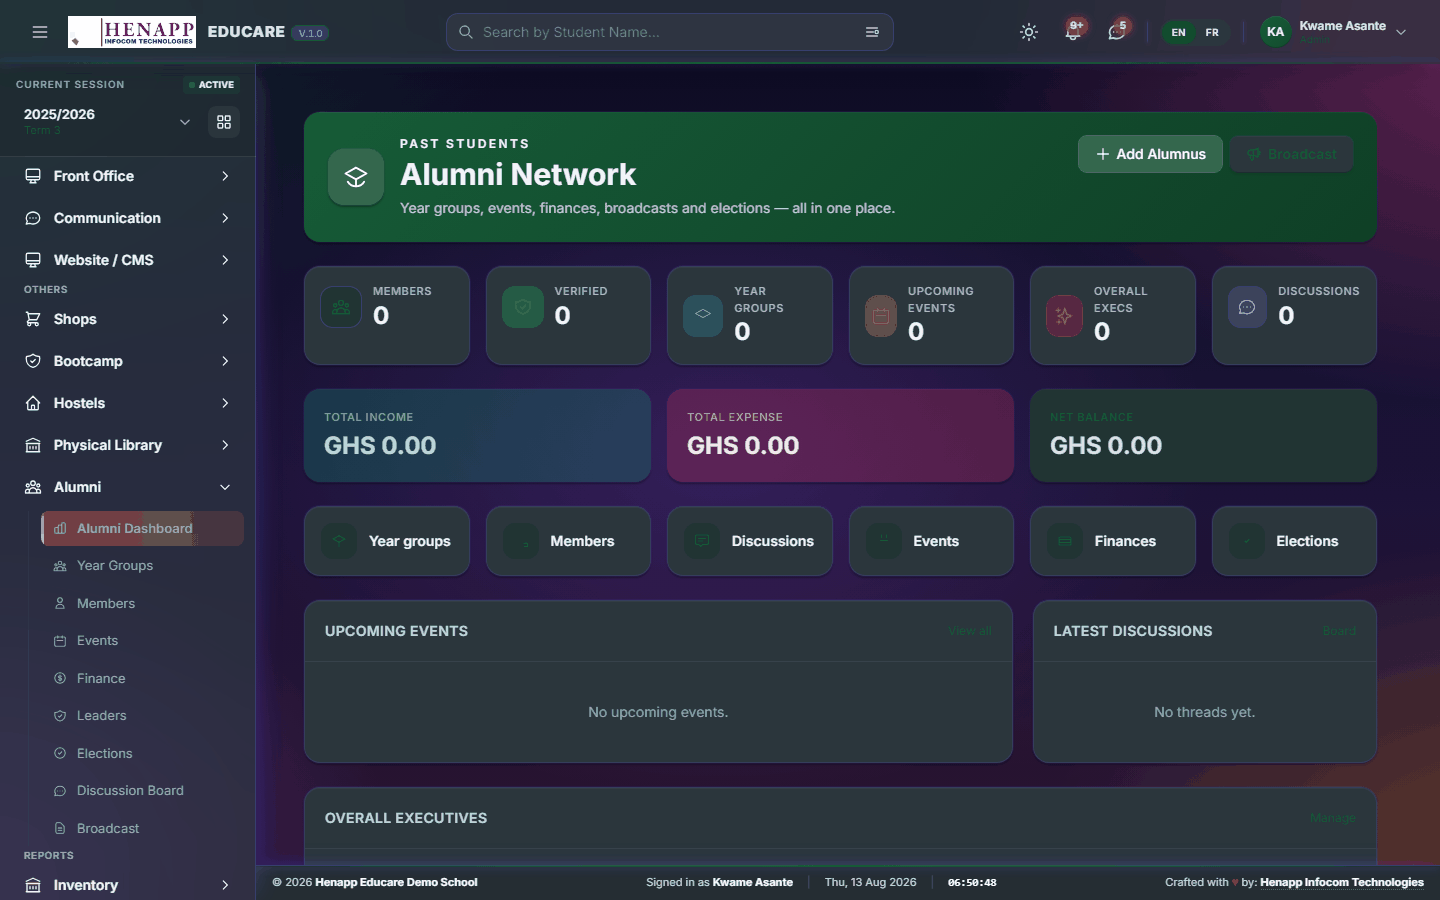
How to use it
- Open Alumni → Alumni Dashboard.
- Read membership, dues and upcoming events.
35.2 Year Groups
Alumni grouped by the year they left.
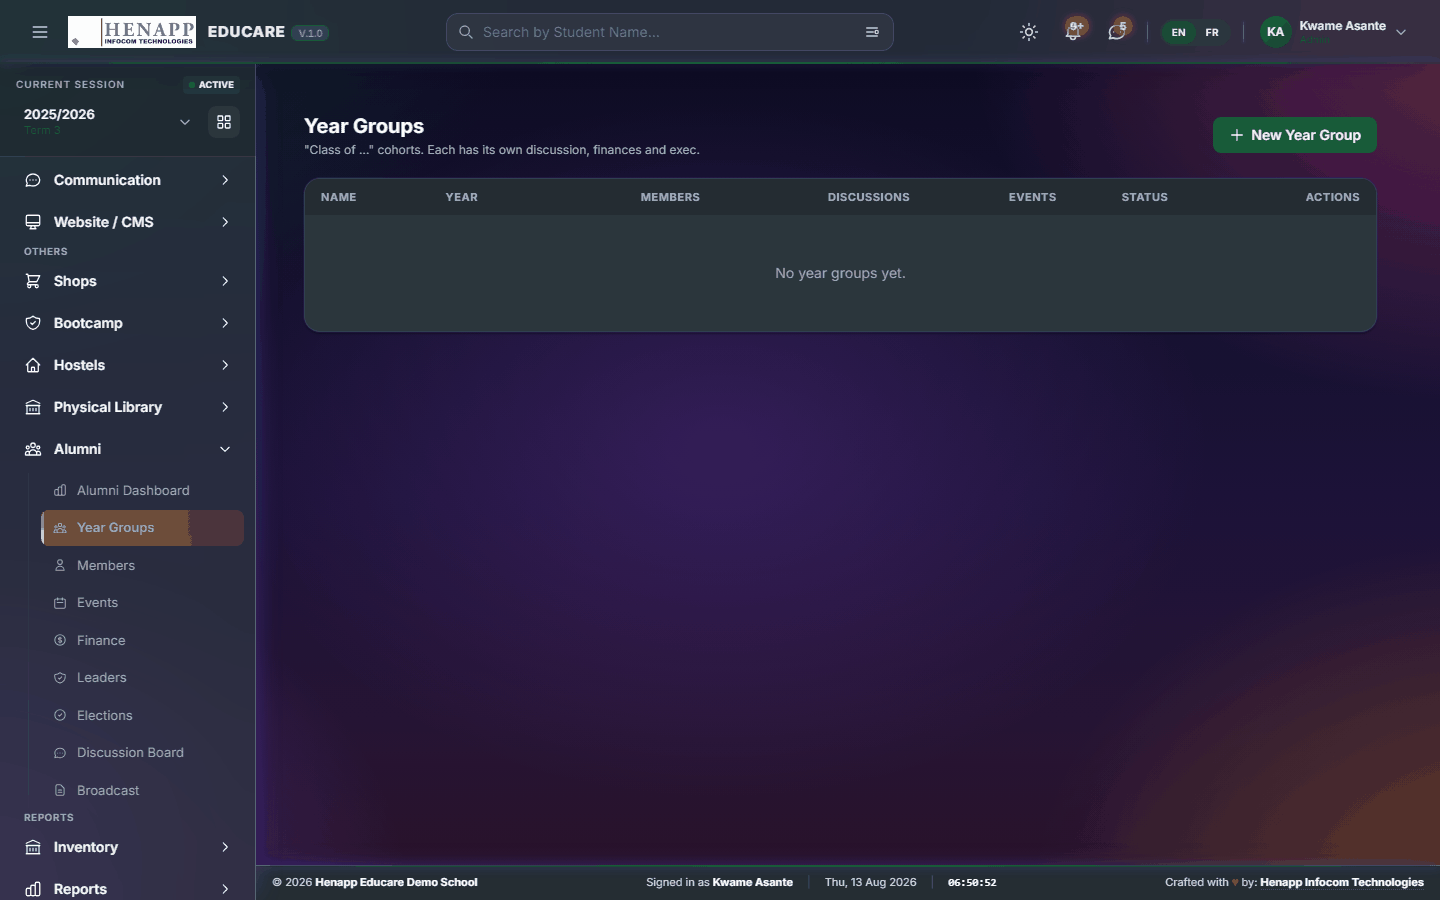
How to use it
- Open Alumni → Year Groups.
- Add a year group and see its members.
35.3 Members
Alumni records and contact details.
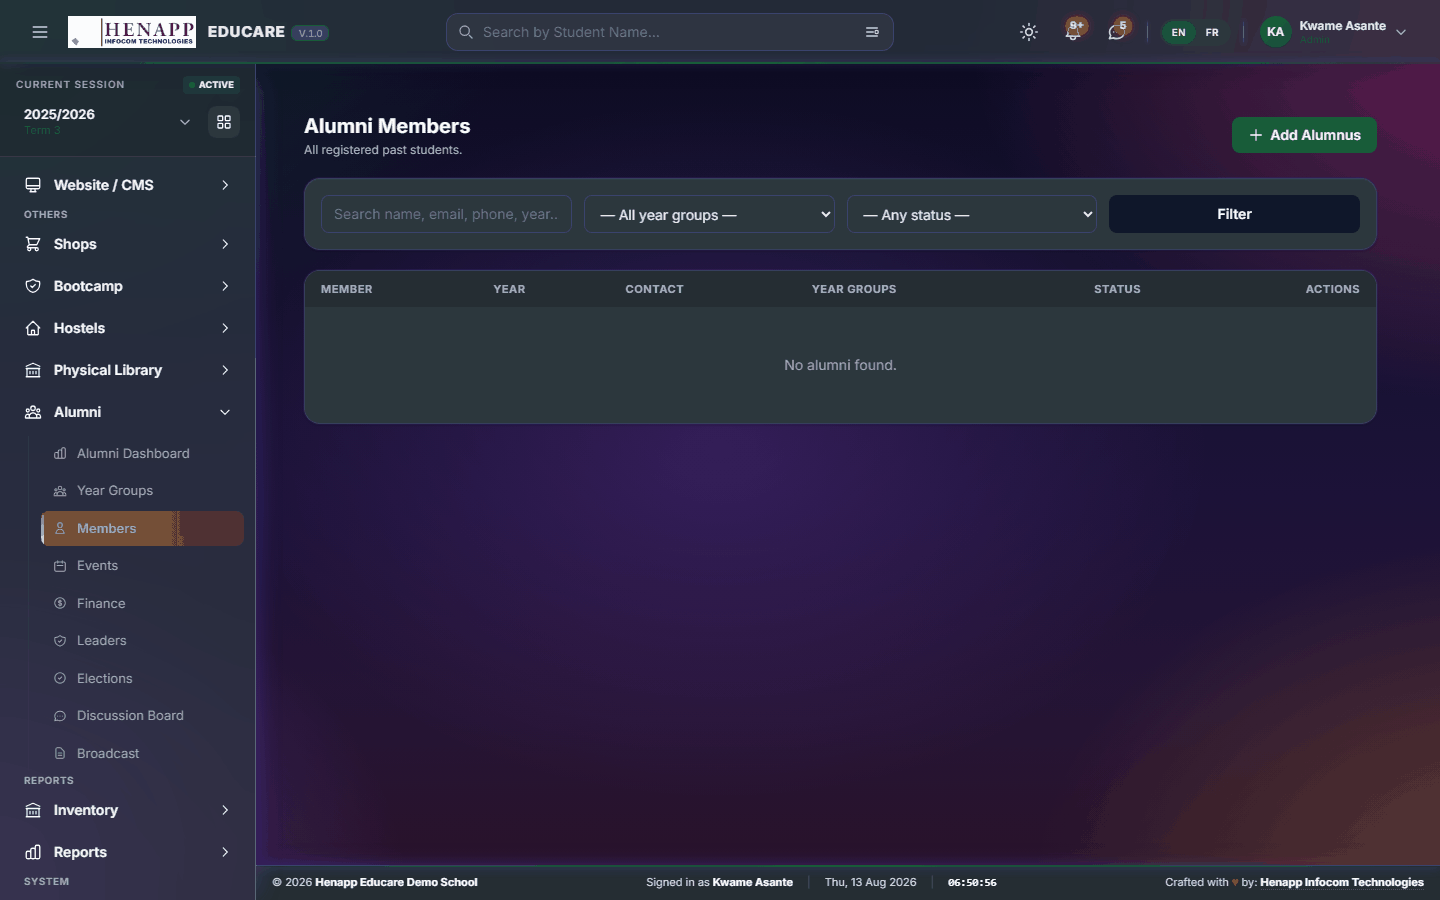
How to use it
- Open Alumni → Members.
- Search or filter by year group.
- Add a member manually, or let graduating learners flow in from the student roll.
- Keep contact details current — this is what broadcasts use.
35.4 Events
Reunions and association events.
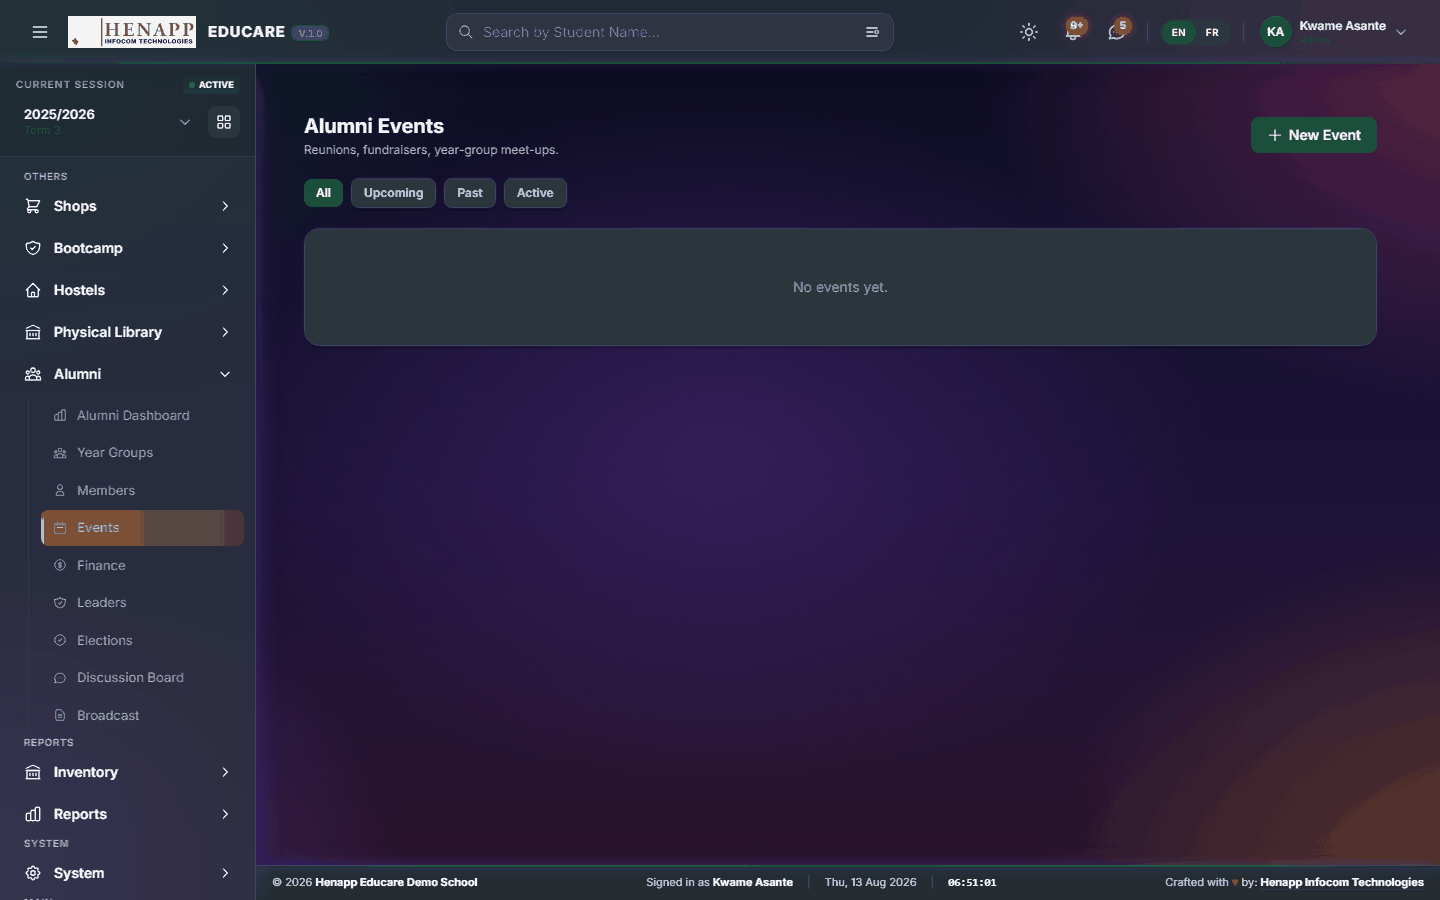
How to use it
- Open Alumni → Events.
- Create the event with its date, venue and description.
- Publish it and invite the year groups concerned.
35.5 Finance
Association money — dues in and spending out.

How to use it
- Open Alumni → Finance.
- Record each contribution or expense with its date and description.
- Read the running balance and export the statement.
35.6 Leaders
The association's officers.
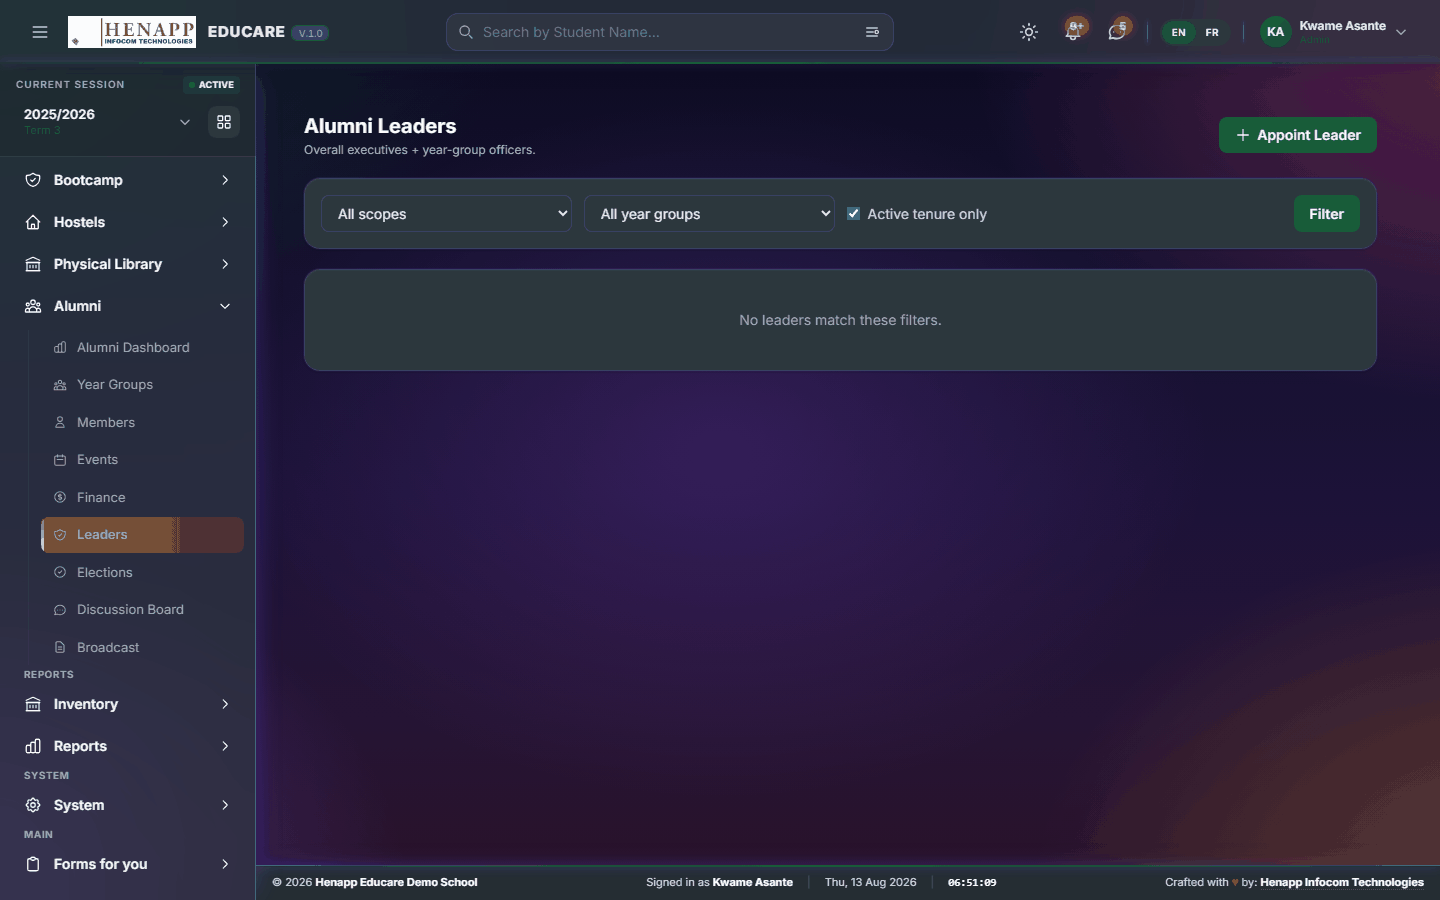
How to use it
- Open Alumni → Leaders.
- Record each officer, their position and their term.
35.7 Elections
Elections for association office.
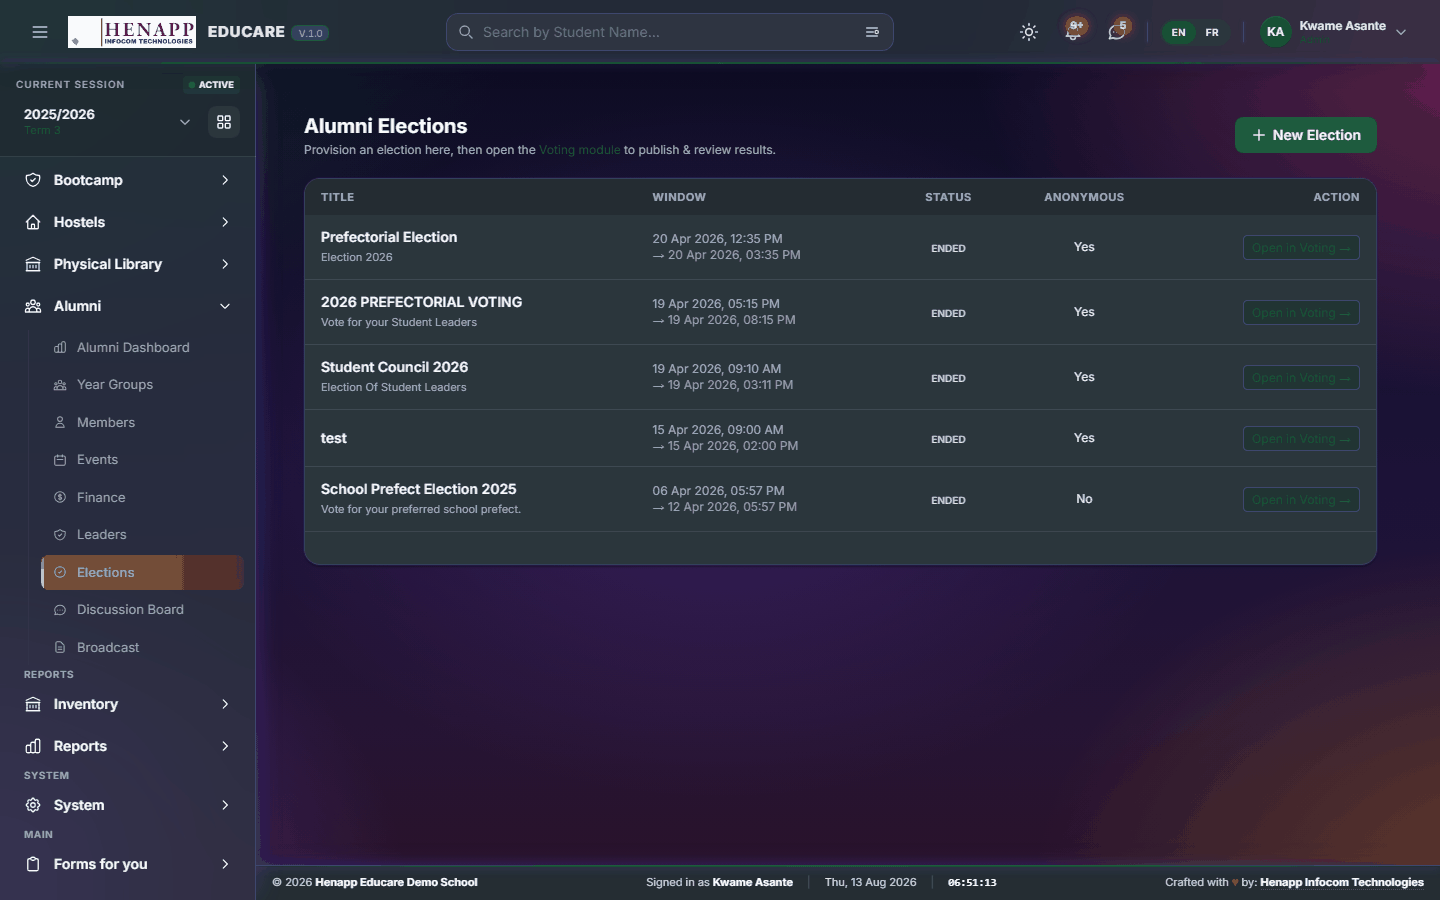
How to use it
- Open Alumni → Elections.
- Create the election, add the candidates and set who may vote.
- Open voting, then publish the result when it closes.
35.8 Broadcast
A message to alumni — all of them, or particular year groups.

How to use it
- Open Alumni → Broadcast.
- Choose the year groups to reach.
- Write the message and choose the channel.
- Check the recipient count, then send.
36. Inventory
School property and consumables — what is held, where it is, and what has been issued.
Find it in the sidebar under Reports → Inventory.
36.1 Inventory
School property and consumables — what is held, where it is, and what has been issued to whom.
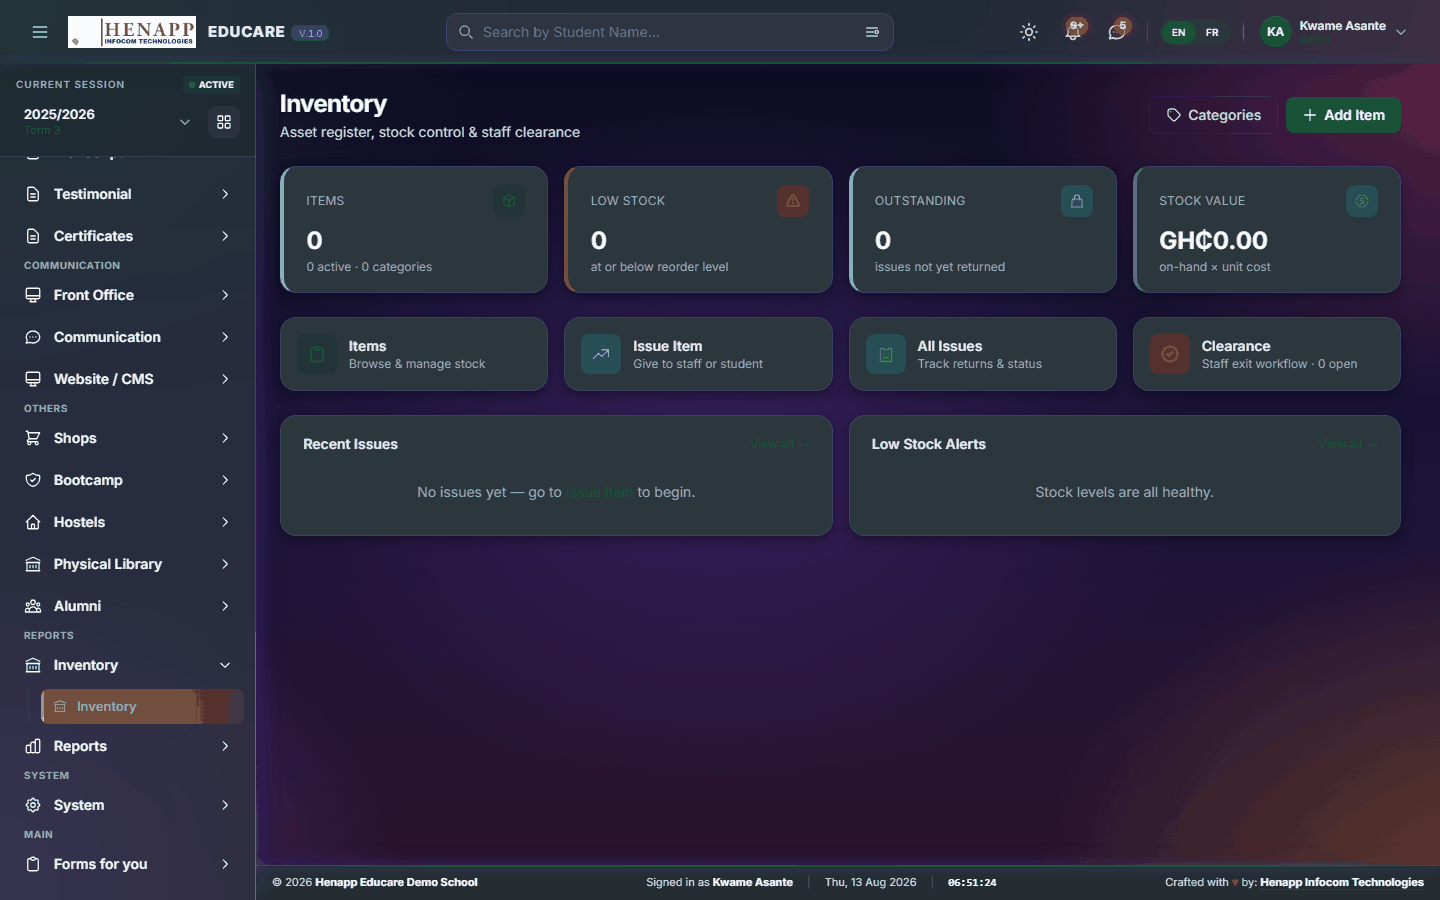
How to use it
- Open Inventory.
- Add each item with its category, quantity, location and value.
- Record an issue when something is given out — to a department or a member of staff.
- Record a receipt when stock comes in.
- Items at or below their reorder level are flagged for restocking.
- Export the stock list for a physical count.
37. Reports
Reporting across the whole system, and the analytics behind it.
Find it in the sidebar under Reports.
37.1 Reports
The reporting centre — academic, financial, attendance and staff reports in one place.
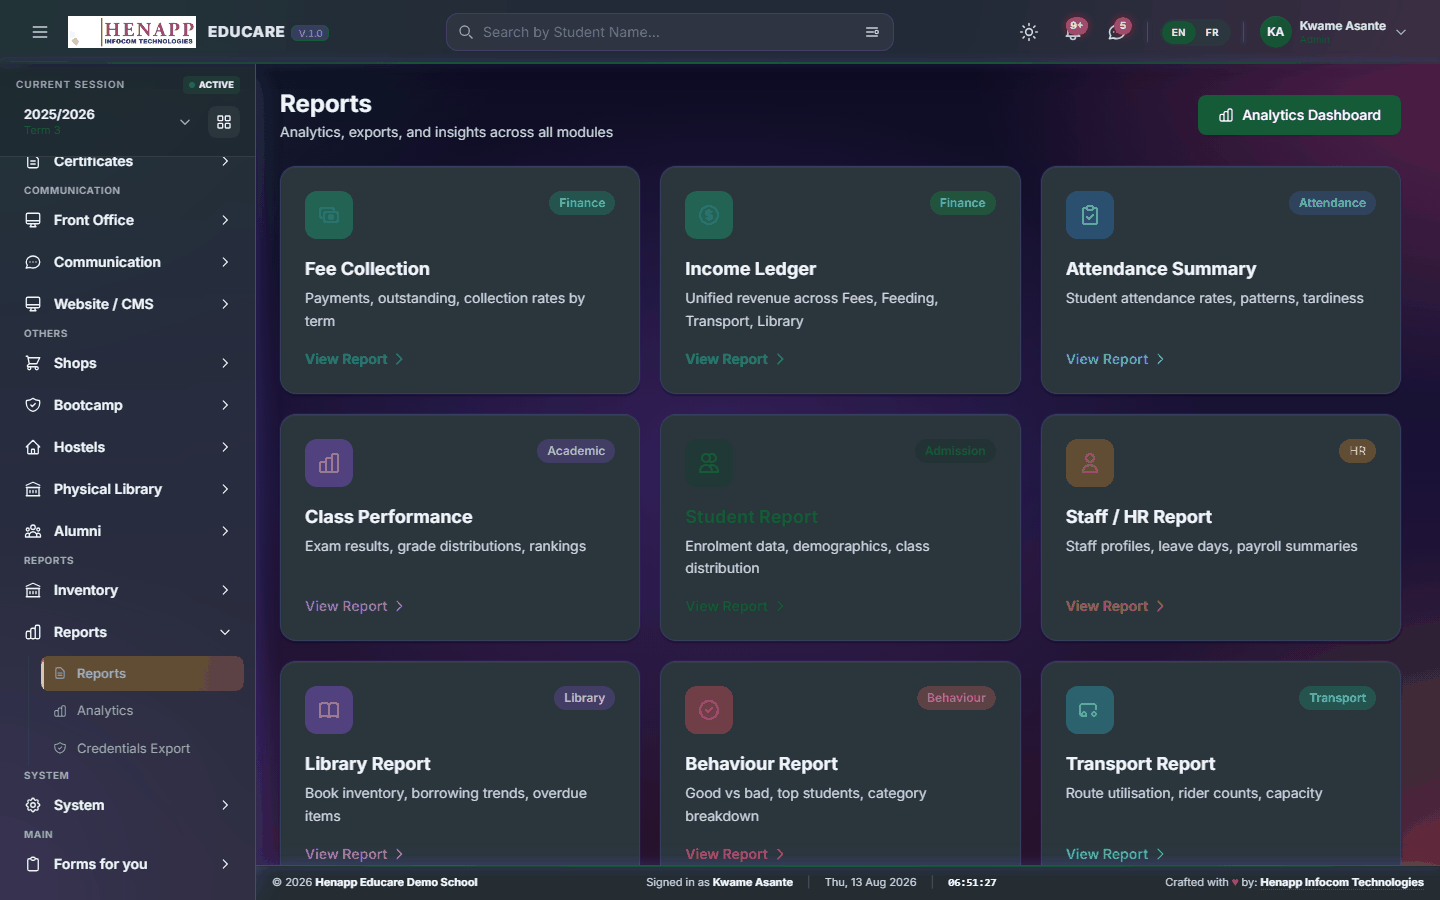
How to use it
- Open Reports → Reports.
- Choose the report you need.
- Set the period, class or other filters it asks for.
- Generate it, read it on screen, then export to PDF or Excel.
38. My Schedule
Your own teaching week and the school calendar behind it.
Find it in the sidebar under My Portal → My Schedule.
38.1 My Timetable
Your own teaching week.
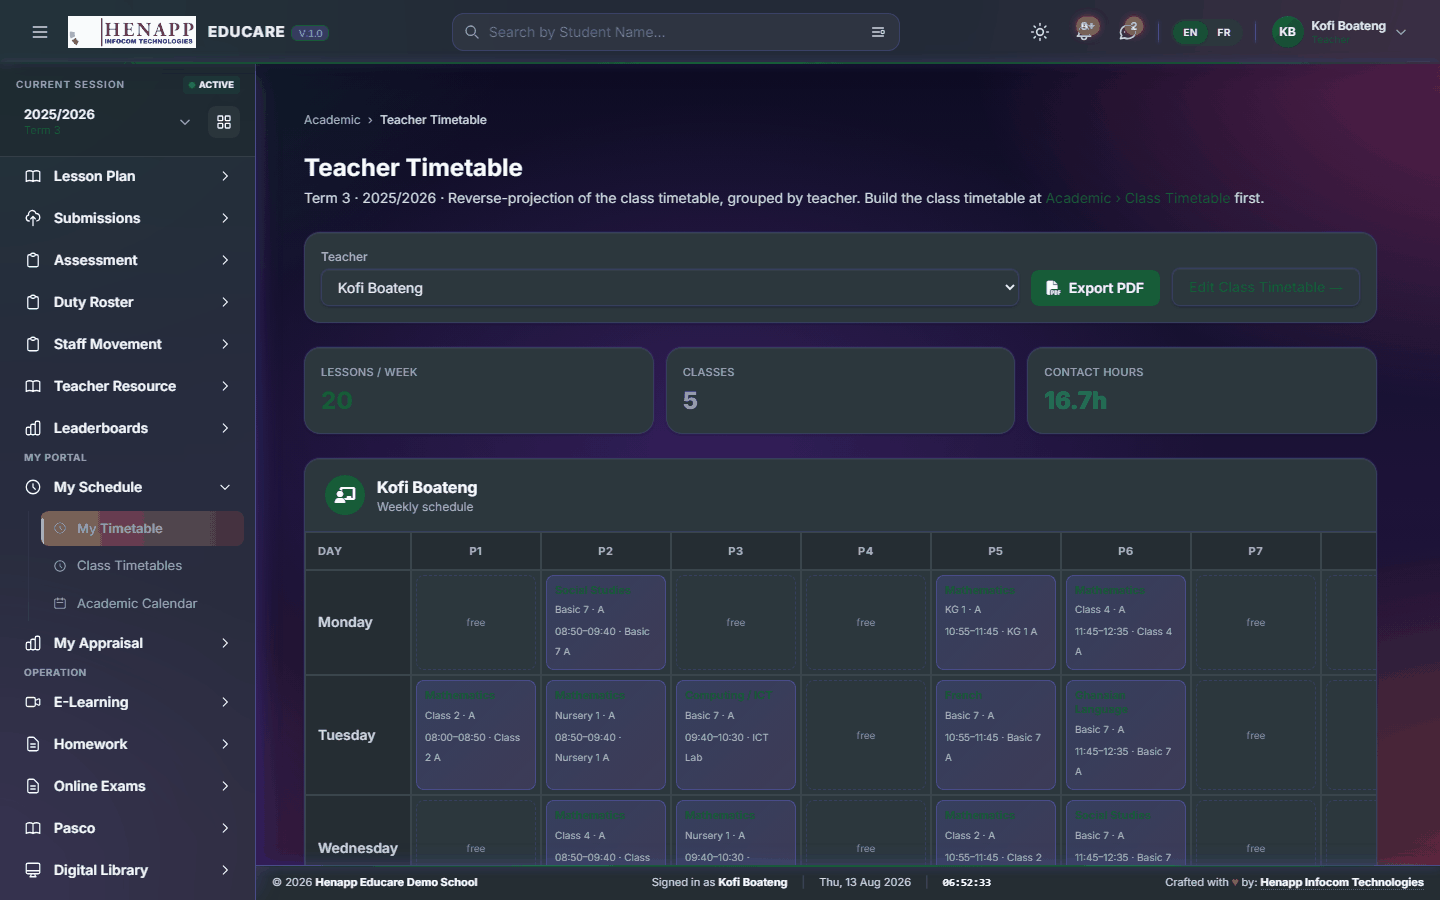
How to use it
- Open My Schedule → My Timetable.
- Read your week; print it if you want a copy at your desk.
38.2 Academic Calendar
The school calendar — terms, holidays, examinations and events.
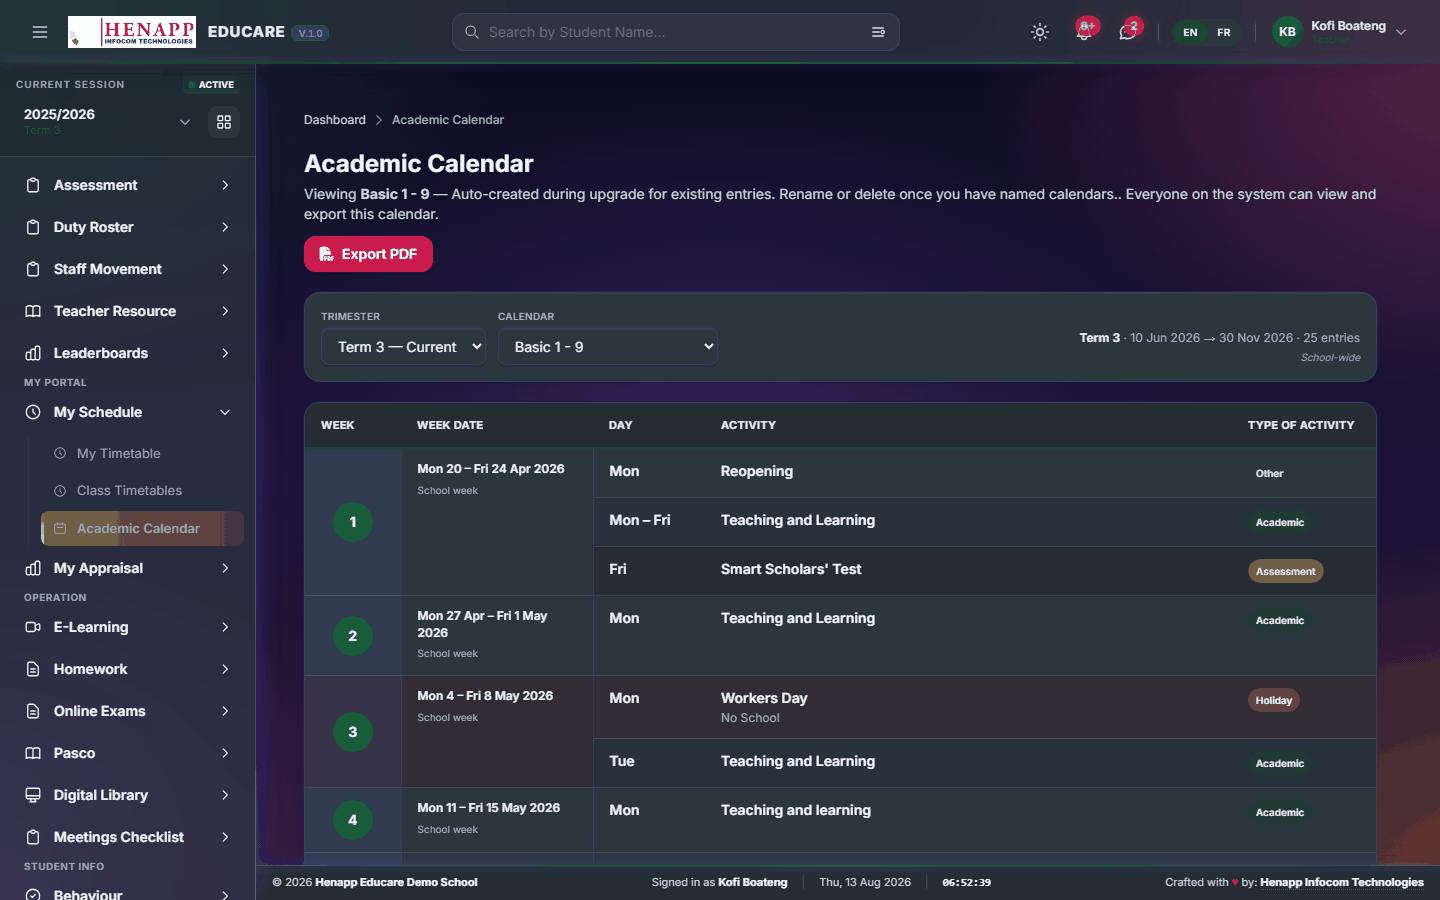
How to use it
- Open My Schedule → Academic Calendar.
- Read the term ahead; print it if useful.
39. Getting help
If a page does not behave as this guide describes, or you believe you are missing a menu you should have, contact your school office first — most access questions are settled by an administrator adjusting your role.
- A menu is missing — your role does not include it. Ask an administrator.
- A list is empty — check the academic year and term in the top bar before anything else.
- A page refuses to load — sign out, sign back in, and try once more before reporting it.