
This guide covers every menu you can see on your own screen, in the order it appears in your sidebar. Each entry explains what the page is for and the exact steps to carry out its actions. For parents and guardians.
1. Signing in
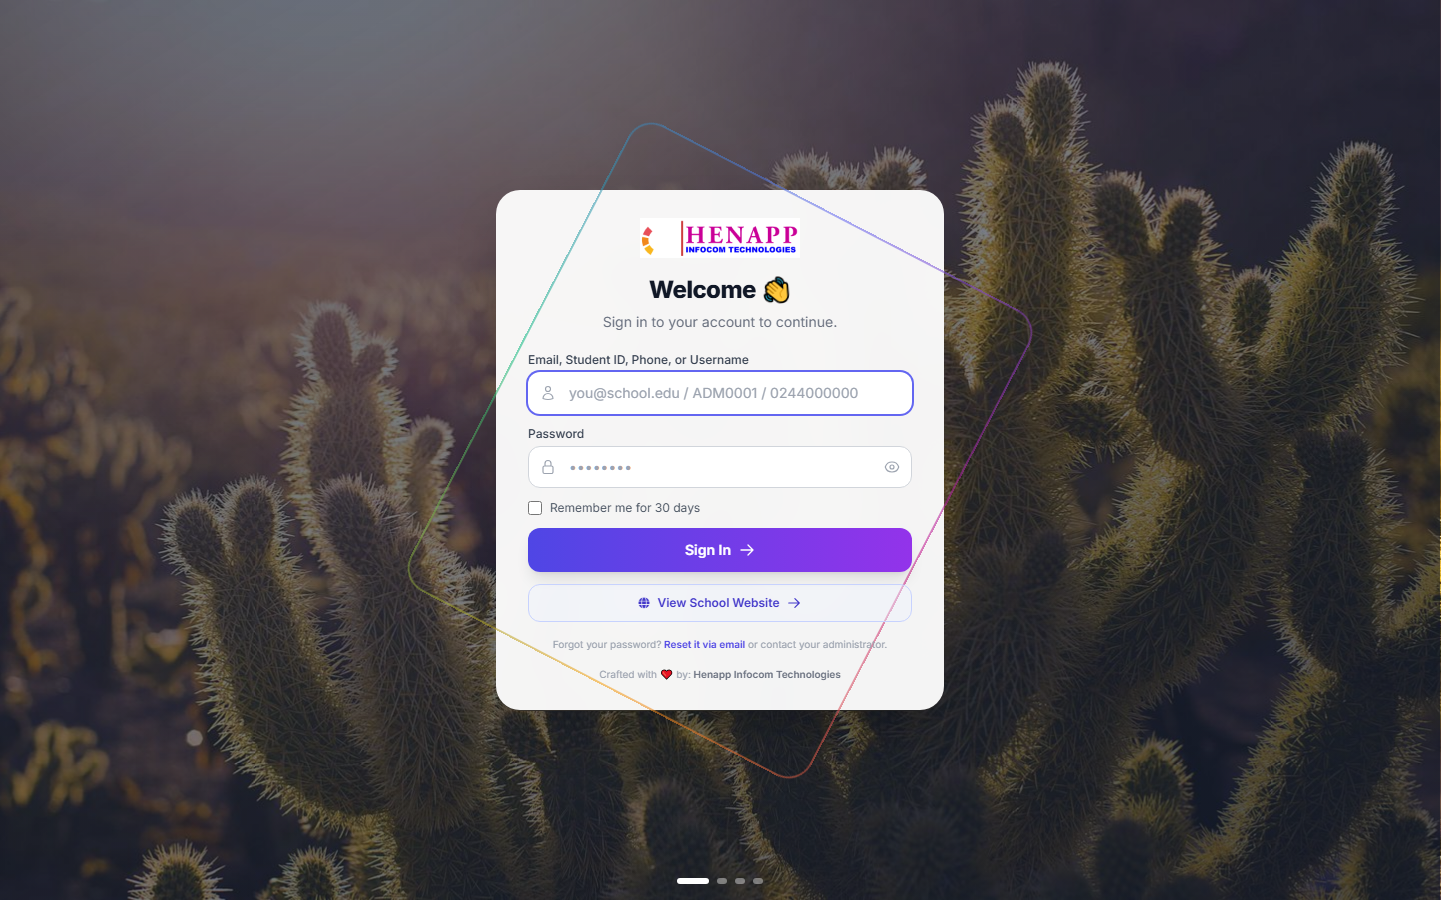
Your school gives you a web address, your email or username, and a first-time password. Open the address in any modern browser — Chrome, Edge, Safari or Firefox — on a phone, tablet or computer.
How to sign in
- Open your school portal address. If you were given a link, tap it.
- Type your email address or username in the first box.
- Type your password in the second box. Passwords are case-sensitive.
- Tick "Remember me" only on a device nobody else uses.
- Click Sign In.
If you forget your password
- Click "Forgot password?" on the sign-in page — if your school has email set up, a reset link is sent to you.
- Otherwise ask the school office to reset it. They can issue you a new temporary password.
The system asks you to set your own password the first time you sign in. Choose something only you know, and never share it — everything you do is recorded against your name.
2. Finding your way around
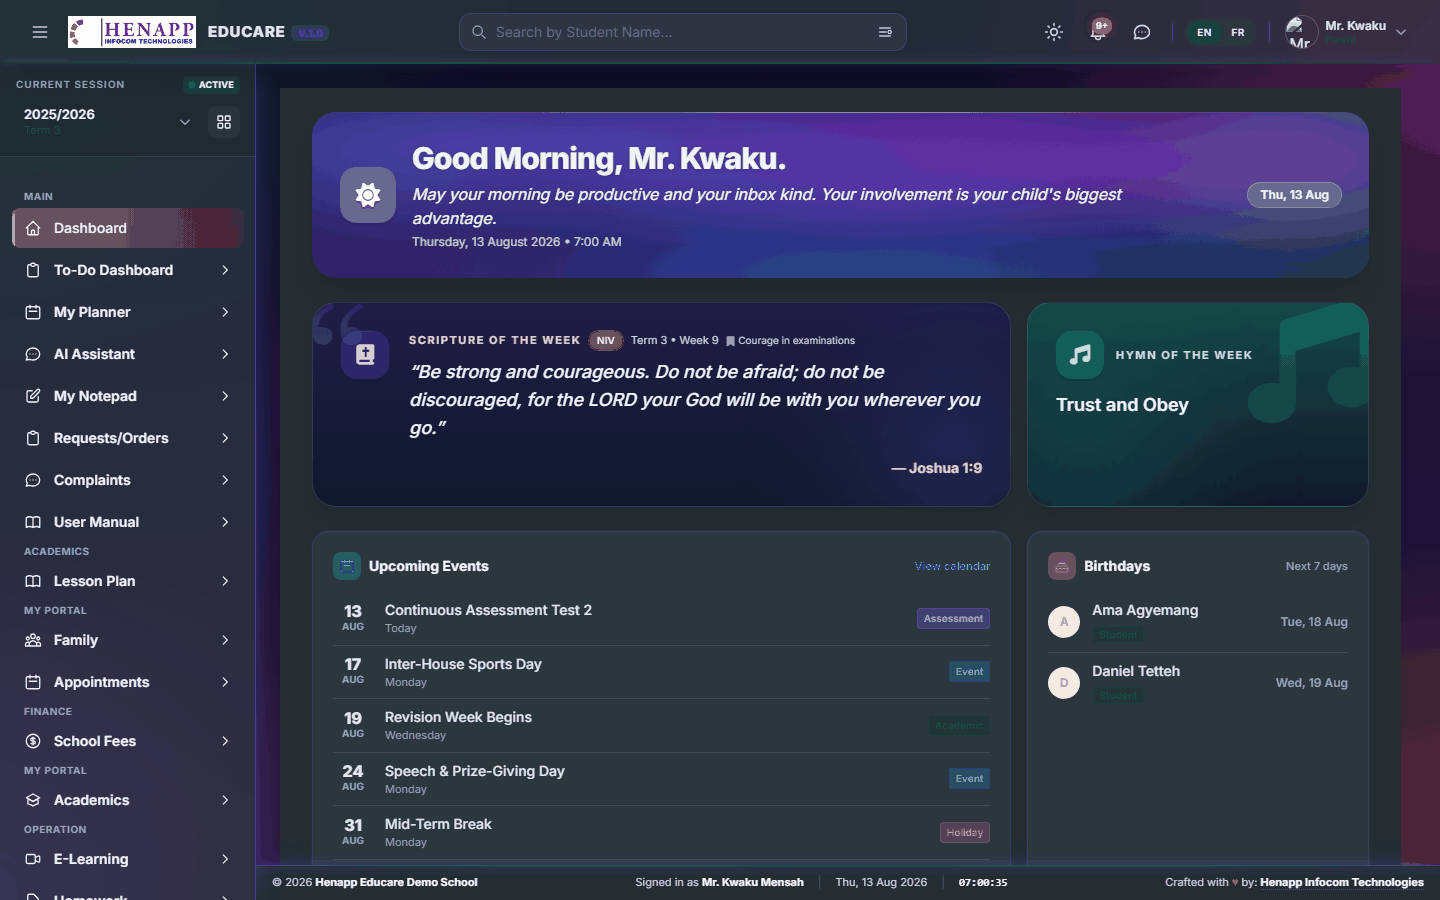
After signing in you land on your dashboard. Everything else is reached from the sidebar on the left and the bar across the top.
The sidebar
- The sidebar lists every part of the system you are allowed to use. What you see here is exactly what this guide covers — nothing more, nothing less.
- Click a heading to open its submenus; click again to close it.
- On a phone, tap the ☰ menu icon at the top-left to slide the sidebar in and out.
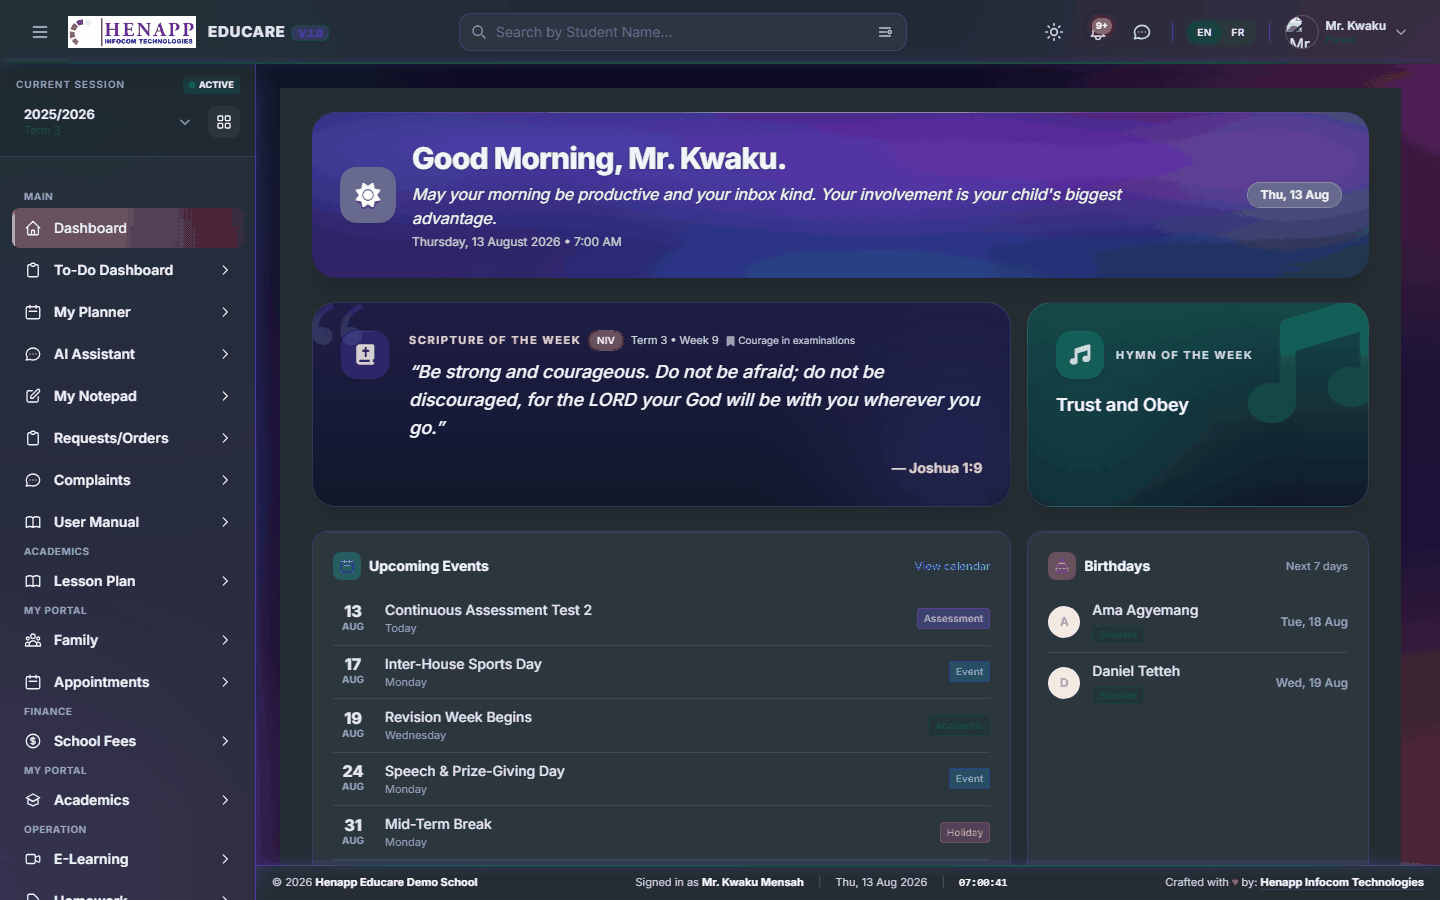
The top bar
- Academic year and term selector — nearly every page shows data for the year and term chosen here. If figures look wrong or a list looks empty, check this first.
- Search — jump to any page or person by name.
- Sun / moon icon — switch between light and dark appearance.
- Bell icon — your notifications.
- Your name and photo — profile, and Sign out.
3. Your profile and password
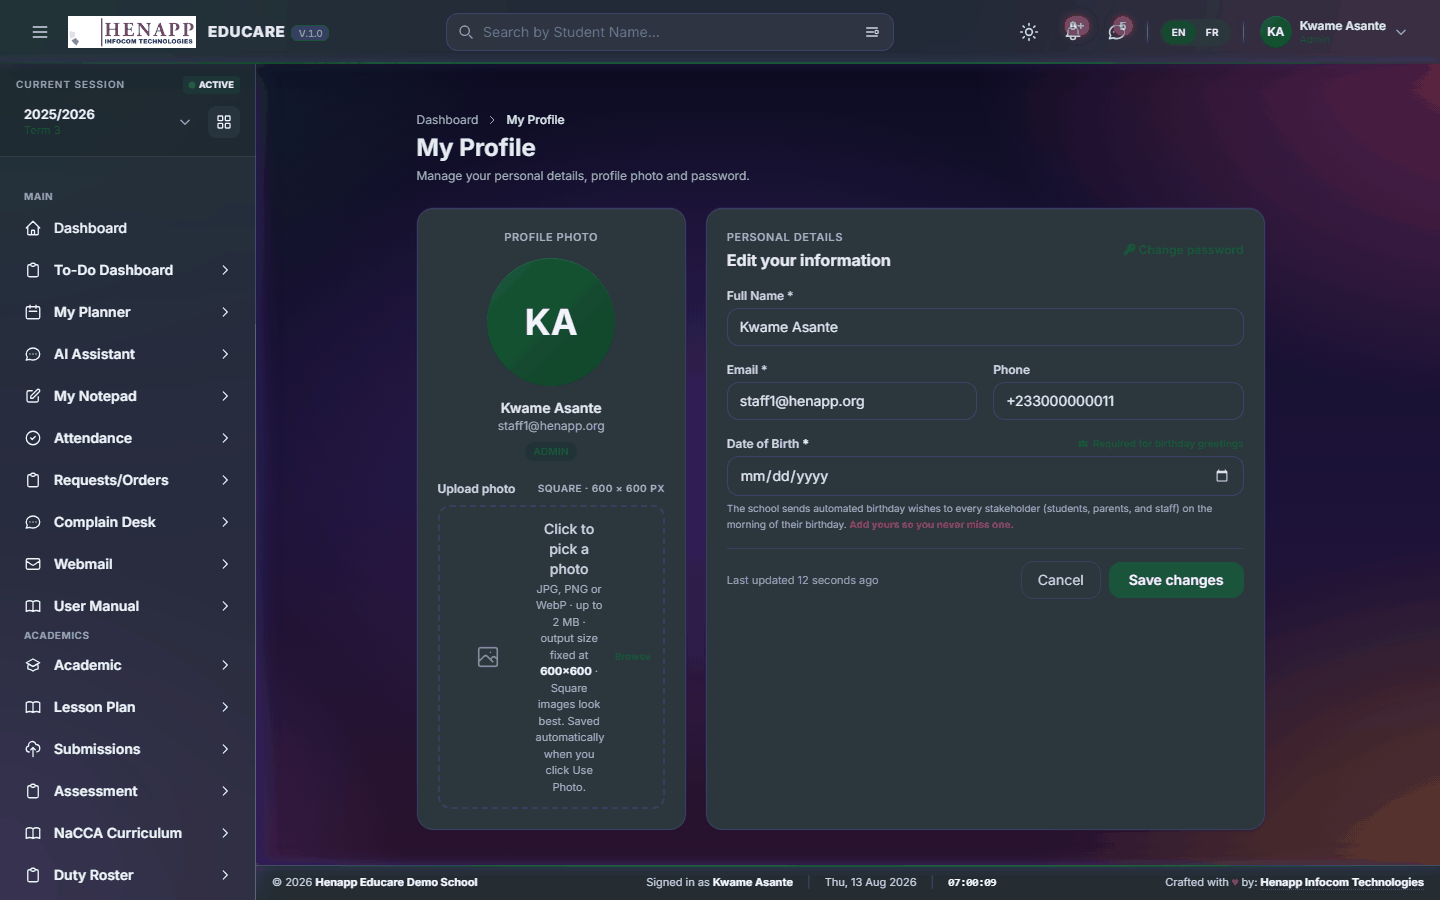
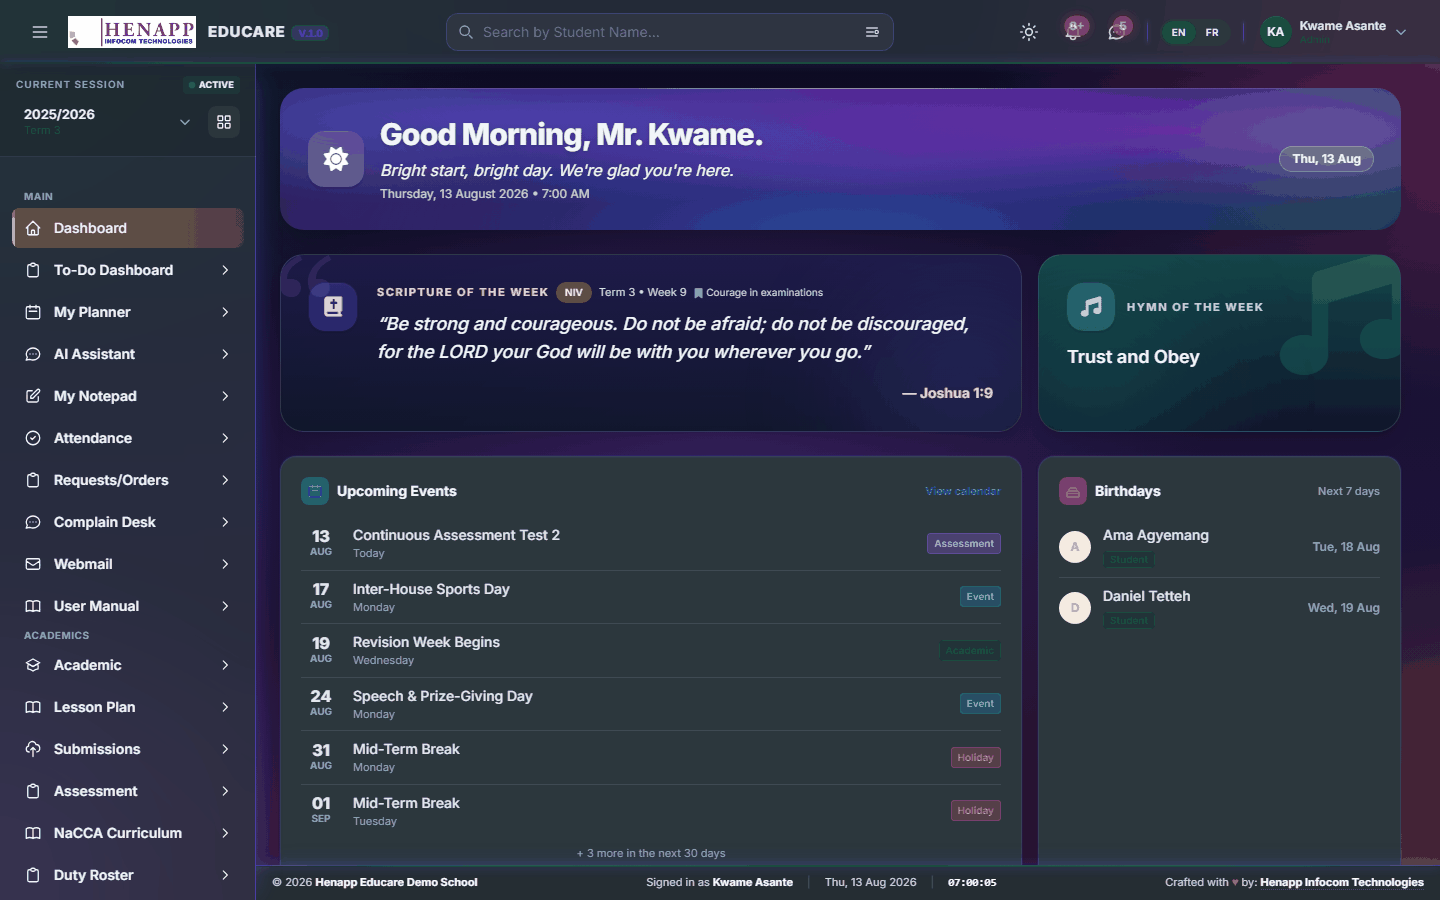
Your profile holds your contact details, your photo and your password.
How to update your details
- Click your name at the top-right, then Profile.
- Edit your phone number, address or other details and click Save.
- Click your photo to upload a new one — a clear head-and-shoulders picture works best.
How to change your password
- Open your profile and find the Change Password section.
- Type your current password, then your new password twice.
- Click Update Password. You stay signed in on this device.
On a school, library or family computer, click your name and choose Sign out when you finish. Closing the tab alone does not sign you out.
4. Dashboard
Your home page. It summarises what needs your attention today and links straight to the pages that answer it.
Find it in the sidebar under Main → Dashboard.
4.1 Dashboard
The first page after you sign in. The cards you see depend on your role — the important thing is that each one is a shortcut: click it to open the page behind the number.

How to use it
- Read the cards along the top for the headline figures for today.
- Click any card or chart to open the full page it summarises.
- Use the academic year and term selector in the top bar to see the same dashboard for a different period.
- Scroll down for your recent activity and anything awaiting your action.
5. To-Do Dashboard
A single running list of everything the system is waiting on you for, gathered from every module.
Find it in the sidebar under Main → To-Do Dashboard.
5.1 To-Do Dashboard
Every outstanding task the system knows about, collected in one place — lesson plans not yet submitted, registers not yet marked, approvals waiting on you, forms not yet returned.

How to use it
- Open To-Do Dashboard from the sidebar.
- Each card is one kind of outstanding task, with a count.
- Click a card to open the list behind it, then work through the items.
- Items disappear from the list on their own once the underlying task is done — there is nothing to tick off here.
You only ever see tasks that are actually yours. Two teachers signed in side by side will see different counts on the same day.
6. My Planner
Your private diary inside the portal — appointments, reminders and personal deadlines that are not school-wide events.
Find it in the sidebar under Main → My Planner.
6.1 My Planner
A month, week and day diary that only you can see. Use it for anything you want to remember that is not a school-wide calendar event.
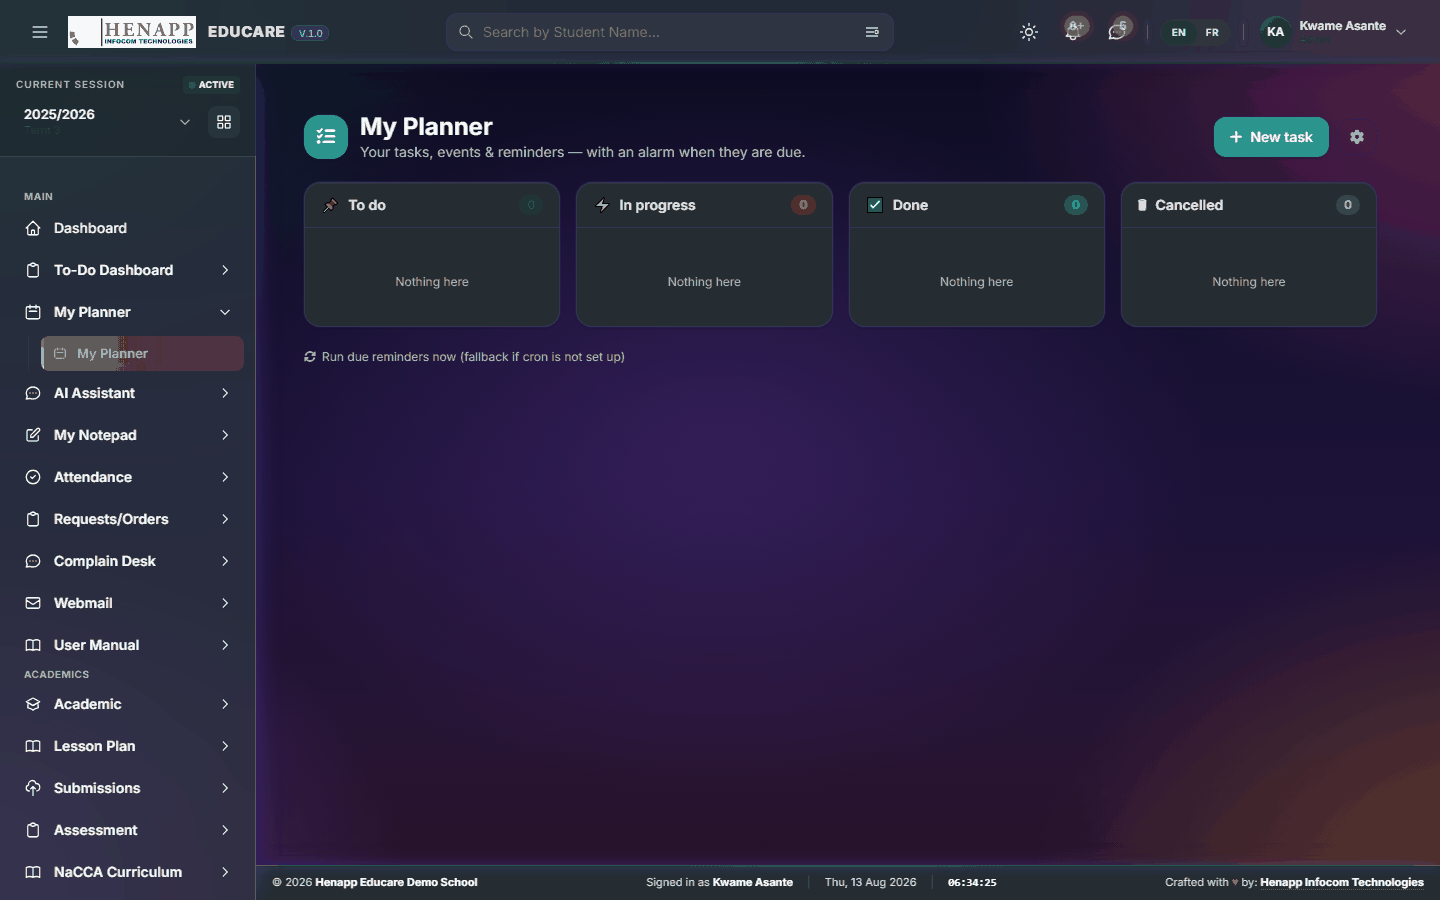
How to use it
- Open My Planner from the sidebar.
- Switch between Month, Week and Day using the buttons above the grid.
- Click any empty day or time slot to start a new entry.
- Give it a title, set the date and time, pick a colour, and Save.
- Click an existing entry to edit it, or use its delete button to remove it.
7. AI Assistant
A built-in assistant that answers questions about your own school data and drafts routine text for you.
Find it in the sidebar under Main → AI Assistant.
7.1 AI Assistant
Ask questions in plain language and get answers drawn from your school data, within the limits of what your role is allowed to see. It also drafts routine wording for you to edit — a notice to parents, a report remark, an SMS short enough to send.
How to use it
- Open AI Assistant from the sidebar.
- Type your question or instruction in the box at the bottom and press Enter.
- Ask follow-up questions in the same conversation — it remembers what you just asked, so "now make it shorter" works.
- Your past conversations are listed down the side; click one to reopen it.
- Start a new conversation when you change subject, so earlier context does not colour the answer.
The assistant can be confidently wrong. Treat a figure it quotes as a prompt to open the real page and confirm, and read any text it drafts before you send it.
It answers only from data your role can already open. It is not a way around a permission you do not have.
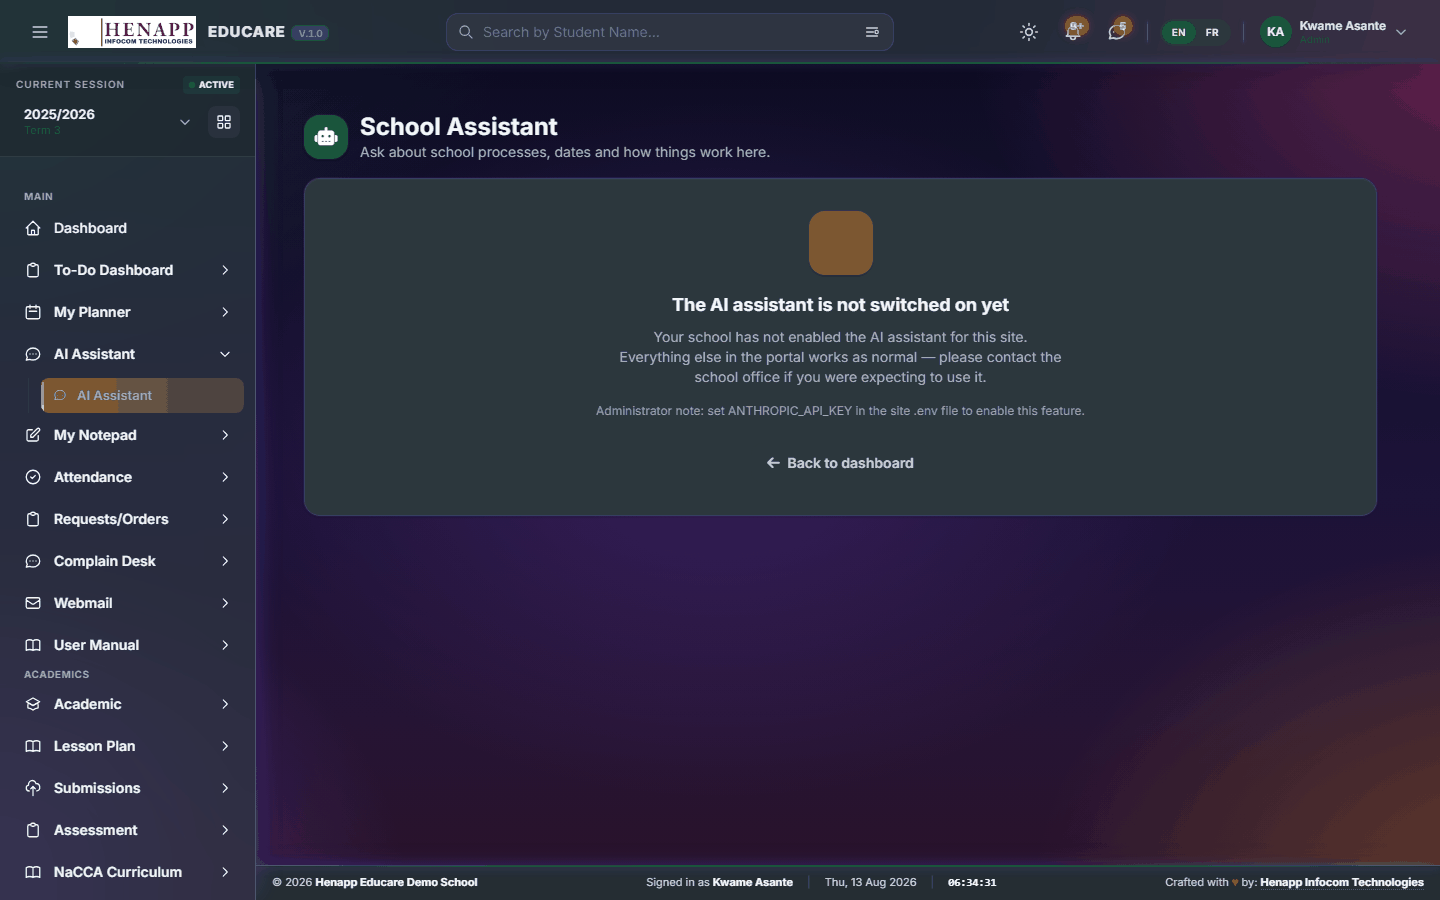
If it says the assistant is not configured, no AI provider key has been set for your school — an administrator sets that under System Settings. The school can hold keys for several providers, and the system moves to the next one automatically if one is busy or over its daily limit, so the feature keeps working.
8. My Notepad
Quick private notes that stay with your account and follow you to any device you sign in on.
Find it in the sidebar under Main → My Notepad.
8.1 My Notepad
Short private notes — a phone number, a reminder, a paragraph you are drafting. Notes save as you type and are visible only to you.
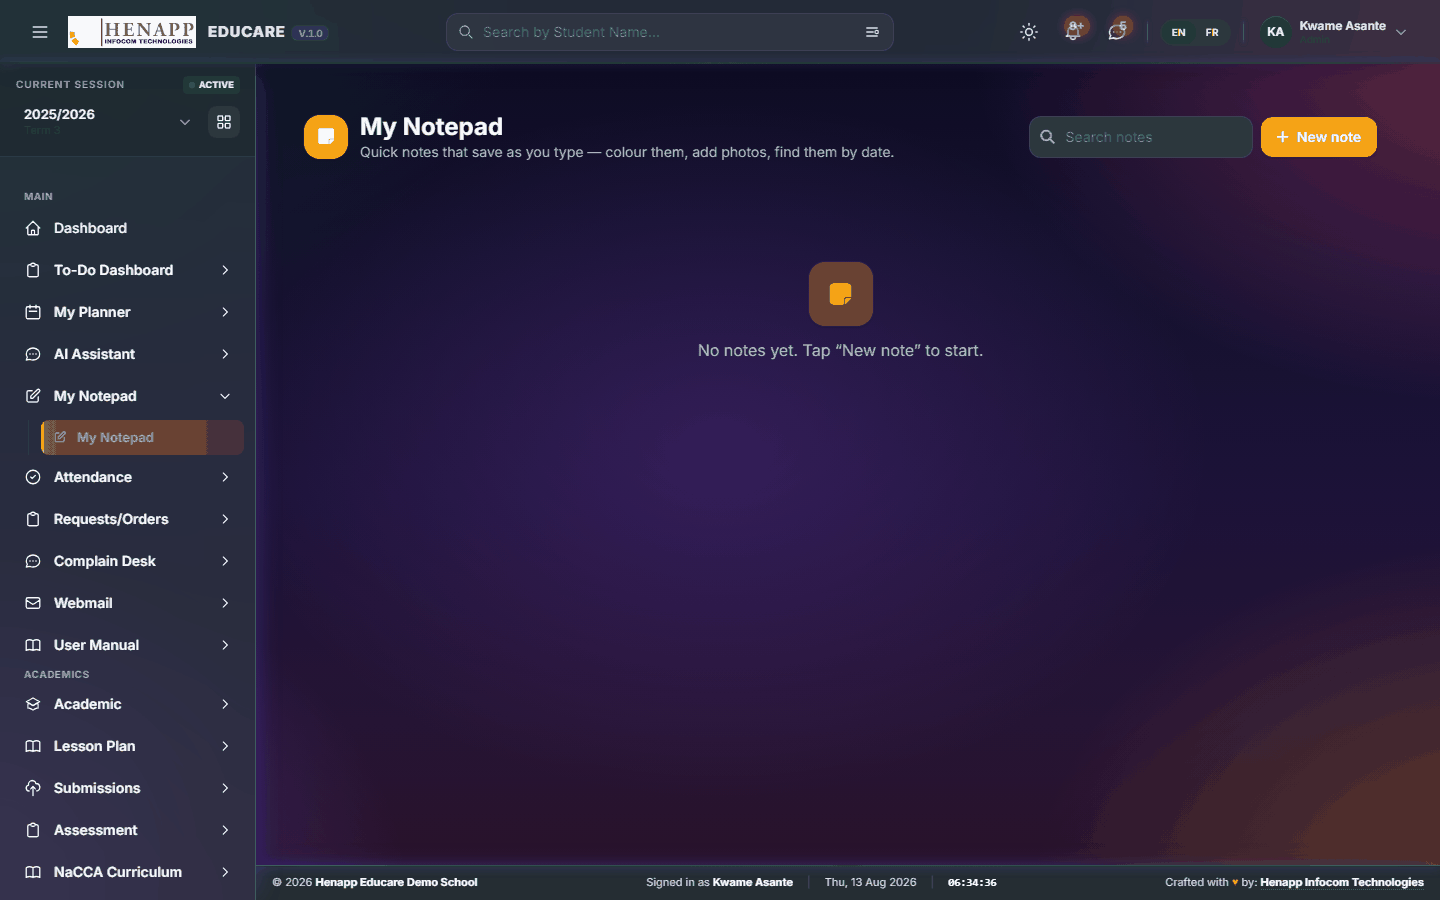
How to use it
- Open My Notepad from the sidebar.
- Click New Note, give it a title and start typing.
- Pick a colour to group related notes visually.
- Notes save automatically; use the search box at the top to find one later.
- Delete a note from its own menu when you no longer need it.
9. Requests/Orders
Ask the school for an item or a service — uniforms, books, a replacement ID card — and follow what happens to the request.
Find it in the sidebar under Main → Requests/Orders.
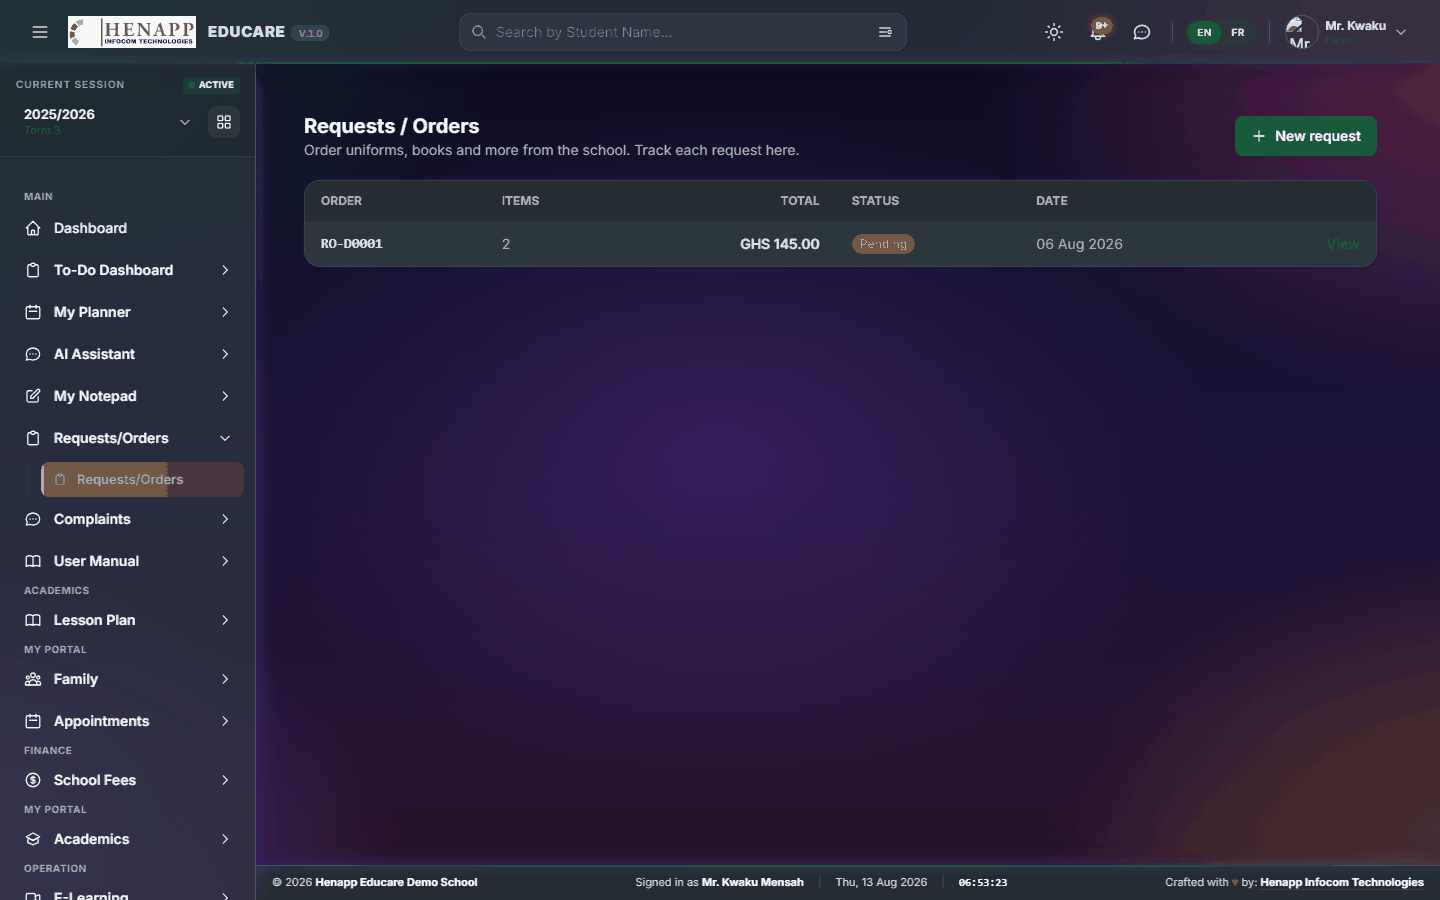
9.1 Requests/Orders
Ask the school for something — a replacement ID card, a uniform item, a book — and watch its progress from request to ready-for-collection.
How to use it
- Open Requests/Orders from the sidebar.
- Click New Request.
- Choose the child it is for, pick the item or service, and set the quantity.
- Add a note if there is anything the school needs to know, then Submit.
- Track the status on the same page. Where the item is chargeable, an invoice appears under School Fees.
10. Complaints
Raise a concern with the school and follow the reply, privately.
Find it in the sidebar under Main → Complaints.
10.1 My Complaints
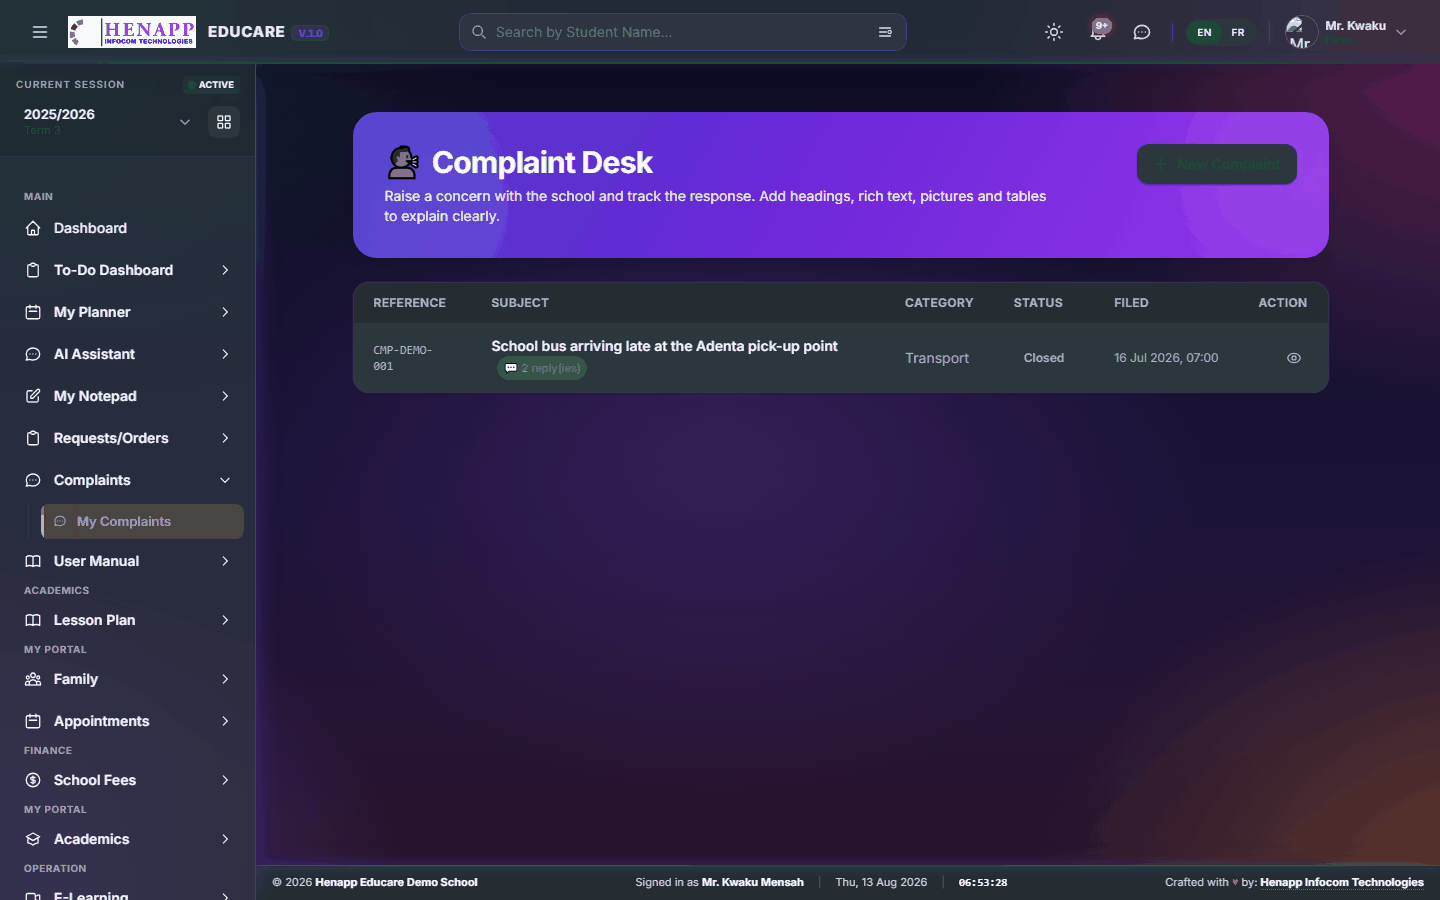
Raise a concern with the school and follow the response. Only you and the staff handling it can see the thread.
How to use it
- Open Complaints → My Complaints.
- Click New Complaint.
- Choose the category, write what happened, and Submit.
- The school's reply appears on the same thread; you are notified in the portal and by email.
11. User Manual
This manual. It is built from your own sidebar, so it documents exactly the menus you can see and nothing you cannot.
Find it in the sidebar under Main → User Manual.
11.1 User Manual
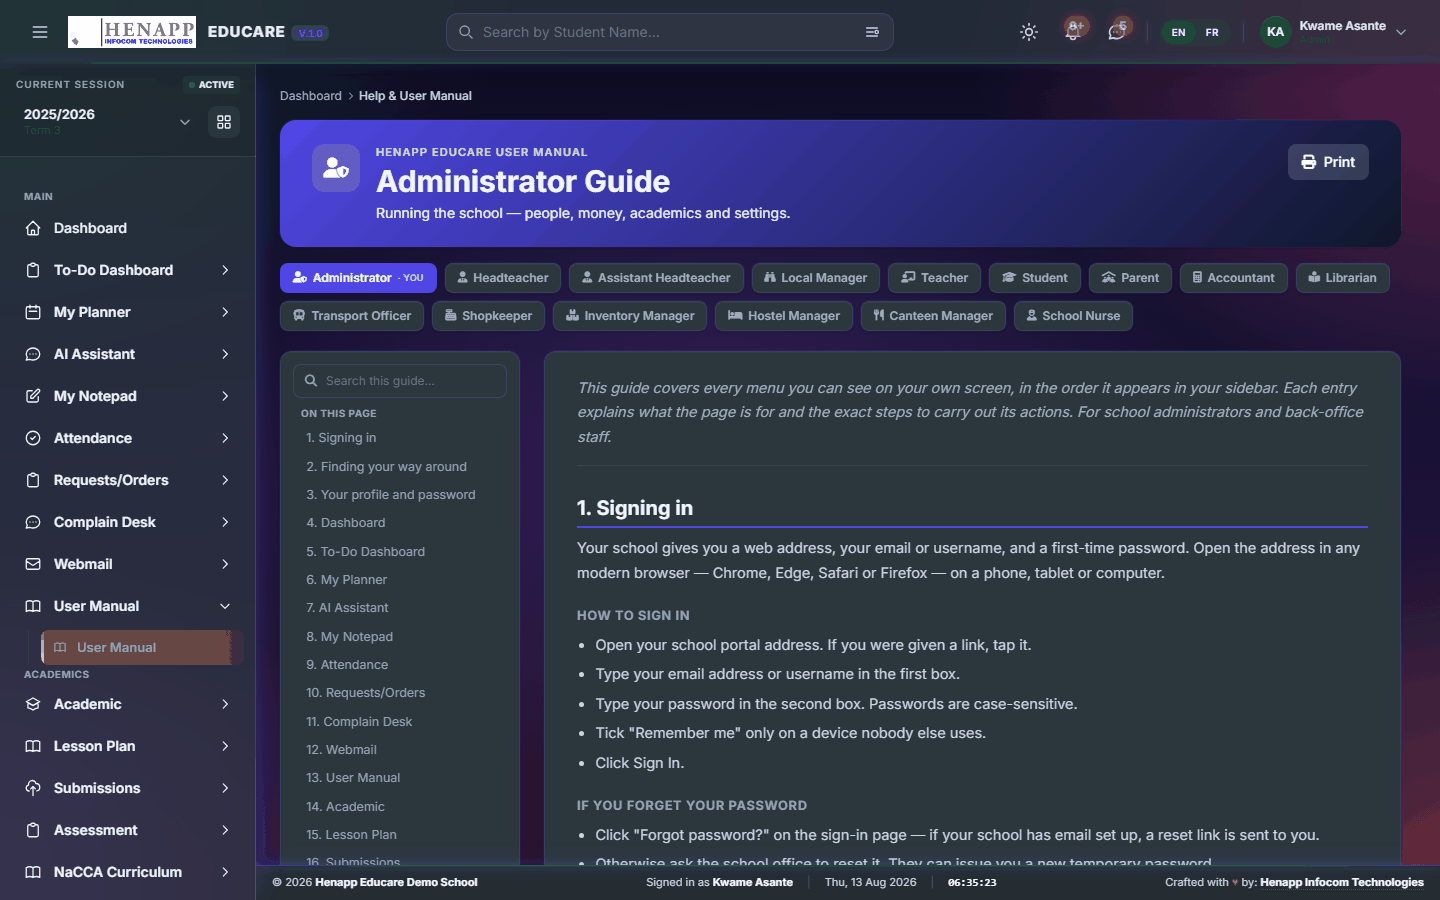
This manual. It is generated from your own sidebar, so every chapter matches a menu you actually have.
How to use it
- Open User Manual from the sidebar.
- Use the contents list on the left to jump to a chapter.
- Type in the search box to filter to the chapters that mention a word.
- Click Print for a paper copy or a PDF.
12. Lesson Plan
The teaching-planning chain, from the year's scheme of work down to the notes for a single lesson — and the tracker that shows who has submitted what.
Find it in the sidebar under Academics → Lesson Plan.
12.1 Scheme of Learning
What your child's class is scheduled to cover this week, so you can follow the work at home.

How to use it
- Open Lesson Plan → Lesson Forecast.
- Choose the child if you have more than one.
- Read the week's forecast for each subject. Use the week selector to look ahead or back.
13. Family
Your children as the school has them recorded.
Find it in the sidebar under My Portal → Family.
13.1 My Children
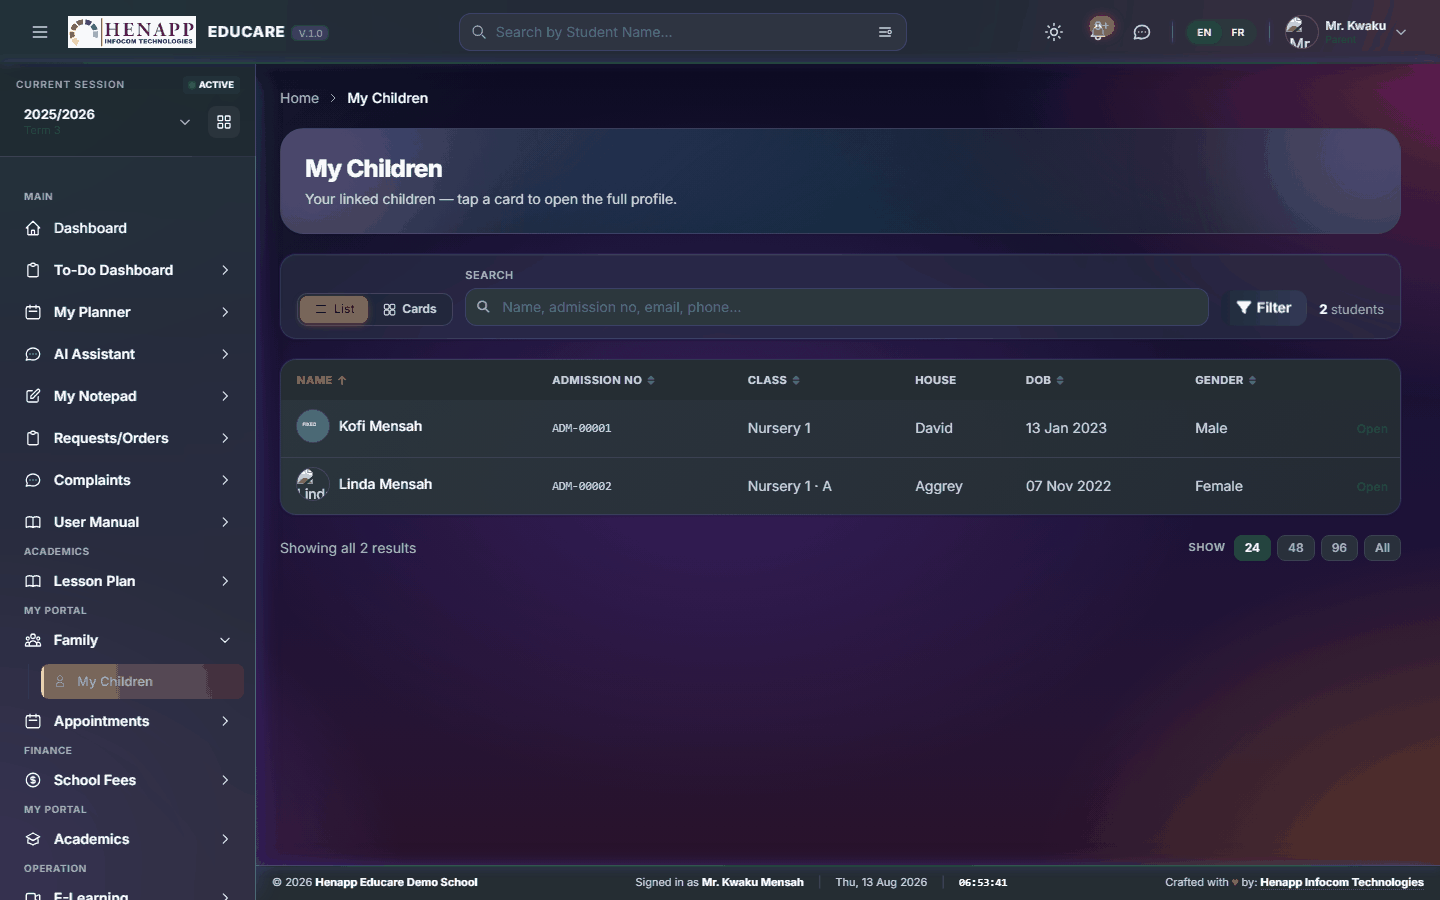
Your children as the school has them recorded — class, teacher and key details.
How to use it
- Open Family → My Children.
- Click a child to open their details.
- Tell the office about anything out of date.
14. Appointments
Booking time with a member of staff, and keeping track of what you have booked.
Find it in the sidebar under My Portal → Appointments.
14.1 Book an Appointment
Find a member of staff and book one of their published times.
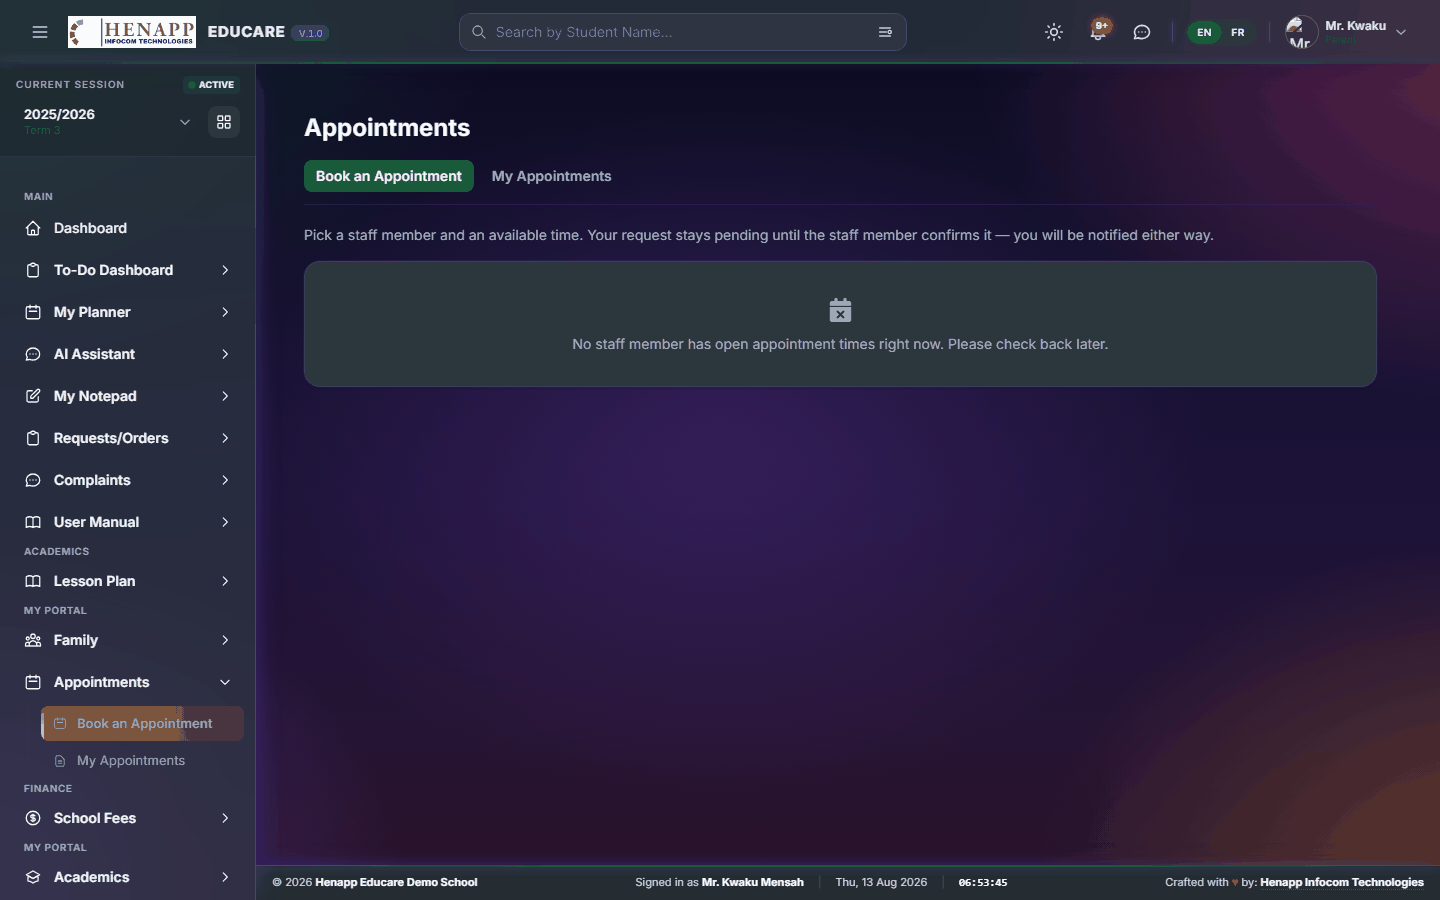
How to use it
- Open Appointments → Book an Appointment.
- Find the member of staff you need to see.
- Pick a free slot from their calendar.
- Say briefly what it is about, and Submit.
- You are notified when they accept or suggest another time.
14.2 My Appointments
Your bookings — upcoming and past.
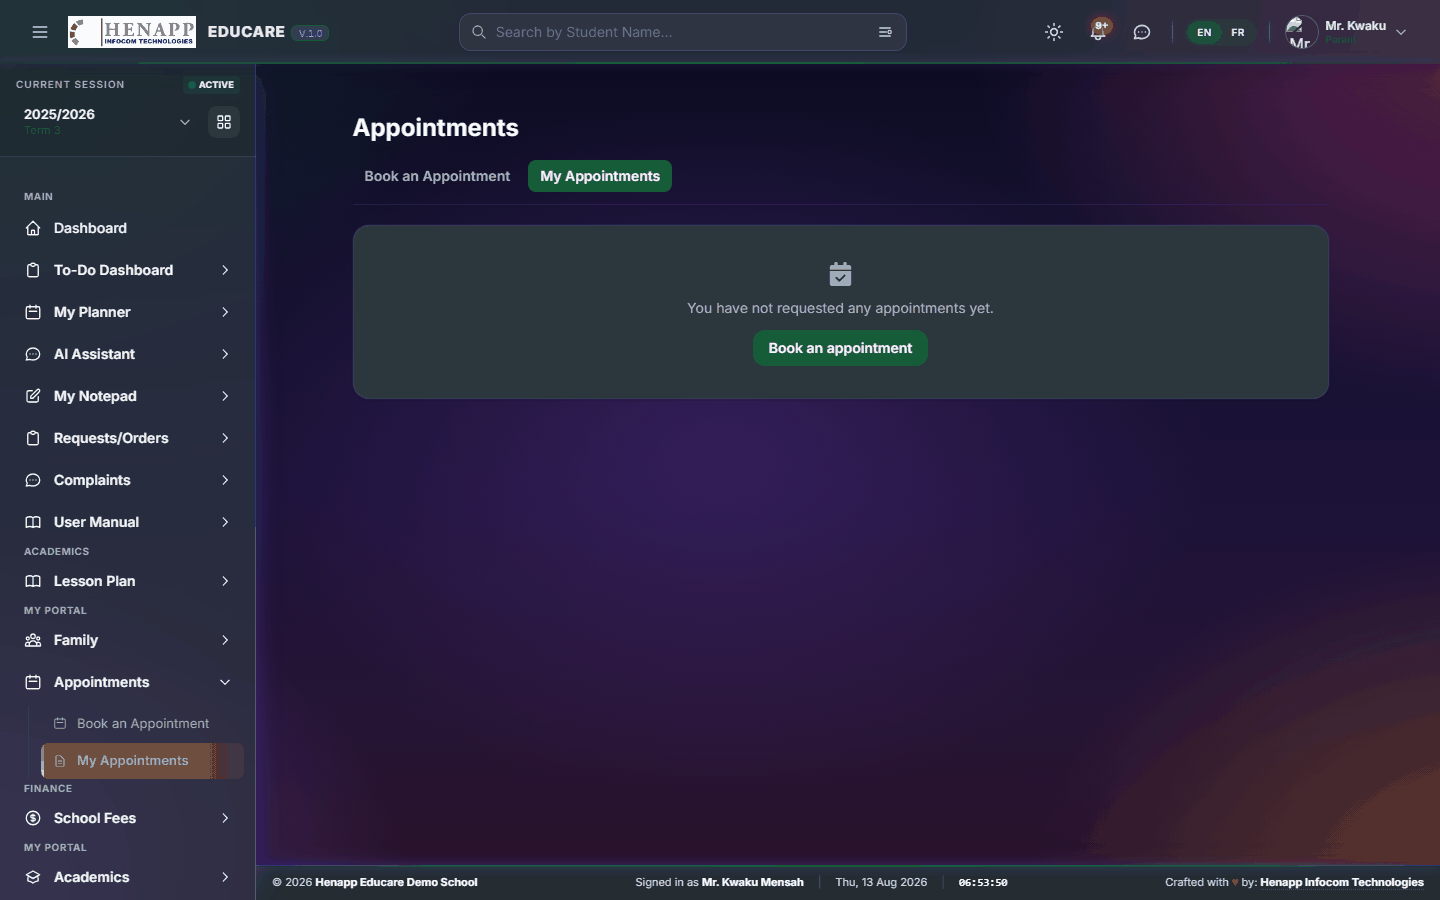
How to use it
- Open Appointments → My Appointments.
- Read your upcoming appointments and their status.
- Cancel one you can no longer keep, so the slot is released.
15. School Fees
Your family's money with the school: what is owed, what has been paid, and the meal and transport plans you are subscribed to.
Find it in the sidebar under Finance → School Fees.
15.1 Invoices & Payments
Your invoices and what you have paid — the family account.
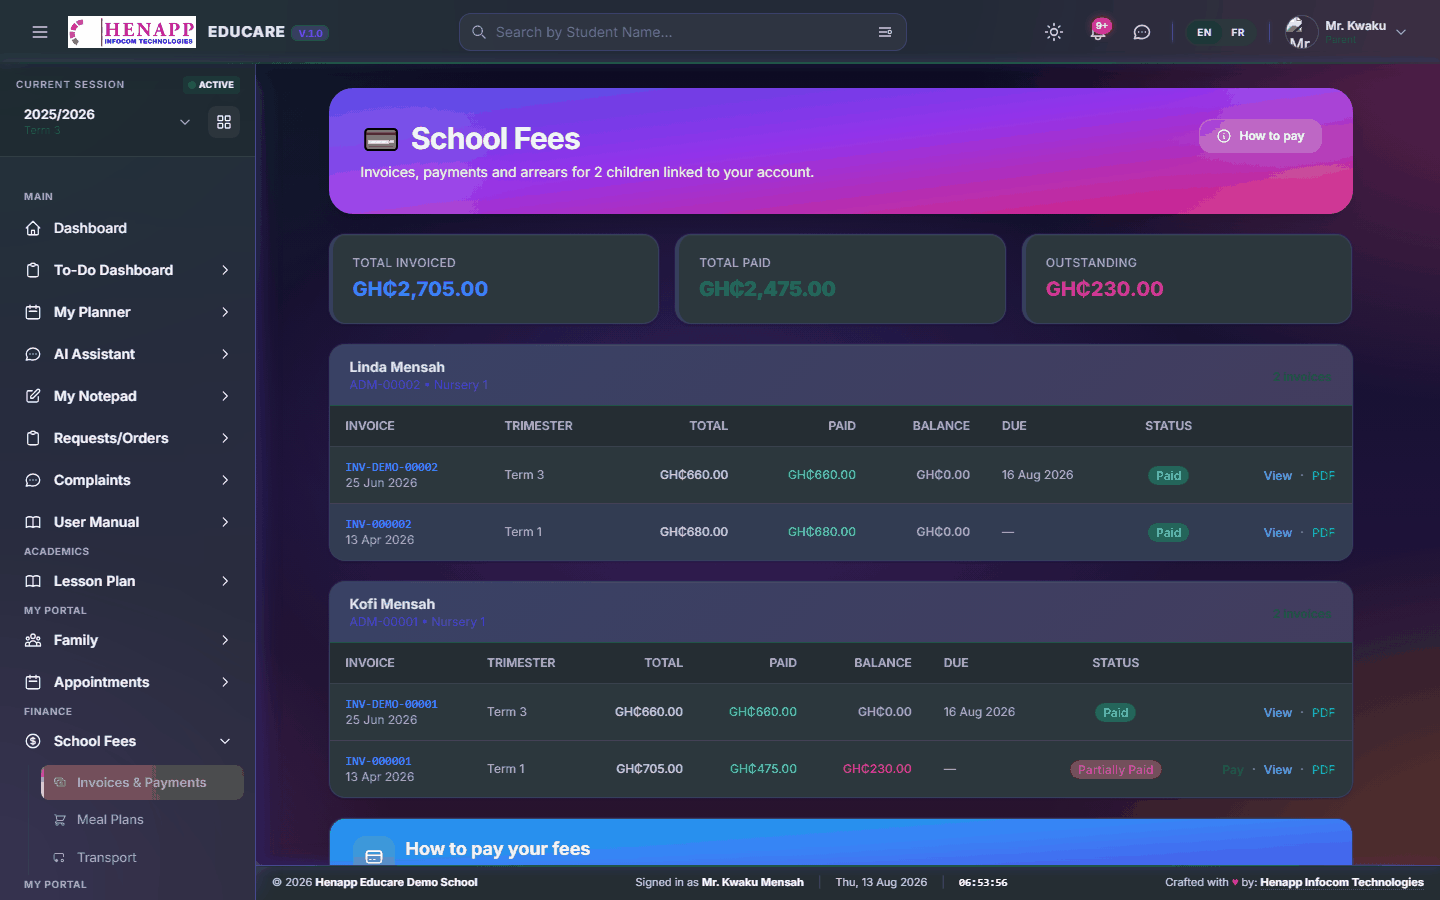
How to use it
- Open School Fees → Invoices & Payments.
- Choose the child if you have more than one.
- Open an invoice to see each line and the balance.
- Download or print an invoice or receipt for your records.
- Where online payment is enabled, pay from the invoice itself.
15.2 Meal Plans
Your child's meal plan — what they are subscribed to and what is being served.
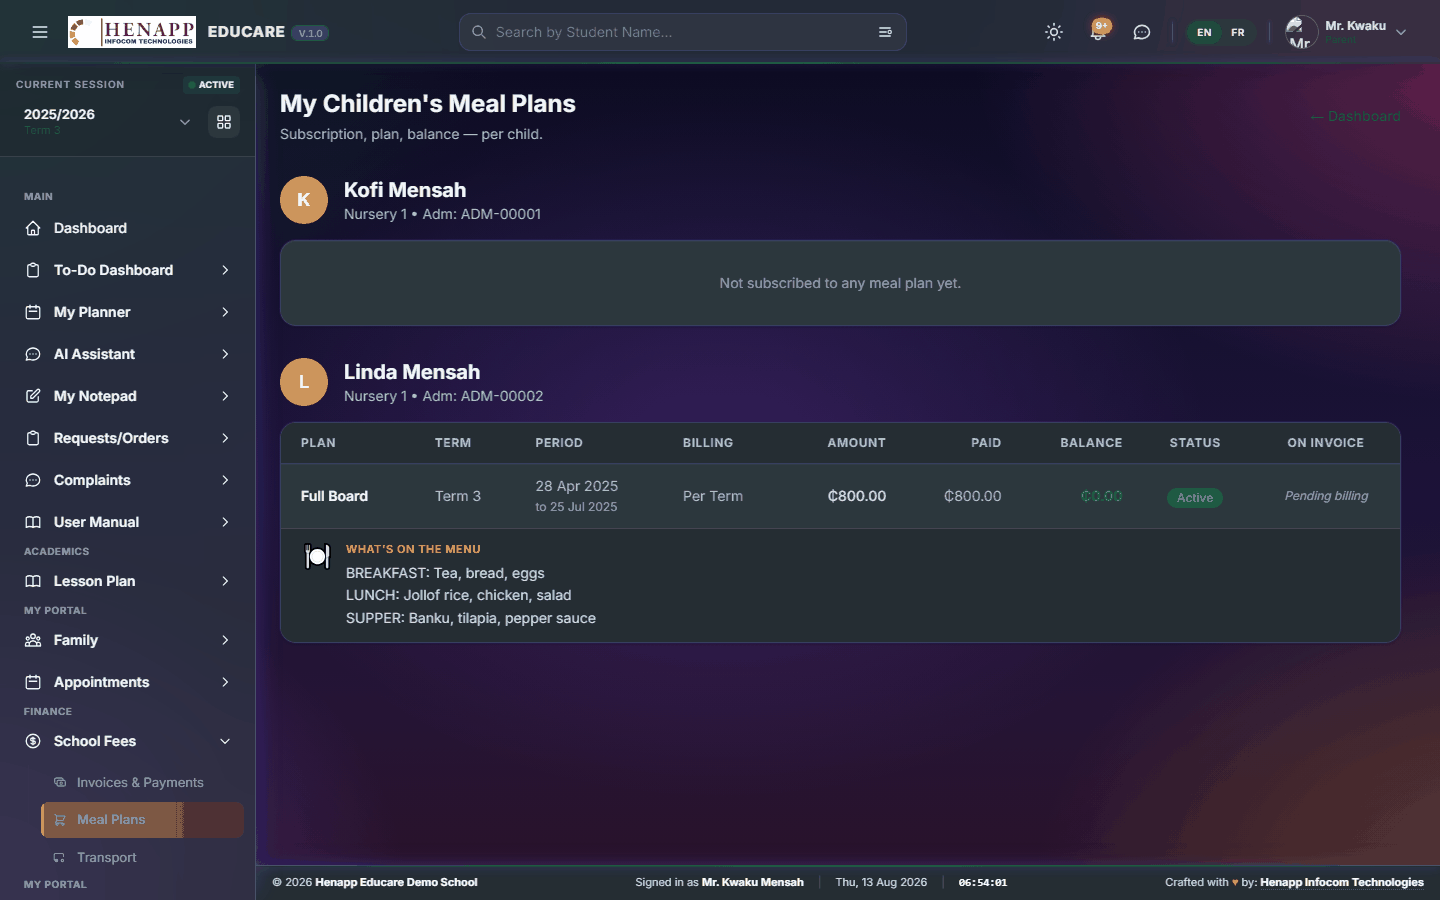
How to use it
- Open School Fees → Meal Plans.
- Choose the child.
- Read the plan and the week's menu, and see what has been charged.
15.3 Transport
Your child's transport — the route they ride and the fares charged.

How to use it
- Open School Fees → Transport.
- Choose the child.
- Read the route and the charges.
16. Academics
Your academic pages — timetables, scores, report cards and results.
Find it in the sidebar under My Portal → Academics.
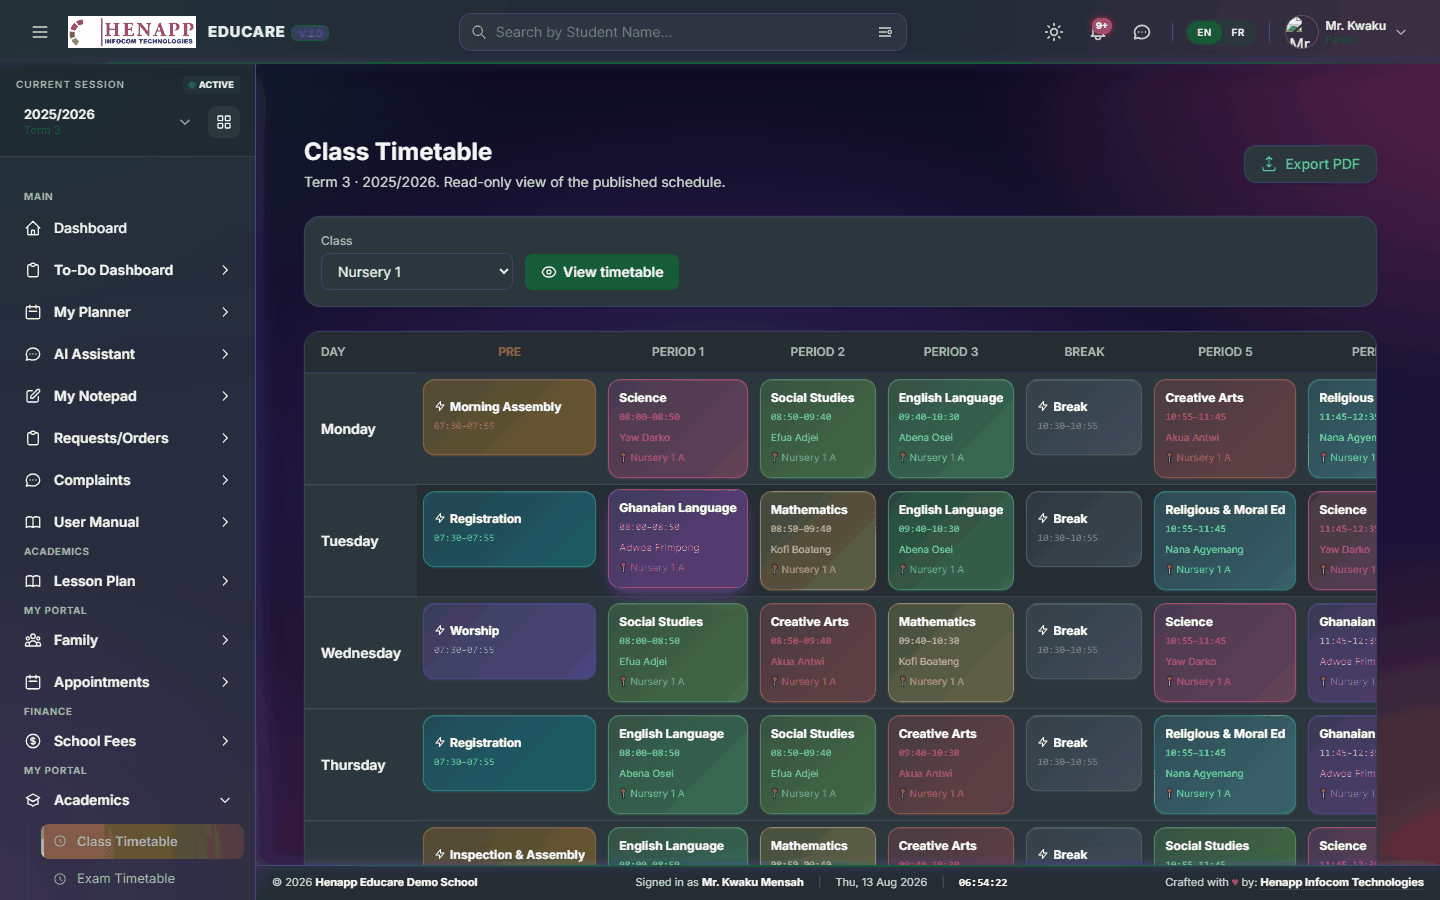
16.1 Class Timetable
The class timetable — which subject is taught when.
How to use it
- Open Academics → Class Timetable.
- Choose the child if you have more than one.
- Read the week, and print it for the wall at home.
16.2 Exam Timetable
When each examination paper is sat.

How to use it
- Open Academics → Exam Timetable.
- Choose the child.
- Read the papers, dates and times, and print it.
16.3 Academic Calendar
The school calendar — terms, holidays, examinations and events.

How to use it
- Open Academics → Academic Calendar.
- Read the term ahead and print it if useful.
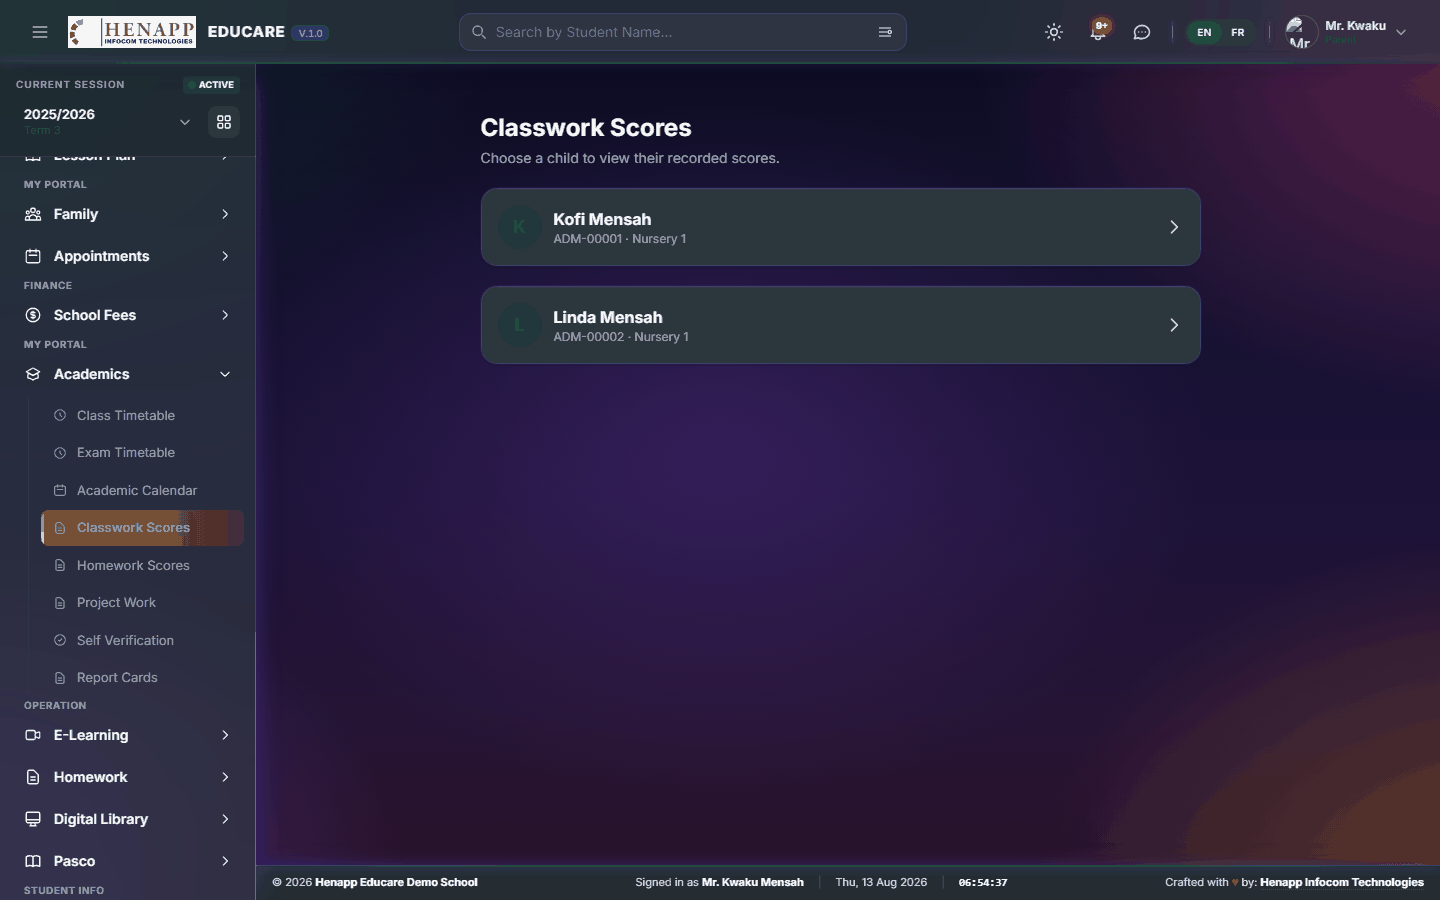
16.4 Classwork Scores
Your child's classwork marks as they are recorded through the term.
How to use it
- Open Academics → Classwork Scores.
- Choose the child and the term.
- Read the marks by subject.
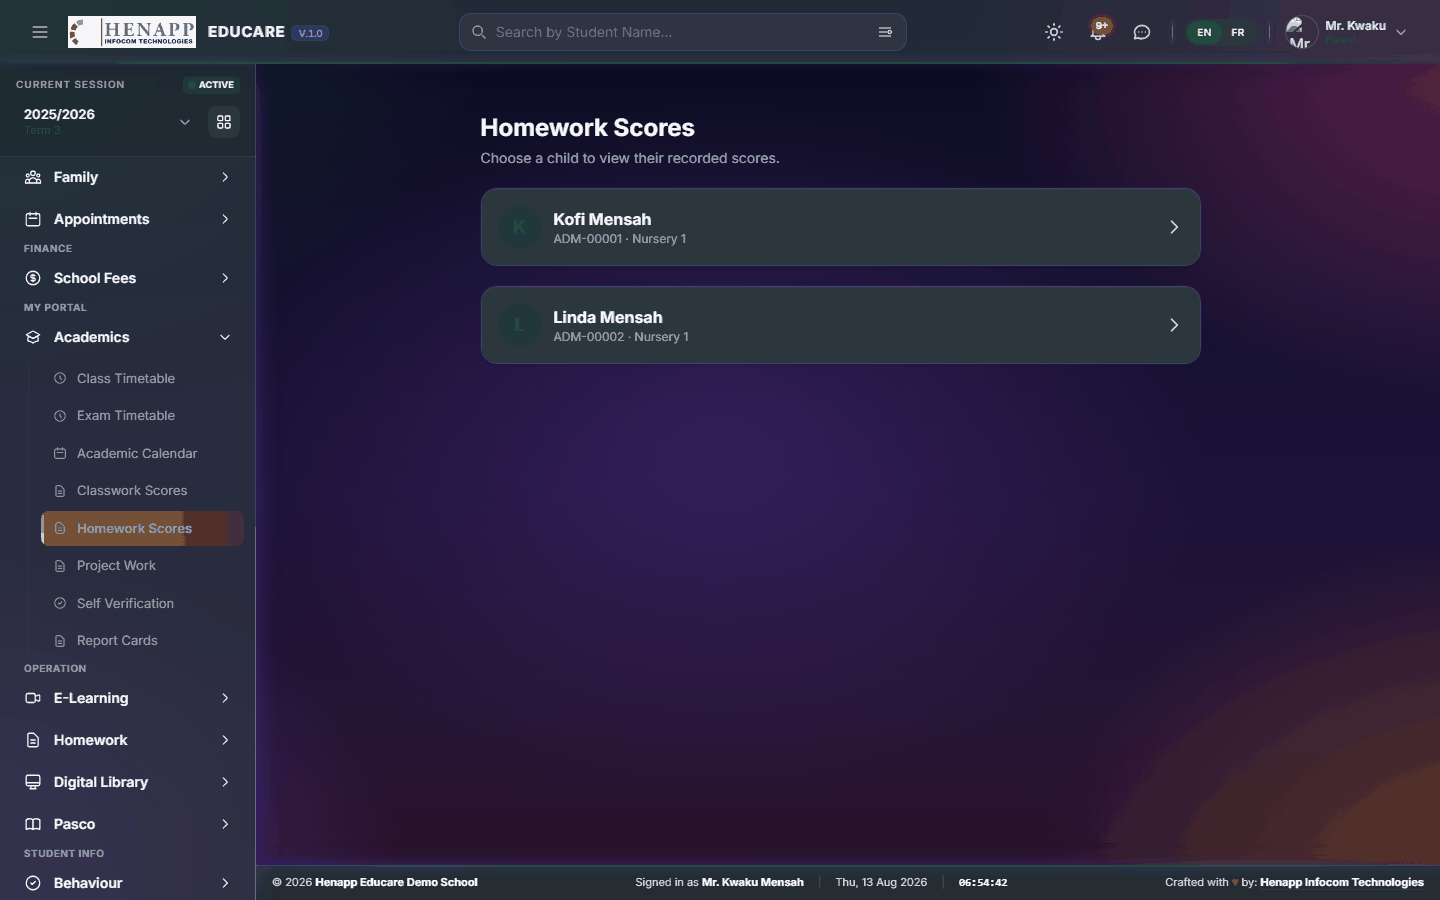
16.5 Homework Scores
Your child's homework marks.
How to use it
- Open Academics → Homework Scores.
- Choose the child and the term, and read the marks by subject.
16.6 Project Work
Your child's project-work marks.

How to use it
- Open Academics → Project Work.
- Choose the child and the term, and read the marks.
16.7 Group Work
Group work your child took part in, and the mark the group was given.
How to use it
- Open Academics → Group Work.
- Choose the child if you have more than one.
- Read each piece of group work and its mark.
Group work is marked once for the group, so every member carries the same score. It is a mark for what the group produced together, not for one child on their own.
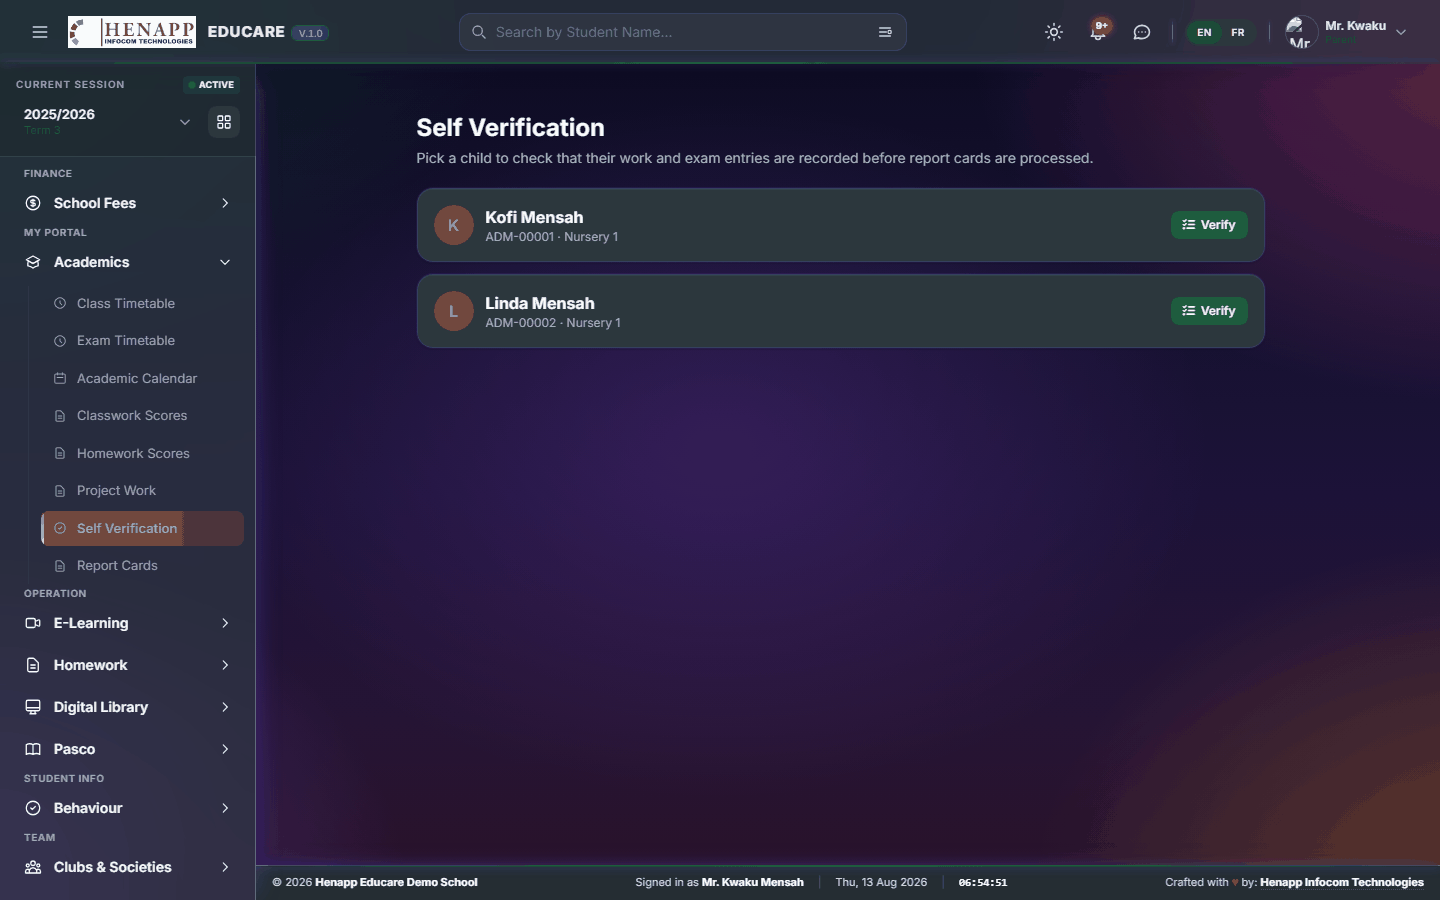
16.8 Self Verification
A read-only view of the marks recorded for your child, so an error can be raised before report cards are issued.
How to use it
- Open Academics → Self Verification.
- Choose the child, the term and the test.
- Check each mark against the work you have seen.
- Raise anything that looks wrong with the class teacher — this page does not change marks.
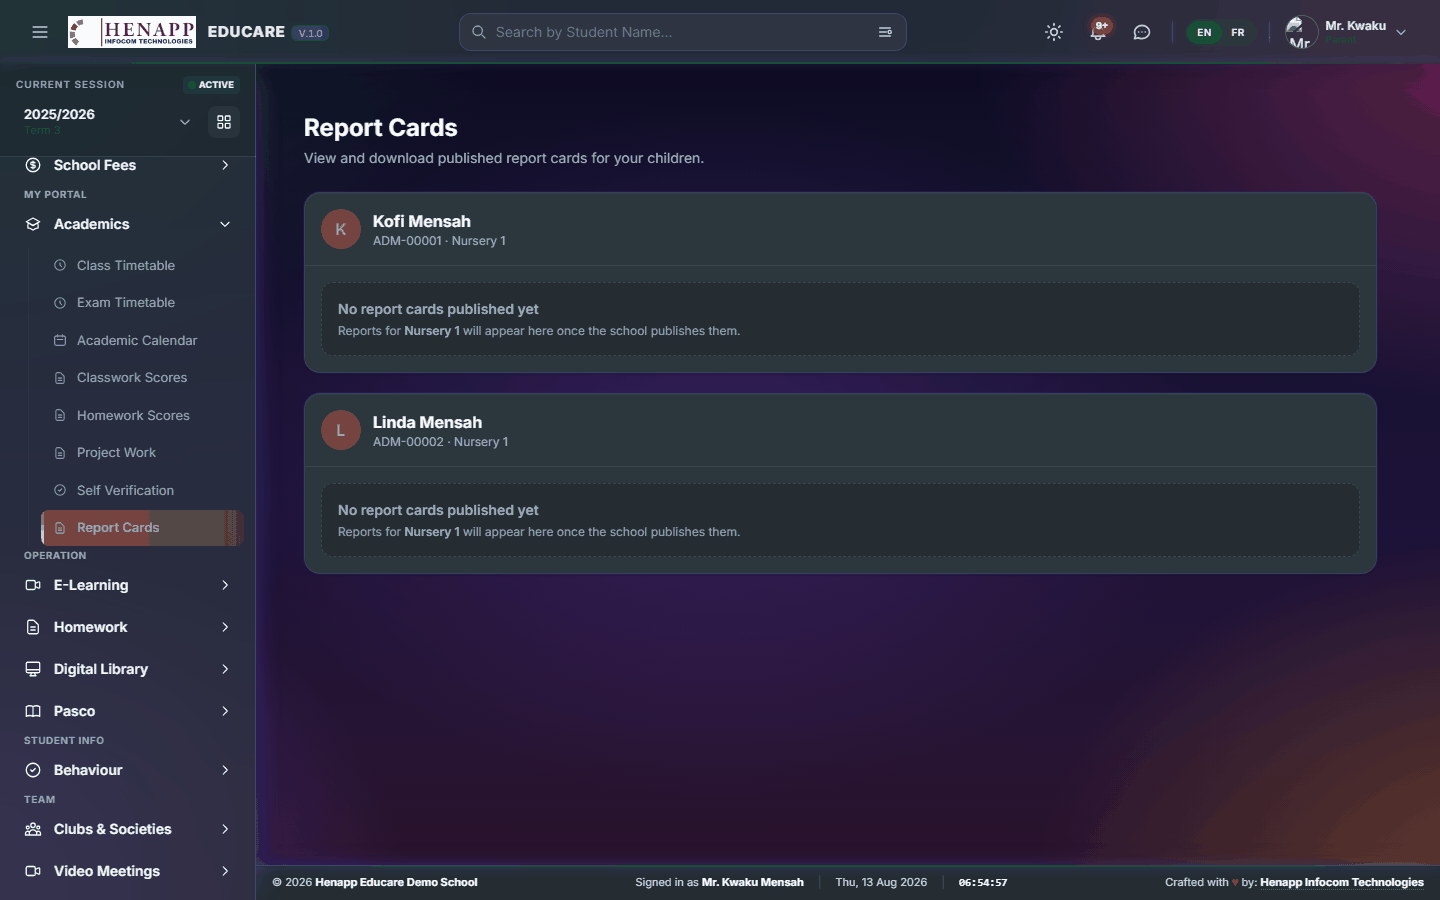
16.9 Report Cards
Your child's report cards, once the school has published them.
How to use it
- Open Academics → Report Cards.
- Choose the child and the term.
- Read the card on screen, or download it as a PDF.
Report cards appear only once the school publishes them for the term. Where a school withholds cards over unpaid fees, settling the account releases it.
17. E-Learning
Online learning — lessons published by teachers, and how far each learner has got through them.
Find it in the sidebar under Operation → E-Learning.
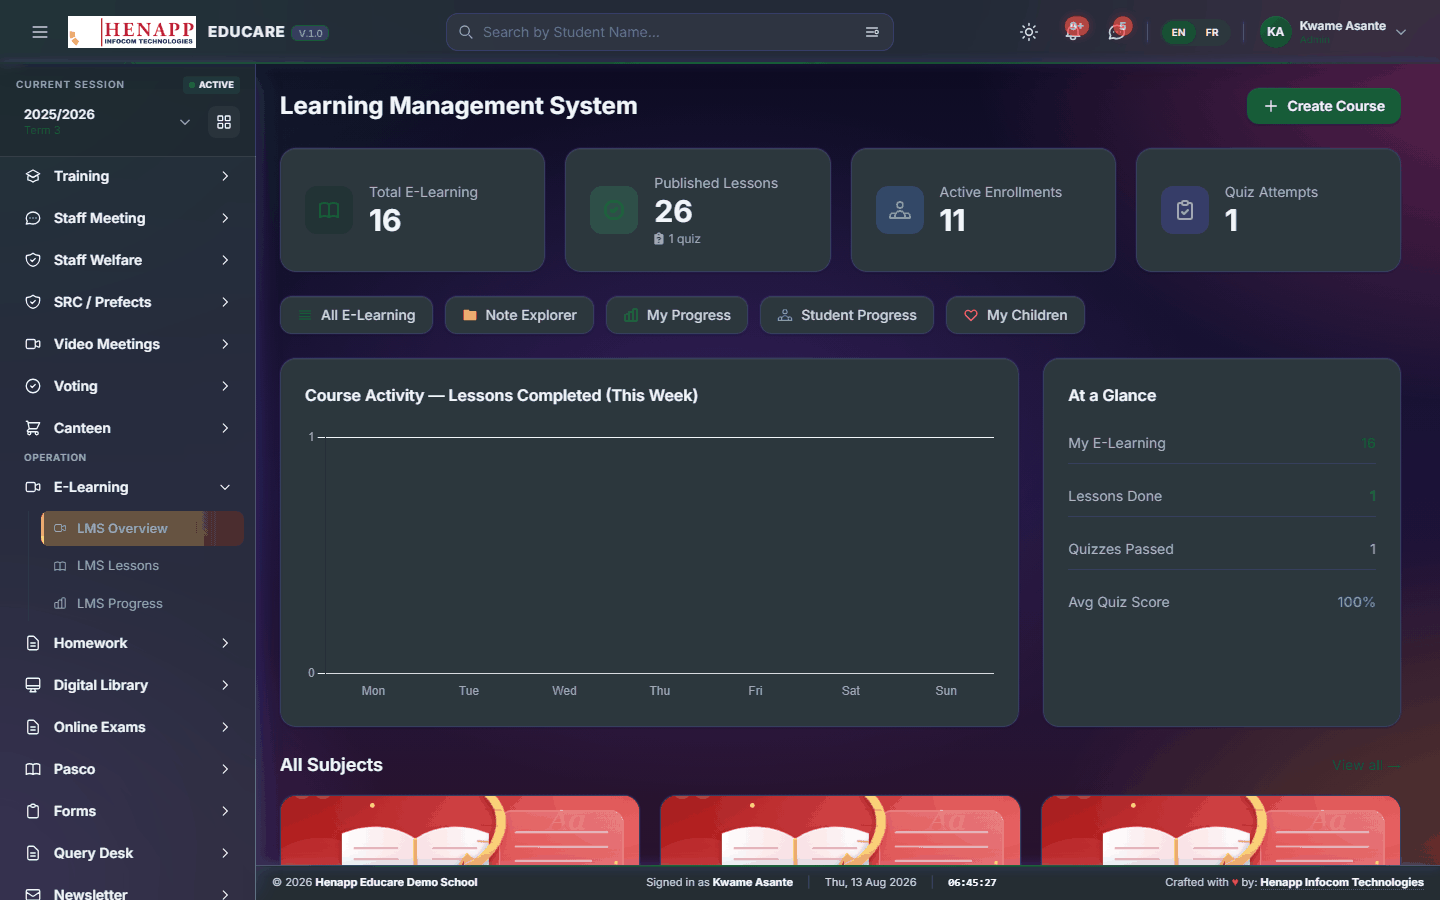
17.1 LMS Overview
The e-learning home page — what is published and how it is being used.
How to use it
- Open E-Learning → LMS Overview.
- Read the published lesson counts and engagement.
- Click through to a subject or lesson.
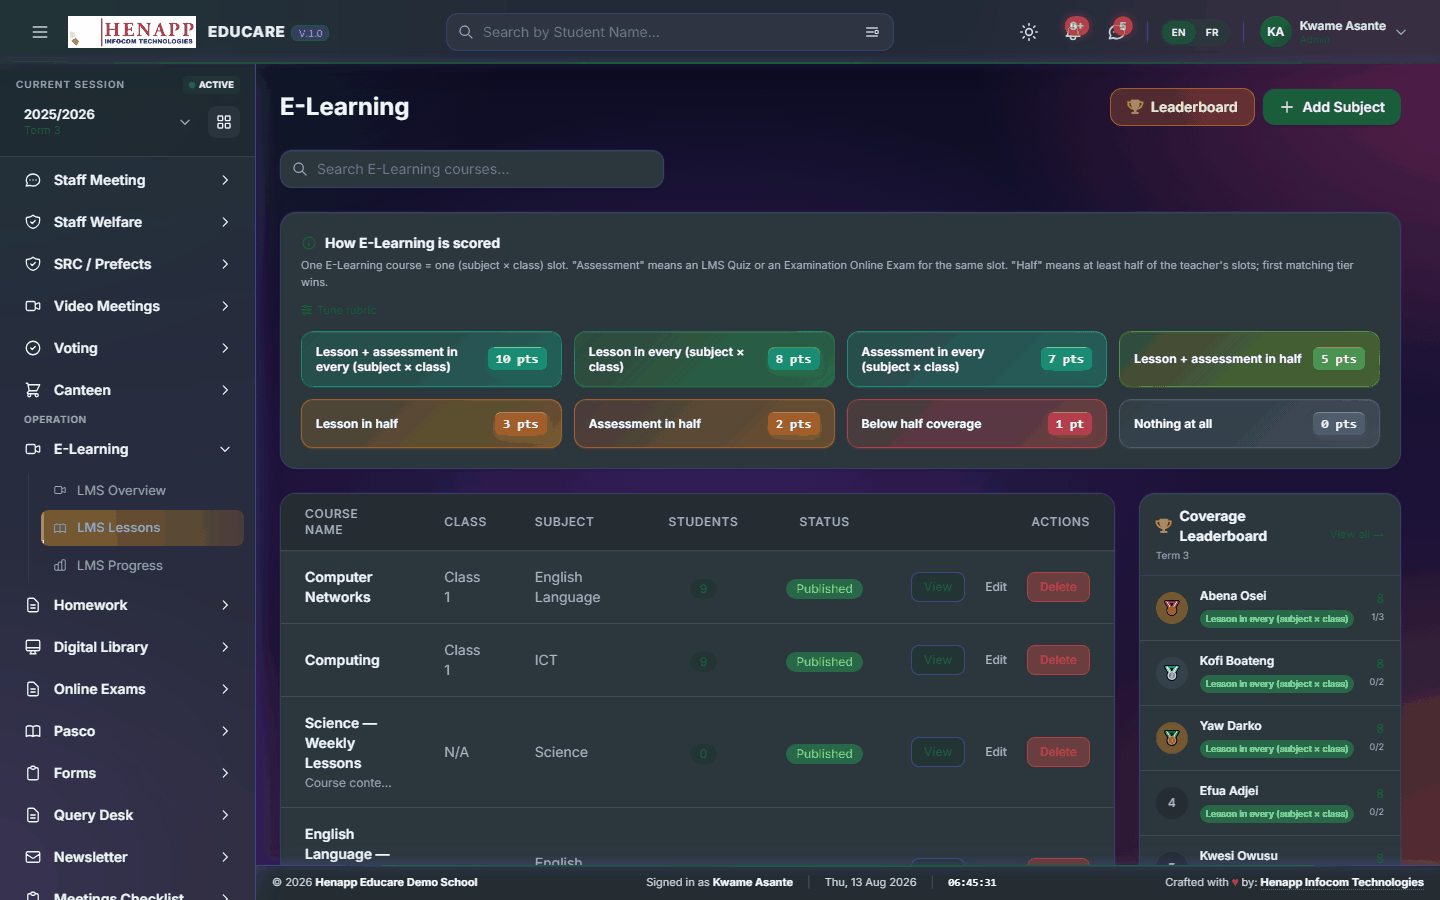
17.2 LMS Lessons
The lessons themselves — video, text, slides and attachments. Teachers create them here; learners work through them.
How to use it
- Open E-Learning → LMS Lessons.
- Learners: click a lesson to open it and work through in order. Your progress is recorded as you go.
- Teachers: click New Lesson, choose the class and subject, then add the content — text, a video link, slides or files.
- Publish when it is ready. Learners see it immediately.
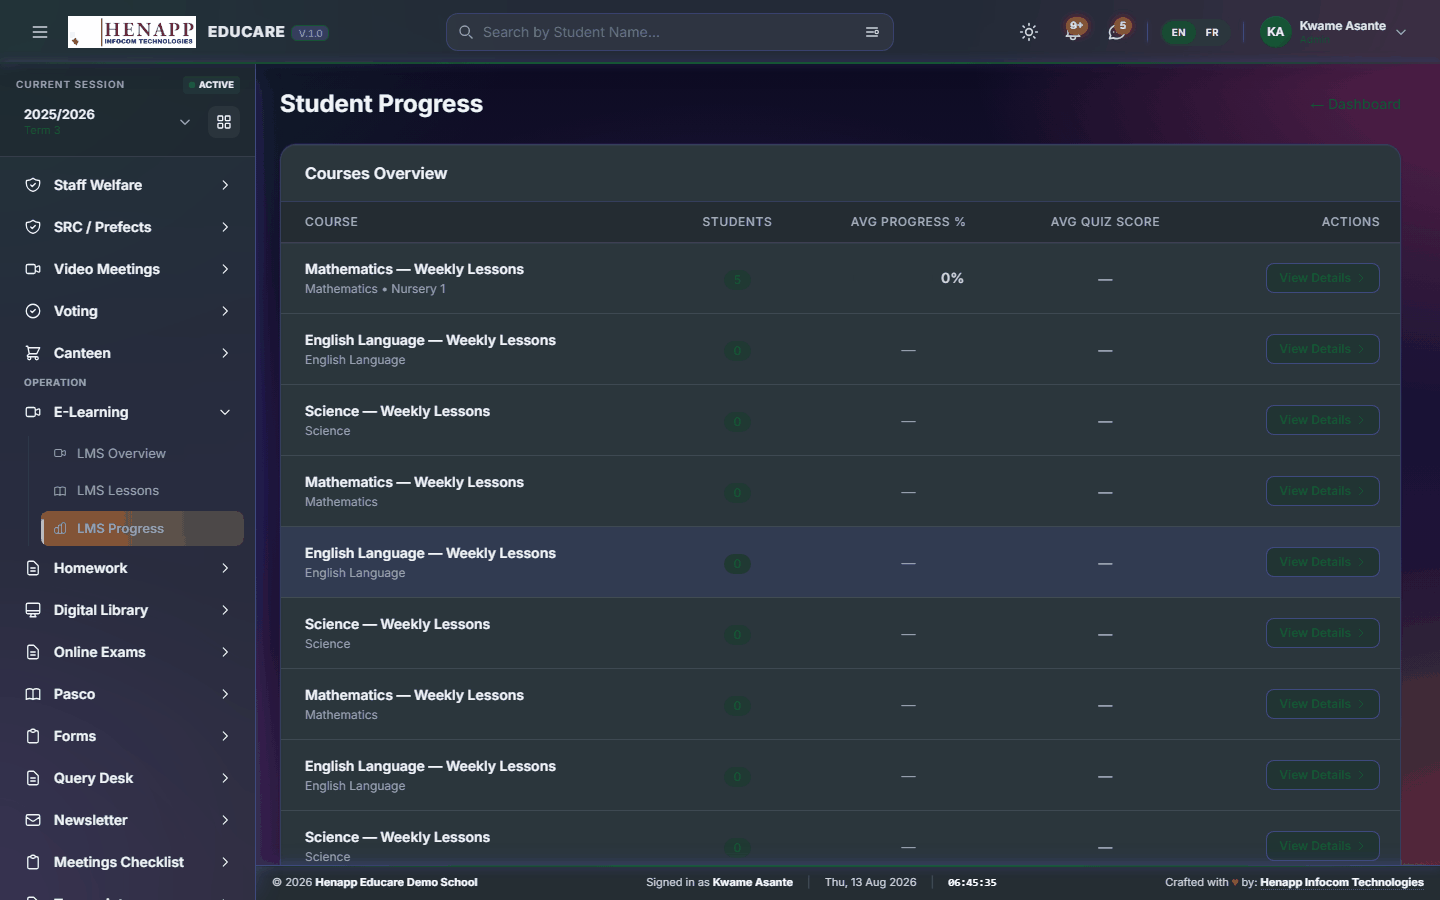
17.3 LMS Progress
How far each learner has got — who has finished, who has started, who has not opened it.
How to use it
- Open E-Learning → LMS Progress.
- Choose the class and subject.
- Read the grid and follow up with anyone who has not begun.
18. Homework
Homework set, submitted and marked inside the system.
Find it in the sidebar under Operation → Homework.
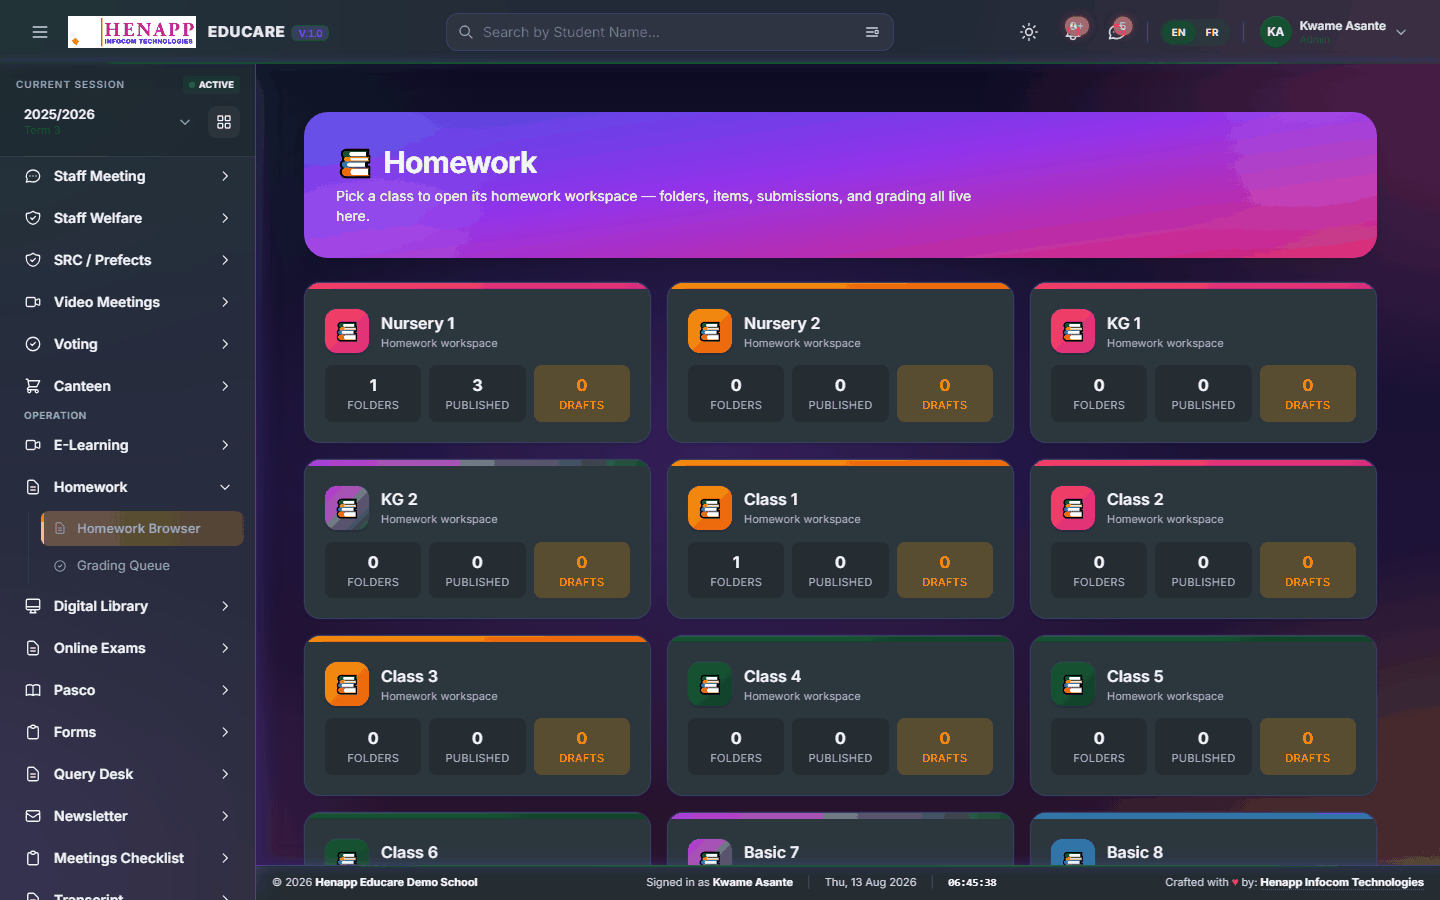
18.1 Homework Browser
Homework across the classes you teach — set it, and see what has come back.
How to use it
- Open Homework → Homework Browser.
- Click New Homework, choose the class and subject.
- Write the instructions, attach any file, and set the due date.
- Publish. Learners and parents are notified.
- Watch submissions arrive against the assignment.
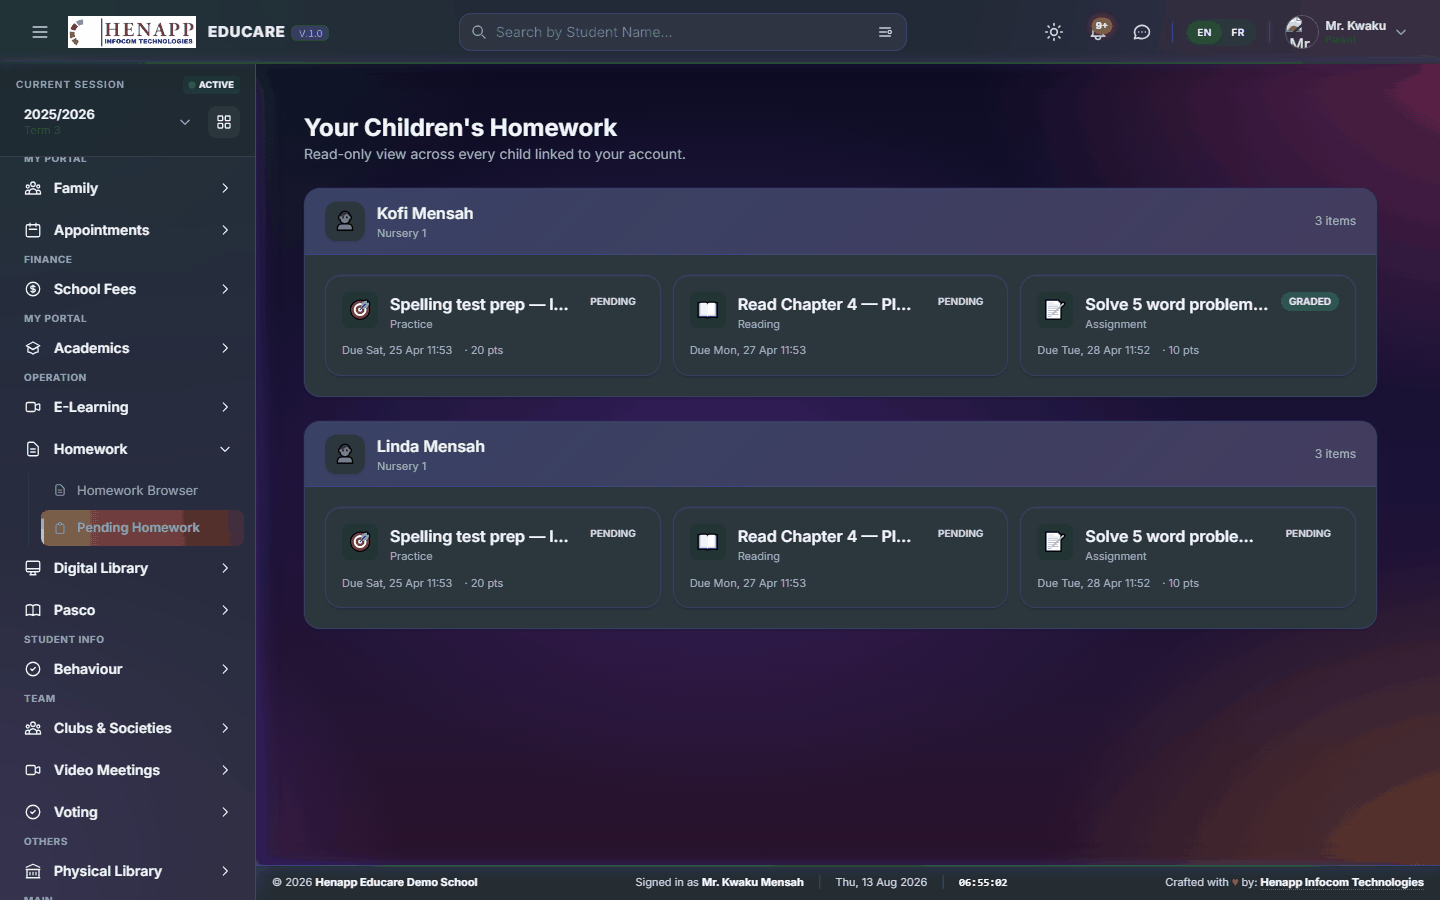
18.2 Pending Homework
Homework still to be done, with the closest deadline first.
How to use it
- Open Homework → Pending Homework.
- Open an assignment to read what is required.
- Do the work, attach your file or type your answer, and Submit.
- Submitted work moves off the pending list.
19. Digital Library
Electronic books and learning games — read in the browser, no download needed.
Find it in the sidebar under Operation → Digital Library.
19.1 Browse / Read
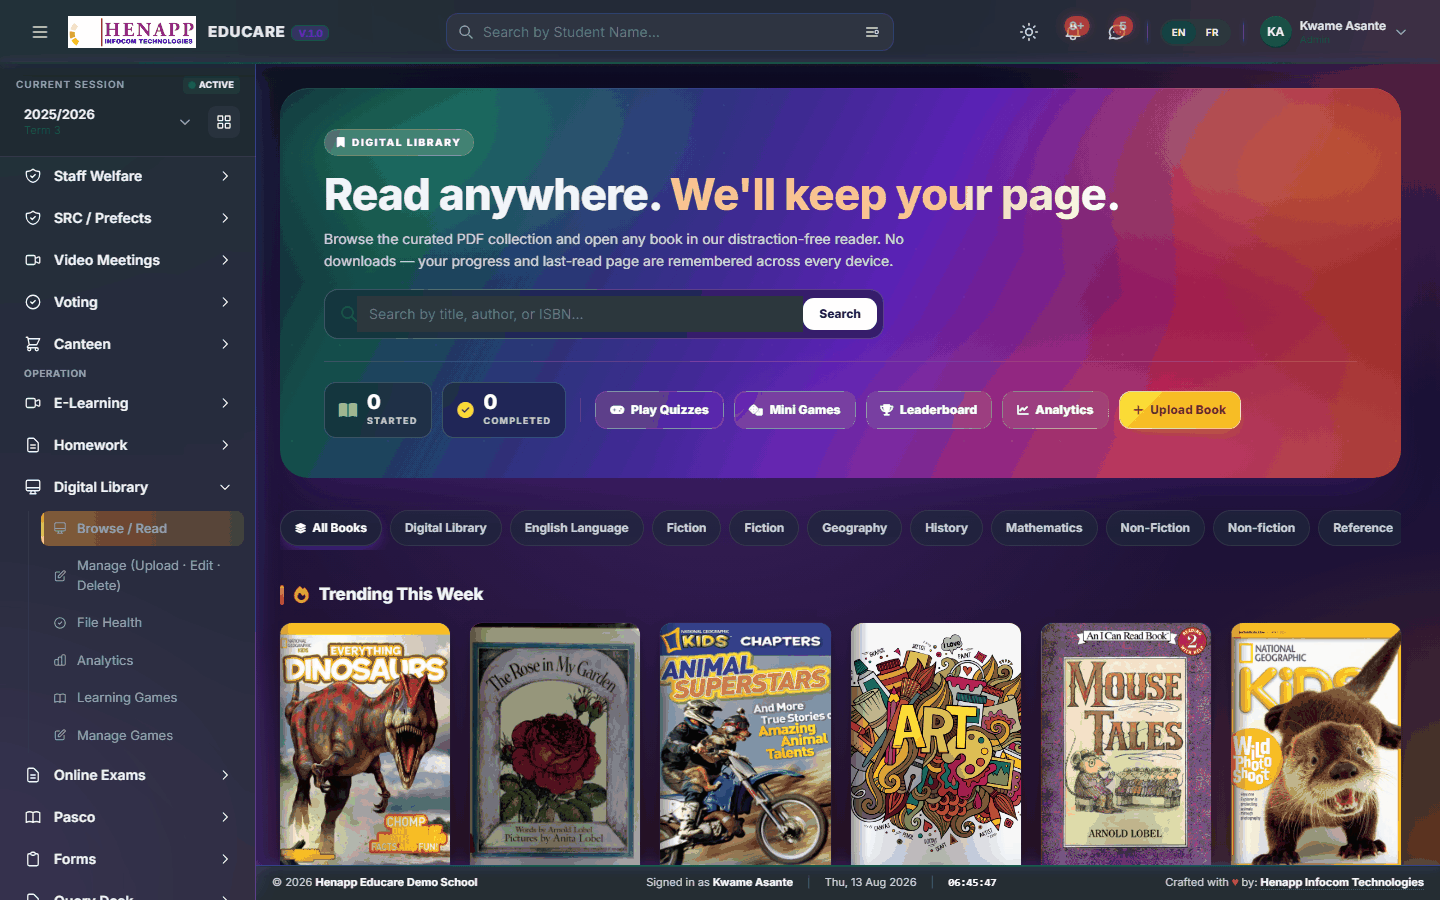
The e-book shelf — read in the browser without downloading anything.
How to use it
- Open Digital Library → Browse / Read.
- Search by title, author or subject, or browse the collections.
- Click a book to open the reader.
- Use the arrows or swipe to turn pages; the reader remembers where you stopped.
19.2 Learning Games
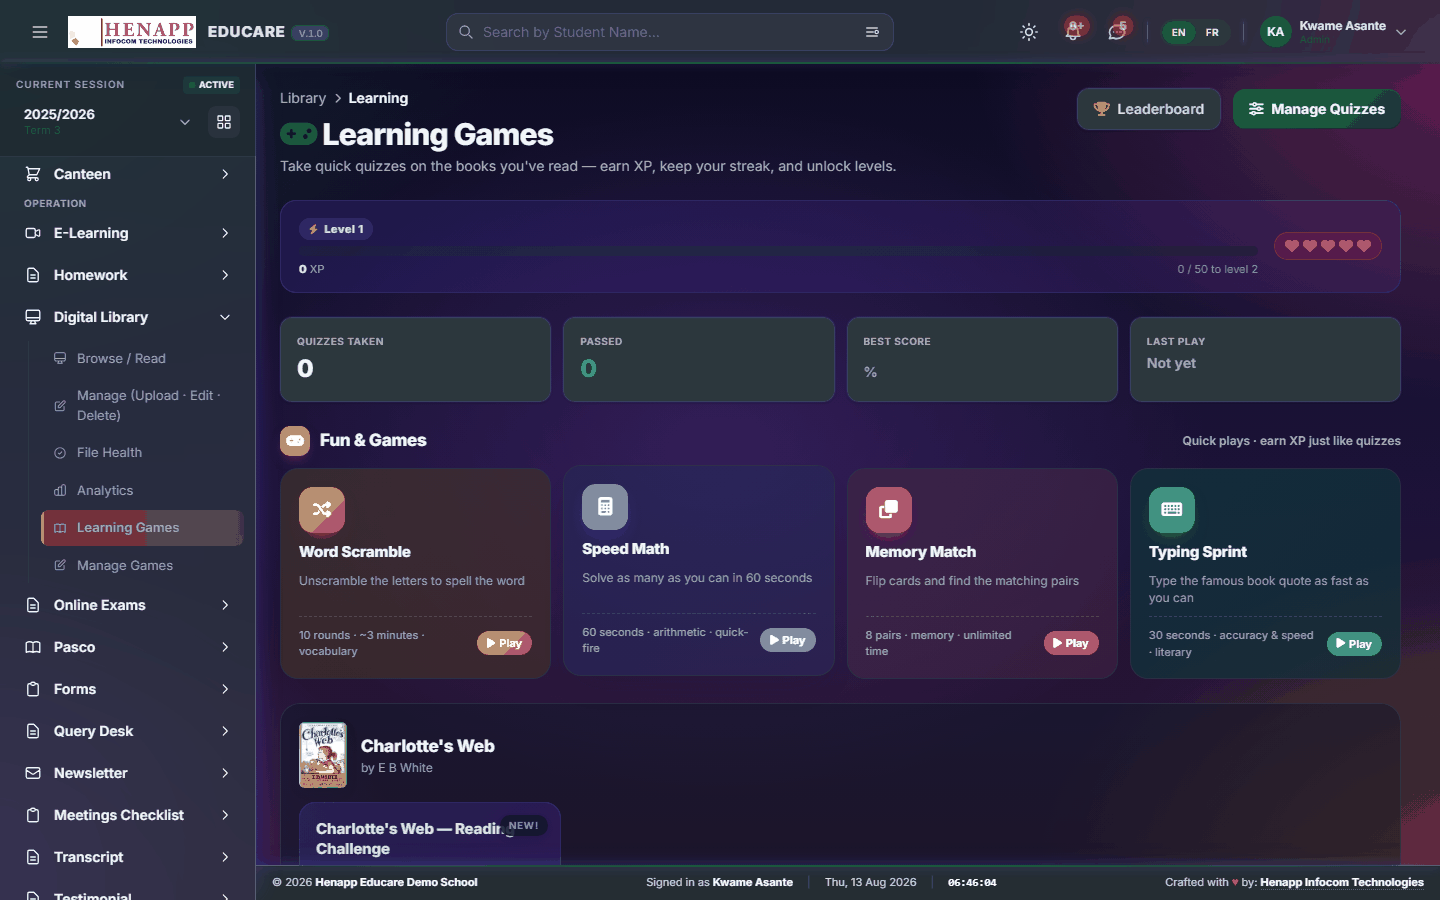
Educational games and interactive activities for learners.
How to use it
- Open Digital Library → Learning Games.
- Pick a game and play it in the browser.
20. Pasco
Past questions, organised by subject and year, for revision.
Find it in the sidebar under Operation → Pasco.
20.1 Pasco (Past Qs)
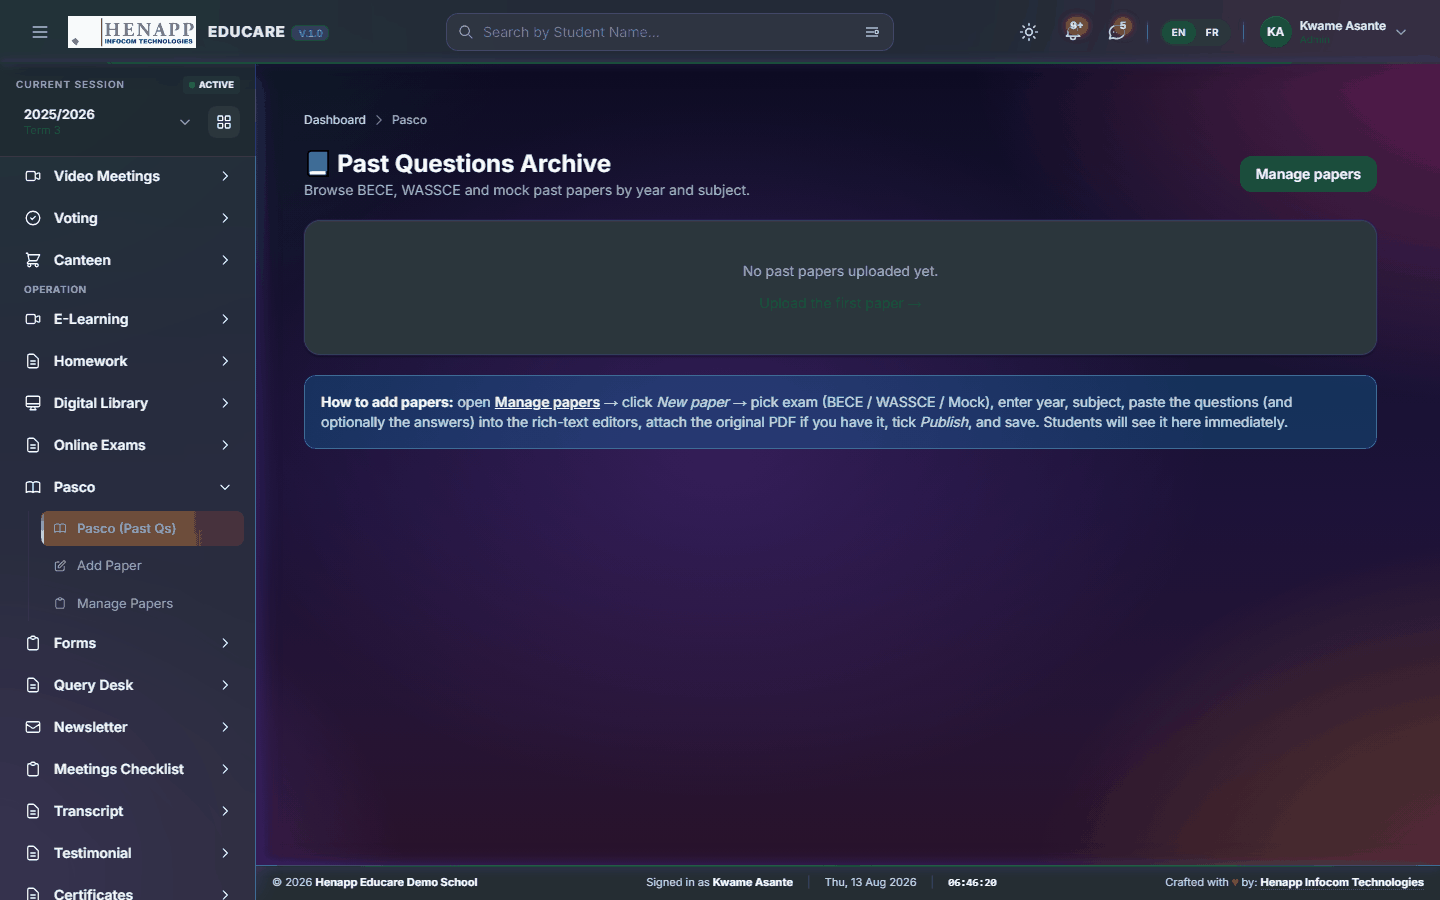
Past examination papers by subject and year, for revision.
How to use it
- Open Pasco → Pasco (Past Qs).
- Choose the subject and year.
- Open a paper to read it, and download it if you want it offline.
21. Behaviour
Conduct recorded as it happens — merits and demerits against agreed categories, and the rankings that come out of them.
Find it in the sidebar under Student Info → Behaviour.
21.1 Dashboard
Conduct across the school in summary — the pattern, not the individual entries.

How to use it
- Open Behaviour → Dashboard.
- Read the totals by category and class for the term.
- Click through to the records behind any figure.
22. Furniture Use
School furniture issued to a named learner — a tagged desk, chair or locker, held for a set period, with its condition and replacement value recorded on the day it is handed over.
The record is only worth what the family knew at the time. The policy is shown to the parent when the item is assigned, and they are asked to acknowledge it; the date and wording they saw are kept with the record.
Condition and value are fixed at handover and never change afterwards. If the item comes back damaged, that is what any charge is worked out against — not what the item is worth today.
Only the school administration may put a figure on damage. A class teacher reports what they see; the amount, and whether to charge at all, is an administrative decision.
A damage charge is added to the learner's bill through Additional Fees, so it appears on their statement and carries forward as arrears until it is paid or written off.
Find it in the sidebar under Student Info → Furniture Use.
22.1 My Furniture
The school furniture your child is holding — what it is, the condition it was handed over in, the policy, and anything charged.
How to use it
- Open Furniture Use → My Furniture.
- Read the item, its tag and the condition it was issued in.
- Read the policy and click to acknowledge it. The date is recorded.
- Check back here if you are told an item has been damaged — any charge is shown with its reason.
Acknowledging records that you were shown the policy on that date. It is not a payment and it is not an admission that anything is damaged.
If the item is returned damaged, the school may charge all or part of the value recorded when it was handed over. That amount appears on your fees statement.
If you think a charge is wrong, speak to the office — the record shows the condition and value at handover and who recorded them.
23. Clubs & Societies
Clubs and societies, and who belongs to each.
Find it in the sidebar under Team → Clubs & Societies.
23.1 All Clubs
The clubs and societies the school runs, with their patrons and meeting times.

How to use it
- Open Clubs & Societies → All Clubs.
- Click Add Club and set its name, patron, meeting day and description.
- Save.
24. Video Meetings
Video meetings scheduled and joined from inside the portal.
Find it in the sidebar under Team → Video Meetings.
24.1 Meetings (Meet/Zoom)
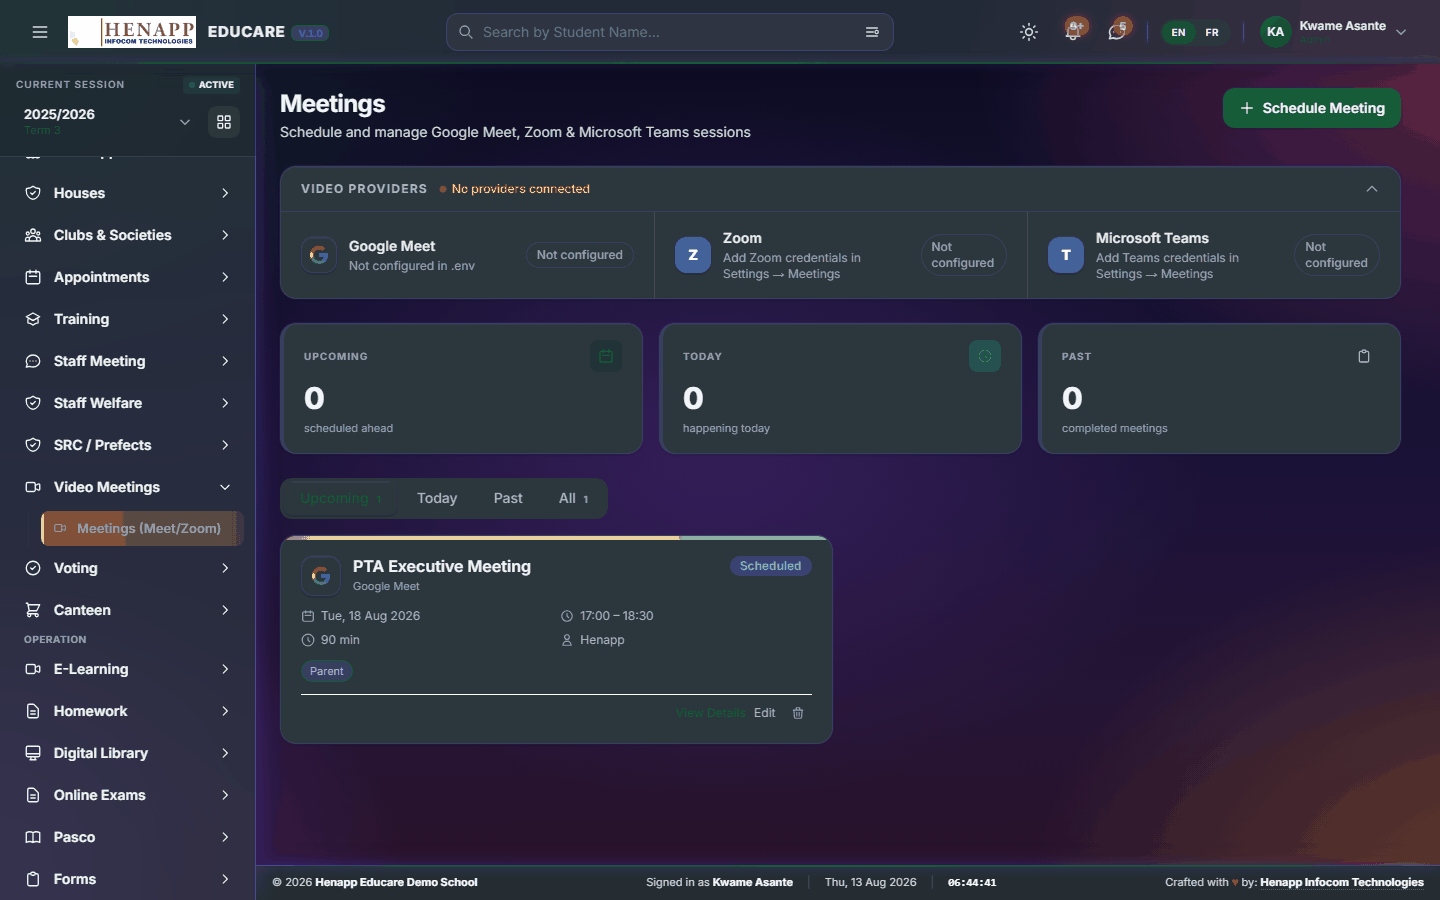
Video meetings scheduled in the portal and joined by one link.
How to use it
- Open Video Meetings → Meetings.
- Click New Meeting and set the title, date and time.
- Choose the platform and paste the meeting link.
- Choose who is invited, then save. They are notified and see a Join button when it is time.
25. Voting
Elections and polls run inside the system, with one vote per eligible voter and a result nobody has to tally by hand.
Find it in the sidebar under Team → Voting.
25.1 Voting Dashboard
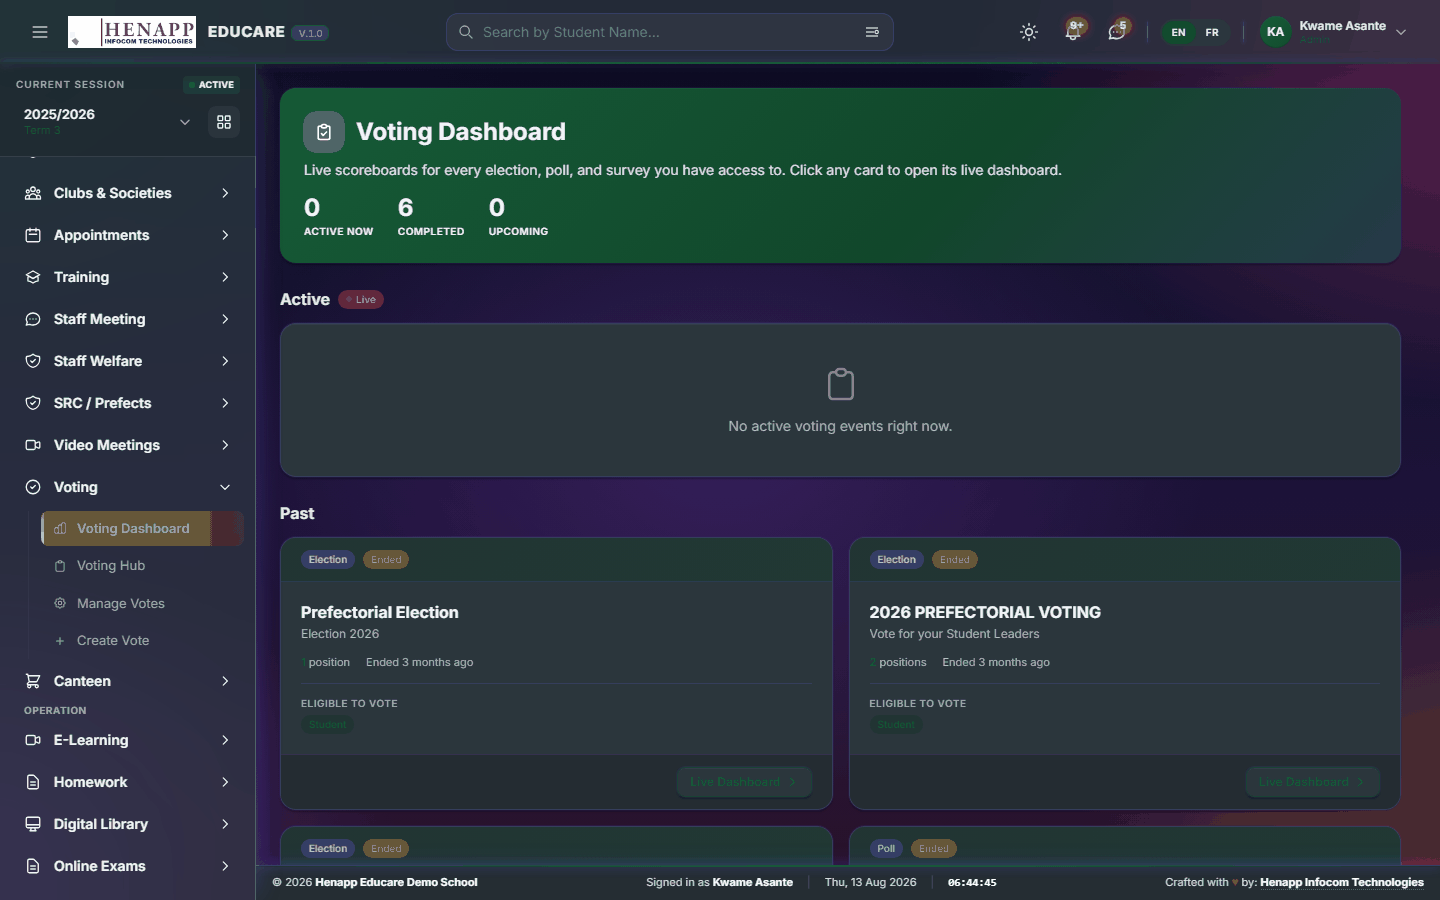
Open votes and their turnout.
How to use it
- Open Voting → Voting Dashboard.
- Read the open votes and how many have voted so far.
25.2 Voting Hub
Where you cast your own vote.

How to use it
- Open Voting → Voting Hub.
- Open a vote you are eligible for.
- Choose your candidate or option and Submit.
- A vote cannot be changed once submitted, so check before confirming.
26. Physical Library
The physical library — the catalogue, loans and returns, fines and reservations.
Find it in the sidebar under Others → Physical Library.
26.1 Dashboard
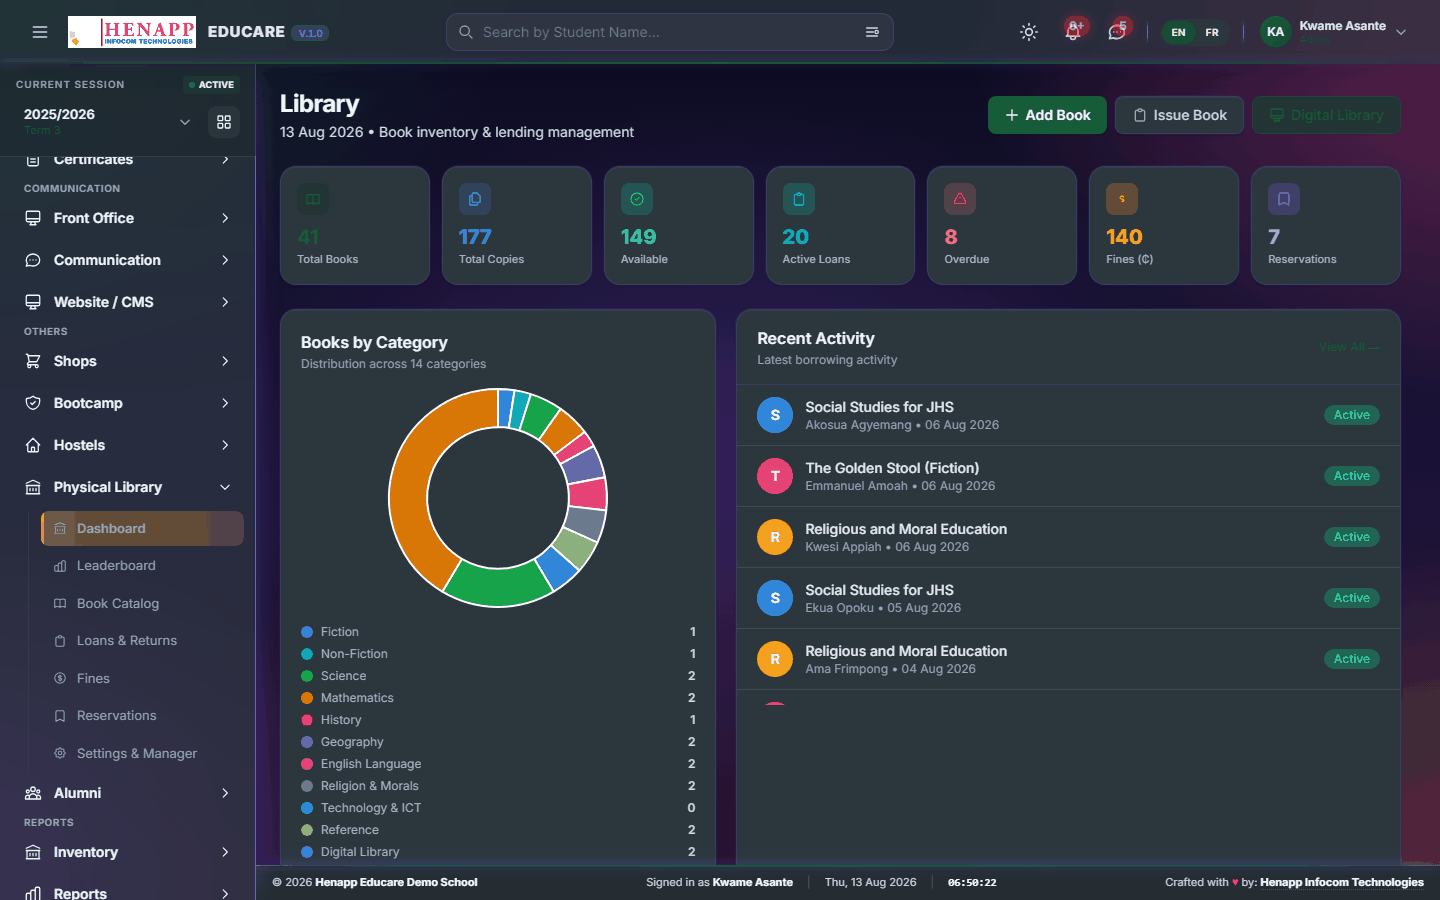
The library at a glance — books out, overdue and reserved.
How to use it
- Open Physical Library → Dashboard.
- Read the loans, overdue items and reservations.
26.2 Leaderboard
The most active readers, by class and across the school.
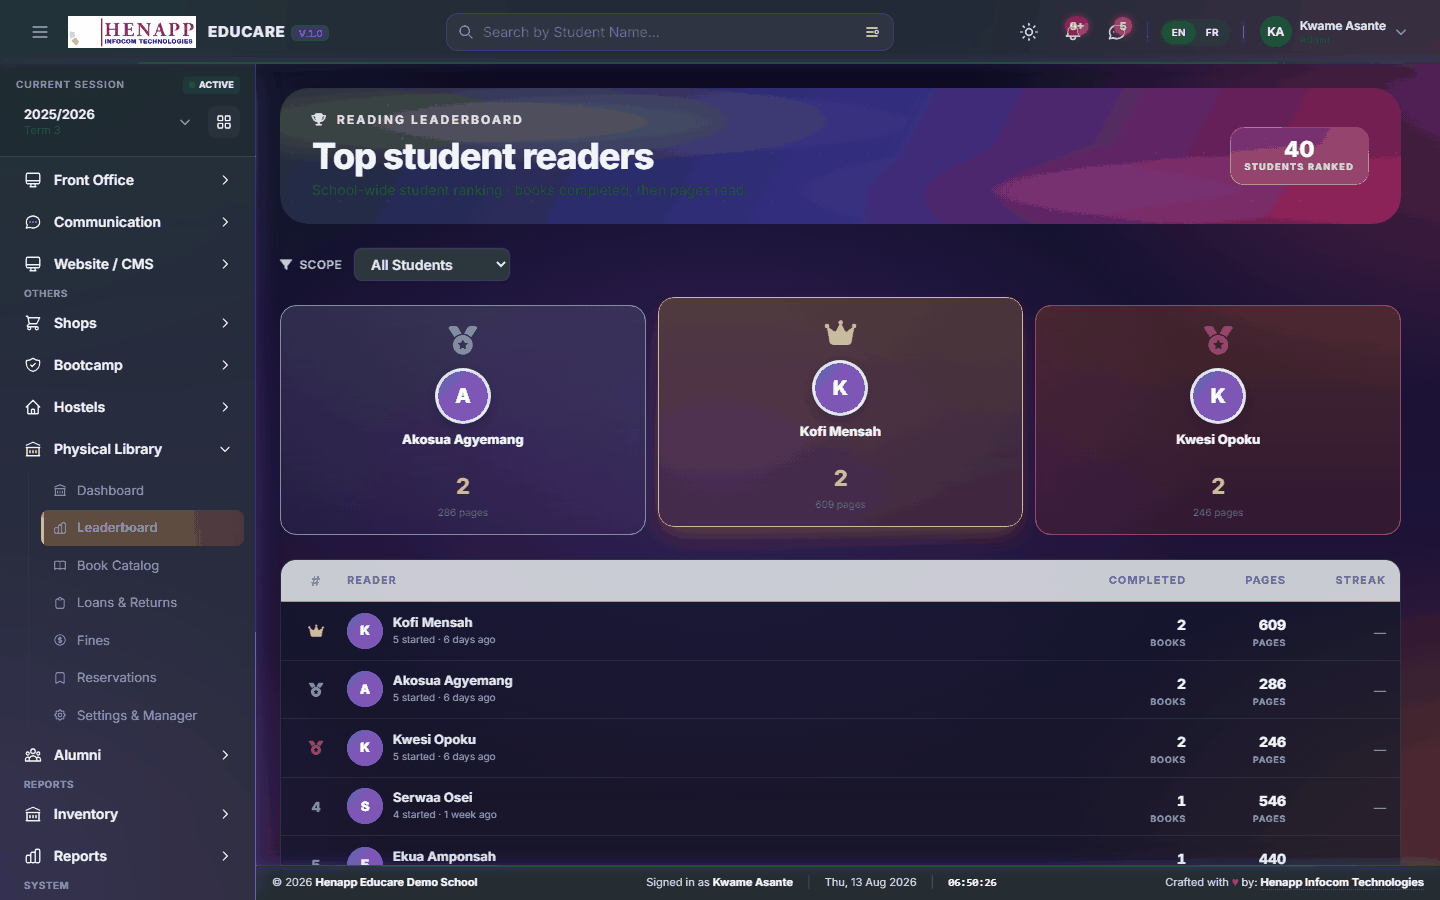
How to use it
- Open Physical Library → Leaderboard.
- Choose the period and read the standings.
26.3 Book Catalog
The catalogue — every title held, with its copies and where they are.
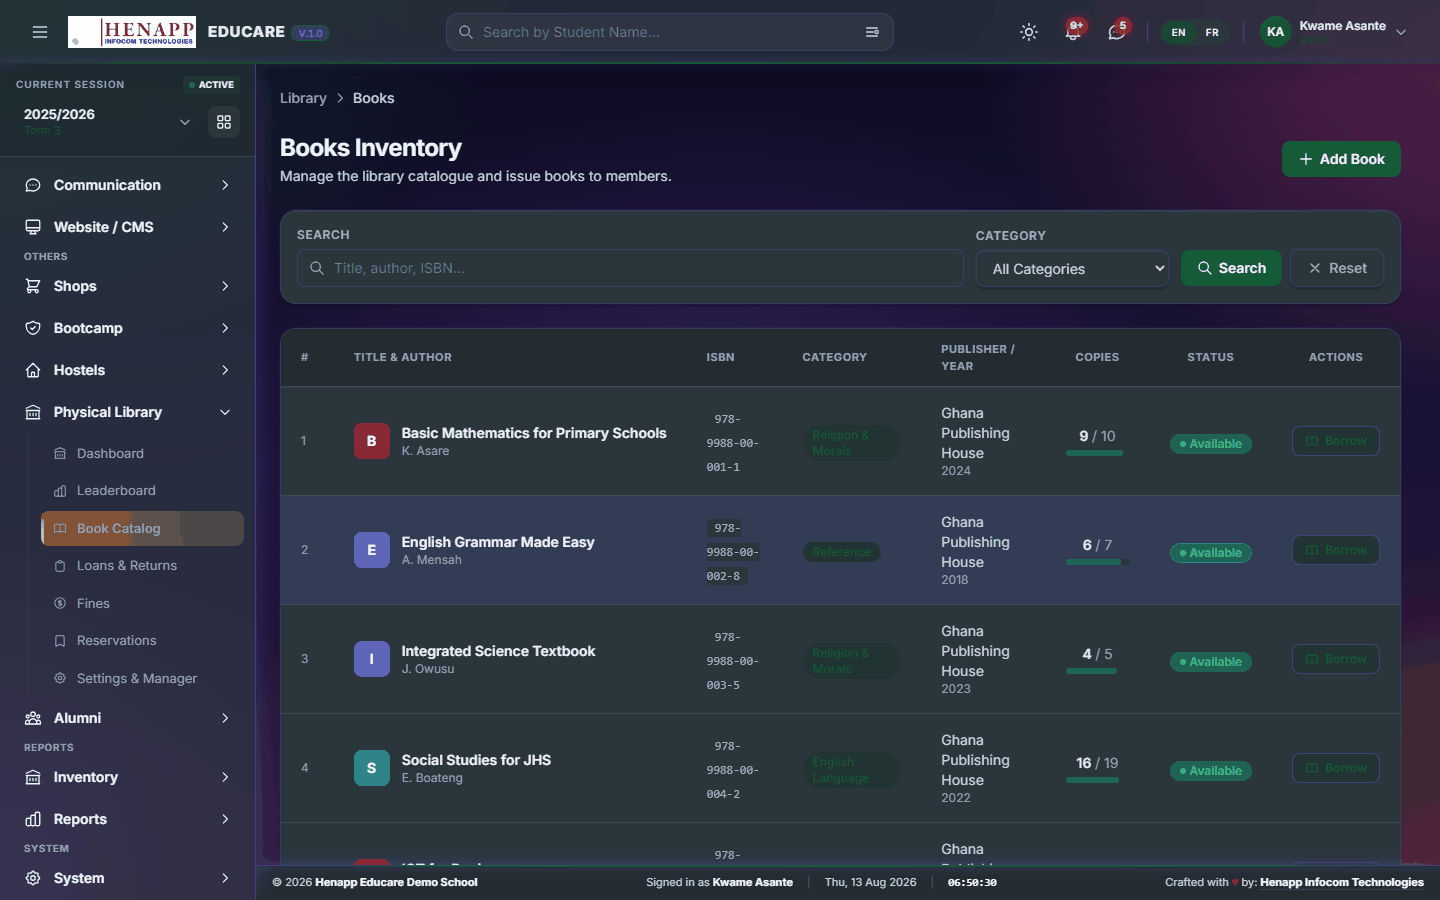
How to use it
- Open Physical Library → Book Catalog.
- Click Add Book and enter the title, author, ISBN, category and number of copies.
- Give it a shelf location so it can be found.
- Save. Search or filter the catalogue to find anything later.
26.4 My Orders
Books you have reserved and where you are in the queue.
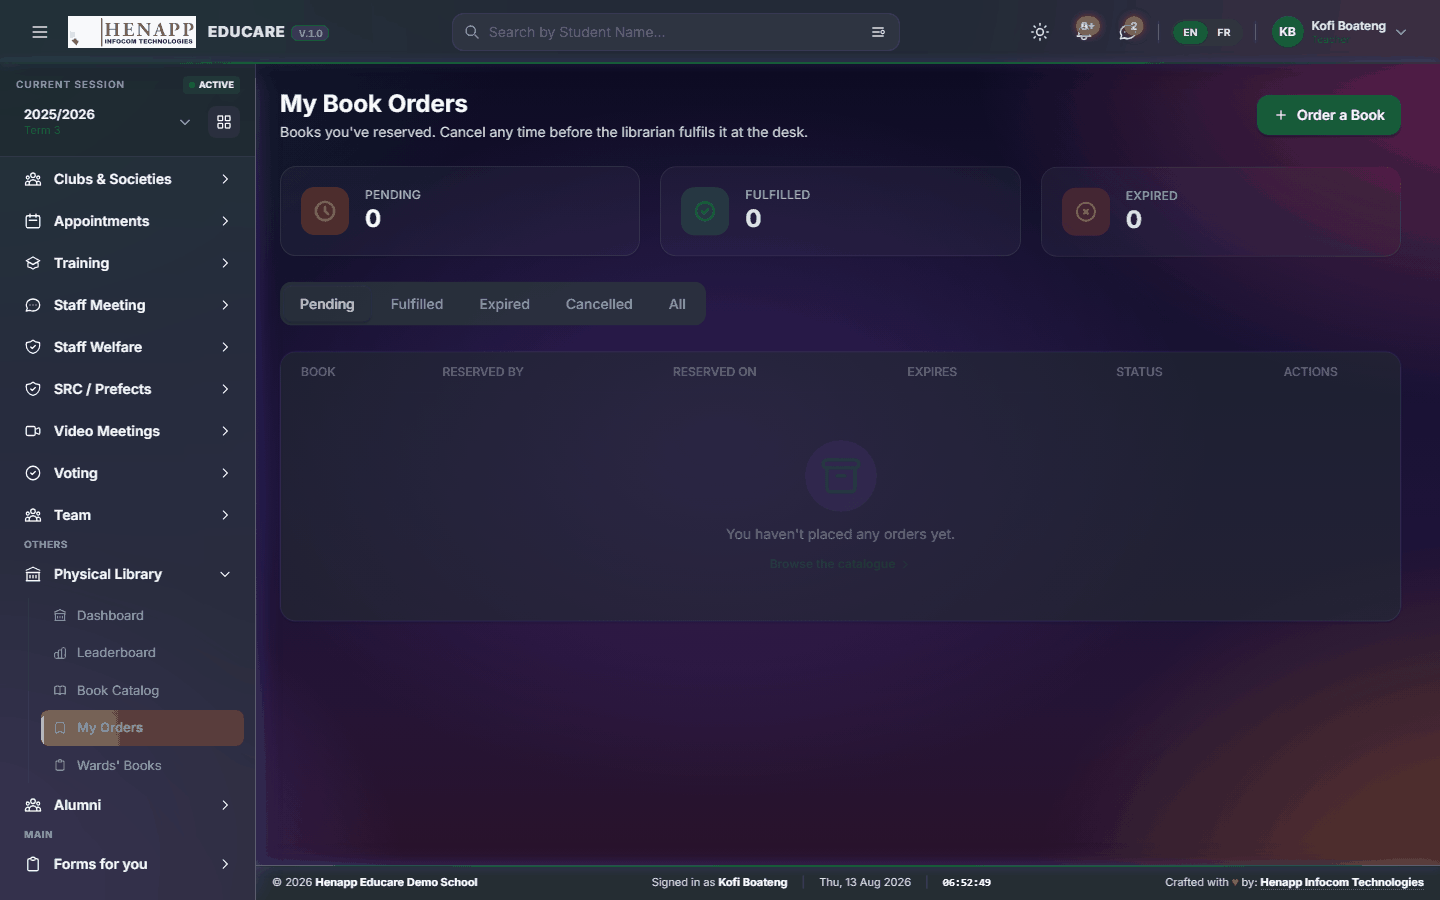
How to use it
- Open Physical Library → My Orders.
- Read your reservations and their position.
- Cancel one you no longer need.
26.5 Wards' Books
What your children — or the learners you teach — currently have on loan.
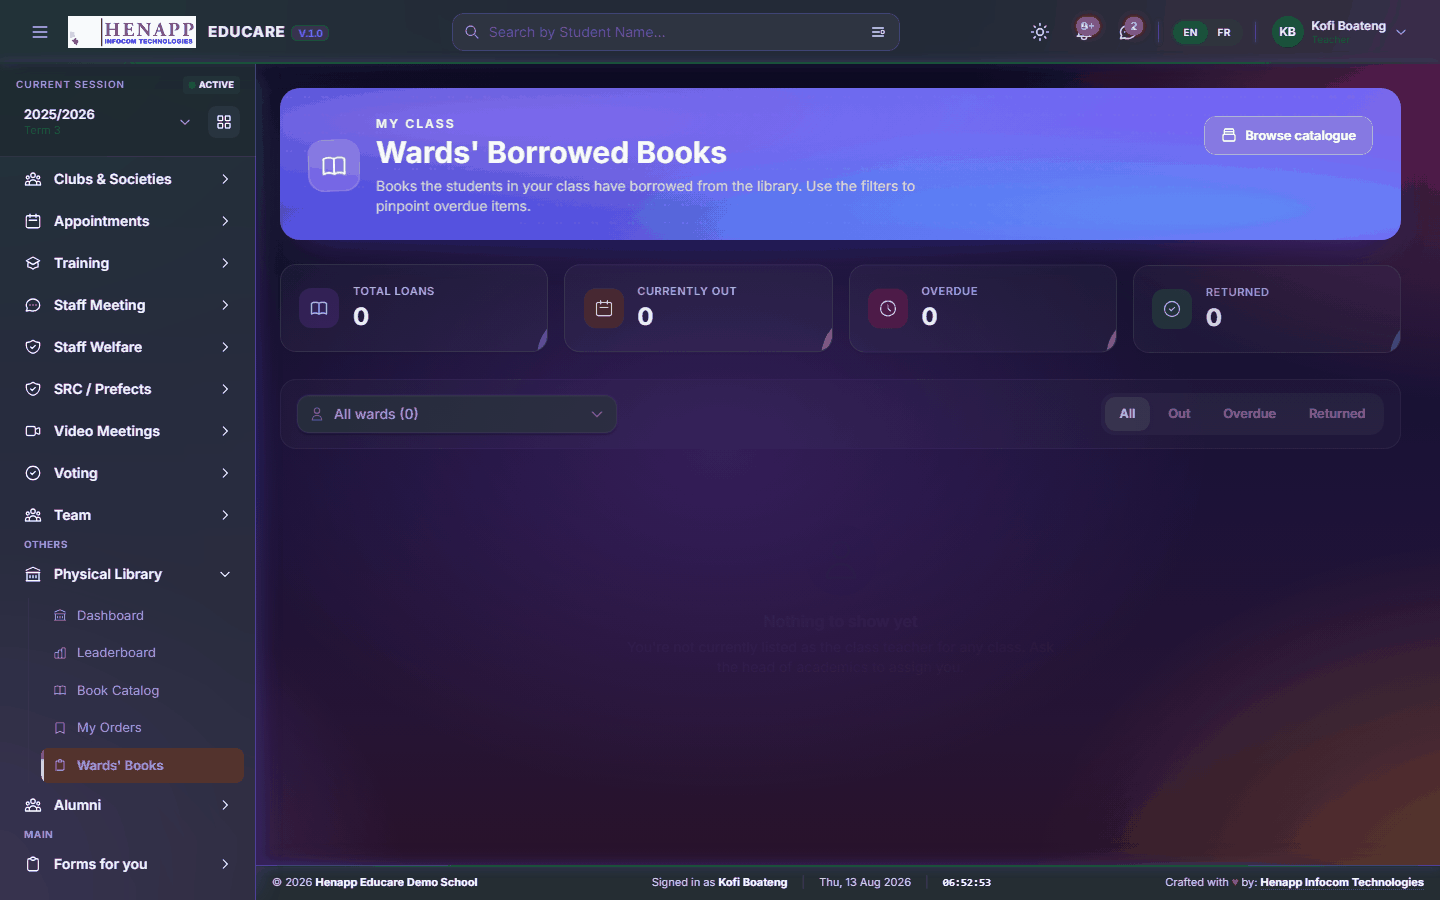
How to use it
- Open Physical Library → Wards' Books.
- Read the loans and their due dates.
- Anything overdue is flagged.
27. Getting help
If a page does not behave as this guide describes, or you believe you are missing a menu you should have, contact your school office first — most access questions are settled by an administrator adjusting your role.
- A menu is missing — your role does not include it. Ask an administrator.
- A list is empty — check the academic year and term in the top bar before anything else.
- A page refuses to load — sign out, sign back in, and try once more before reporting it.